Thursday, March 31, 2011

Thai Pork and Noodles


I've purchased cookbooks and magazine subscriptions from Food Network stars in the past, only to be disappointed that I could find all the recipes on the website.  Why was I wasting my money, I thought.  It turns out, though, that it's a valuable resource for me.  It highlights recipes that are seasonal, and things I might never have found on the website otherwise.  (Seriously, you can find what you're looking for pretty easily, but browsing can be daunting).

This was not a recipe I would have tried on my own.  I have to say, fish sauce is daunting to me.  I never saw the point in buying a bottle of it, but went ahead and went for it this time around.

EW.  Fish sauce is disgusting.  Gag worthy for sure.  As I was making this, I got a really bad feeling that it wasn't going to be good.  Getting ready to serve it, I said to M, "I hope this doesn't suck."

After taking a few bites, I said, "Well, it doesn't suck....  it's not good, but it doesn't suck."  M agreed, saying that it was weird that it was neither good nor bad.  There are two rave reviews on the recipe on Food Network's website, though  they both made some serious modifications.  Maybe I didn't modify it.  Maybe I messed up.  I don't know, but we won't be making this one again.

Oh yeah, and 1200+ mg of sodium in a serving?  Sooooo not worth it!!


Ingredients

  • 1 pound thin boneless pork chops, fat trimmed
  • 8 ounces wide Thai rice noodles
  • 1 cup fresh cilantro (leaves and stems)
  • Finely grated zest and juice of 1 lime
  • 2 slices peeled ginger
  • 2 cloves garlic, smashed
  • 3 red jalapeno peppers, seeded and roughly chopped
  • 2 shallots, roughly chopped
  • 3 tablespoons fish sauce
  • 2 tablespoons packed light brown sugar
  • 4 tablespoons peanut oil
  • 1/4 pound green beans, split lengthwise and cut into pieces

Directions

Place the pork in the freezer about 10 minutes to make it easier to slice. Soak the noodles in very hot water until just tender, about 10 minutes; drain. Snip the noodles with scissors into shorter lengths. Cut the frozen pork crosswise into 1/4-inch-wide strips.

Puree the cilantro, lime zest and juice, ginger, garlic, jalapenos, shallots, fish sauce, brown sugar and 1 tablespoon water in a food processor until smooth, scraping down the processor as needed.

Heat 3 tablespoons peanut oil in a large skillet over high heat. Add half the cilantro mixture and stir-fry 1 minute. Add the pork and stir-fry until no longer pink, 2 to 3 minutes. Transfer the pork with a slotted spoon to a plate. Add the remaining 1 tablespoon peanut oil to the skillet; add the green beans and stir-fry until tender, 4 to 5 minutes. Add the noodles, pork and 2 tablespoons of the remaining cilantro mixture. Cook, tossing with tongs, until heated through, about 2 minutes. Stir in the remaining cilantro mixture to taste.

Per serving: Calories 553; Fat 24 g (Saturated 6 g); Cholesterol 60 mg; Sodium 1,210 mg; Carbohydrate 61 g; Fiber 3 g; Protein 22 g

Granola


I've tried making granola once before, and used steel cut oats.  I wasn't thrilled with the result, so went looking for a recipe that uses quick oats.  Even though I've read online that this kind of oatmeal isn't great for granola, I was very happy with the results here.  This is delicious!

It's a little bit clumpy, which makes me think of a yummy granola bar, but otherwise, it's difficult to eat this by the handful.  It is, however, delicious on yogurt, and I wonder if it would be good with some milk too.

After baking, I tossed in some raisins.  In my previous version of granola, dried fruit was baked with the granola, but got a little bit hard.  I'm really happy I decided to wait to add it this time, because the raisins are nice and plump and soft, which is a great compliment to the crunch of the granola itself.

Honey Peanut Granola from allrecipes

Ingredients

  • 3 cups quick cooking oats
  • 1/2 cup chopped peanuts
  • 1/4 cup wheat germ
  • 1/3 cup honey
  • 1/3 cup brown sugar
  • 1/4 cup vegetable oil
  • 2 tablespoons warm water
  • 1/2 teaspoon salt
  • 1 teaspoon vanilla extract

Directions

  1. Preheat oven to 250 degrees F (120 degrees C). Lightly grease a baking sheet.
  2. In a large bowl, combine oats, peanuts, and wheat germ.
  3. In a separate bowl, combine honey, brown sugar, vegetable oil, water, salt, and vanilla. Stir well; then pour into the oat mixture, and stir. Spread out on a cookie sheet.
  4. Bake for 1 hour, stirring every 15 minutes. Remove from oven, and cool before serving.
http://allrecipes.com/Recipe/honey-peanut-granola/Detail.aspx

Wednesday, March 30, 2011

Pasta al Forno

The great thing about Meatless Mondays (or Wednesdays, as the case may be) is that there's no pressure to make a side dish, because you're already serving a main that's got vegetables.  This, of course, is in addition to the cost benefits of not using meat, the health benefits, the environmental benefits, etc.


I promise it looks better than this terrible picture.

Thus far, I've received at least 4 issues of Cook's Country magazine, but haven't made a whole lot of recipes from it.  Although I am sort of in love with the Cook's Illustrated folks, the magazine (and, I must admit, my stack of cookbooks) isn't where I turn for recipes most of the time.  But inspiration struck me and I flipped through it during my meal planning for the week, and many of this week's meals are from it.

Baby E and I thought this was delicious, and both went back for seconds.  I was concerned that not salting the eggplant would make it bitter, but cooking it in olive oil and salt seems to have done the trick, and much faster too.  I love that this is loaded with veggies, has very little salt (I only added salt to the eggplant and the pasta water), but is very hearty.  The flavors of tomato and fresh basil had me thinking summer, although the heartiness could easily be a comforting winter meal as well.


M said it was fine, that he was happy with the veggies and it "didn't make me puke" (seriously, this is his commentary), but that it wasn't really WOW worthy.  I'm not sure what would WOW him, since "Not bad" is something that's pretty good.

A took three bites.  Despite begging for snack at 5:15, he wouldn't just dig into the dinner.  I even had him help me make it, and he took three bites.  Sigh.

Pasta al Forno

2 slices white sandwich bread, torn into pieces
2c shredded Italian cheese blend
3T olive oil
4 garlic cloves, minced
1 medium eggplant, cut into bite sized pieces
salt and pepper
1 onion, chopped
2-14.5oz cans diced tomatoes
1/2c finely chopped fresh basil
box rotini pasta

1.  Preheat oven to 475.  Bring pasta water to a boil, and cook pasta according to package directions.
2.  Add bread, 1c cheese, 1T oil, and 1 clove garlic to food processor, and pulse until coarsely chopped.  Set aside.
3.  Heat remaining oil in an oven safe nonstick skillet (I had to use a pot; my biggest oven safe skillet was too small for everything!) over medium high heat until shimmering.  Add eggplant and 1/2t salt.  Cook for about 3 minutes, or until lightly browned, making sure to stir once in awhile.  Add onion and cook until softened, about 5 minutes.  Add remaining garlic and cook until fragrant.  Add tomatoes; simmer about 5 minutes or until sauce is thickened slightly.  Turn off the heat, and add cheese and basil.  Keep warm.
4.  Drain pasta, reserving 1/2c pasta water.  Add drained pasta to the eggplant mixture, adding pasta water as necessary.  Season with salt and pepper, and top with bread crumbs.  Bake in preheated oven about 10 minutes, or until bread crumbs are golden.
Enjoy!

Monday, March 28, 2011

Takeout at Home: Kelly Makes TWO Takeout Inspired Meals!

My friend Kelly has a great cooking blog called Running Mama Cooks.  The recipes she makes are not only tasty, but also are Weight Watchers friendly, and who can't use a little figure slimming?

Kelly took the Takeout at Home challenge up a notch, making two recipes inspired by Chinese takeout:  Sesame cold noodles and chicken fried rice.


Go check  out Kelly's blog and her recipes for these two dishes!

Yoplait Greek Yogurt: Review and Giveaway

I love Greek yogurt.  It's so creamy and thick and sweet, it's easy to think you're having a dessert.  Problem with Greek yogurt is that it's much more expensive, even on sale and compared to my already expensive organic yogurt.
So, when I was given the opportunity to try and review Yoplait's new line of Greek yogurt, I was happy to oblige!  I already had seen the brand on the shelves and noticed that it was not quite as expensive as the other varieties of Greek yogurt.  I chose strawberry.


The first thing I have to tell you is that all their varieties are fruit on the bottom, which is not my first choice when buying yogurt.  I don't like the added sugar and much prefer the already blended or, even better, adding my own fruit and honey to plain yogurt.  That said, when compared to my favorite non Greek yogurt (the organic one), the sugar content is much less--Yoplait's 6oz container has 20g of sugar while the other has 25g in the same size.

Yoplait's take on Greek yogurt also has double the protein of my favorite non Greek yogurt.

I really enjoyed Yoplait's Greek yogurt; I thought it was really creamy and smooth, and the strawberry at the bottom was delicious although a little too sweet.  If you'd like to try it, here's a coupon for 35 cents off a container!

On to the goods!  Yoplait is offering Tales from the Mad Men Kitchen readers the chance to win a Yoplait Greek gift pack that includes a coupon organizer, a magnetic customized meal planner board, a mini pocket fold-up tote, an electronics case, retractable ear buds, a magnetic shopping cart note holder and a pen.

If you would like to win this prize, leave a comment telling me what is your favorite snack?


After you've done that, you can get an extra entry for each of the following.  Please make sure you leave a comment for EACH task!
You have until April 1 at noon (Pacific) to enter.  Good luck! 

Full disclosure:  I received a free 6oz container of Yoplait Greek Yogurt, a prize pack from Yoplait, and this giveaway all from Yoplait through My Blog Spark. The opinions are my own.

I challange you... to a duel!!

I recently subscribed to Food Network magazine, and having received one issue, am very happy with my purchase.  In my first magazine (April 2011,) there was a spread called "He Made She Made," in which they "asked Emeril...and Aarti... to make their best chicken salad.  Whose dish comes out on top?"

The chicken salads offered both look delicious, and so I plan to make both and see which we like better; is Emeril's Chicken Salad with Fresh Herbs the winner, or is Aarti's Lady Marmalade Chicken Salad (she certainly gets bonus points for a creative name!)

So here's the challenge, if you're willing to play along:  Choose a classic recipe and make the interpretations of two different celebrity chefs (you can certainly do these two if you'd like).  Which is the winner?

With your permission, I'd like to make you a guest blogger, either taking pictures and words from your blog post, or have you write one here if you don't have a blog.

Let me know if you want to participate or if you have any questions!

Taco Seasoning

I've been toying with the idea of making my own taco seasoning for a long time, and tried it a few weeks back when I made Crockpot Chicken Taco Soup.  I wasn't thrilled with how that turned out, and also wasn't happy that it made such a small amount, so I turned to my handy dandy Google Reader and searched for Taco Seasoning.

I found this one from Annie's Eats, and it was perfect.  It made a good amount, which I've stored in a washed out spaghetti sauce jar.  Having this around the house makes taco night so much easier, cheaper, and more healthful without all that salt and other junk they put in the packet!

I made a few modifications, based on what was in my spice cabinet, but don't want to change the original recipe here.  I didn't have onion powder, and instead used dried minced onions, in roughly the same quantity.  I also had a jar of smoked paprika that I bought for some recipe and have never used again, so used it here, which was a nice touch--do that if you have it!

Homemade Taco Seasoning


Ingredients:
4 tbsp. chili powder
3 tbsp. plus 1 tsp. paprika
3 tbsp. ground cumin
1 tbsp. plus 2 tsp. onion powder
1 tsp. garlic powder
¼ tsp. cayenne pepper
Directions:
Combine all ingredients in a bowl, and mix well to blend.  Store in an airtight container until ready to use.
To prepare taco meat, use 2 heaping tablespoons in place of a package of taco seasoning (cook approximately 1 lb. of beef or chicken, add 1 cup of water with the seasoning, and simmer until the liquid is almost completely gone.)
Source: Use Real Butter, originally from Mex Recipes, all via Annie's Eats

Sunday, March 27, 2011

Spaghetti Squash with Mushrooms and Herbs

When planning to make Mushroom Ravioli with Marsala Sauce, I decided to use the spaghetti squash I bought to make a side dish.  Internet reviews suggested that many had fooled their families into thinking it was spaghetti pasta, so I hoped I could do the same with my squash hating husband.

That was not at all the case here.  It didn't look like pasta, it certainly didn't taste like pasta.  It was good for those of us who would eat it, but M was not at all fooled. 

Photobucket 

Original recipe from epicurious.

  • a 2- to 2 1/2-pound spaghetti squash, halved lengthwise, reserving 1 half for another use
  • 2 tablespoons unsalted butter
  • 1/4 cup finely chopped onions
  • 1 cup thinly sliced mushrooms
  • 2 tablespoons minced fresh parsley leaves
  • 1 tablespoon minced fresh chives
  • 1/4 cup freshly grated Parmesan
print a shopping list for this recipe

Preparation

Wrap the squash half in microwave-safe plastic wrap and microwave it, cut side up, at high power (100%) for 10 to 12 minutes, or until it feels soft when pressed. Let the squash stand for 5 minutes. In a small microwave-safe dish combine the butter, the onion, and the mushroom and microwave the mixture at high power (100%), stirring once, for 5 minutes, or until the mushrooms are tender. Discard the squash seeds, scrape the flesh with a fork into a bowl, and toss it with the mushroom mixture, the parsley, the chives, the Parmesan, and salt and pepper to taste.

Read More http://www.epicurious.com/recipes/food/views/Spaghetti-Squash-with-Mushrooms-and-Herbs-10315#ixzz1HqsuxKvw

Mushroom Ravioli with Wine Sauce

I've made this recipe lots of times, and we love it around here.  I was in the middle of making it when I realized we were out of marsala wine (not so great on the planning ahead when it comes to staples that I usually have around the house).  I figured, I've got some red wine in the fridge, maybe that will be good in the recipe too.

It was not a great substitute.  It was pretty good on the mushrooms, but not so great on the pasta alone.  So, sometimes when you get creative in the kitchen, you wind up with a delicious new meal, and other times you really wish you'd just followed the damn recipe.

Photobucket
At least it looks pretty!

Malaysian Chicken Pizza

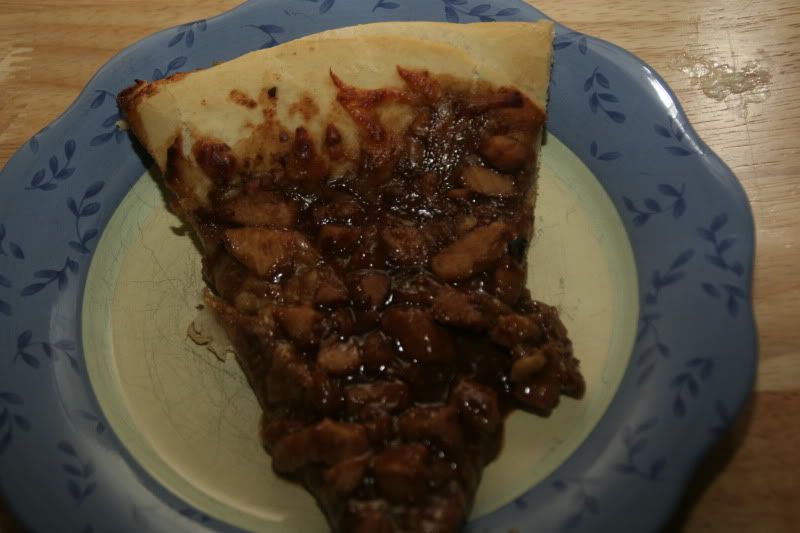
I'm continuing to participate in a recipe exchange.  This time around, the category was Asian.  I received Malaysian Chicken Pizza, which came from Cooking Light magazine originally.  Asian?  Yum.  Pizza?  Yum.  Put em together and what have you got?  Yummity yummity yum!


First thing to say is that the flavor is delicious. That said, I had a ton of problems making this one.  First, rice vinegar.  I had some, but didn't have quite enough.  I meant to go to the store, but it just didn't happen in time, so I used about 1/2c rice vinegar and about 1/4c white wine vinegar.  Next, I don't think I simmered the sauce long enough; it was probably way too liquidy, and as a result the dough sank over the edge of my pizza peel, making a big mess and losing some of the toppings.  The liquidy, um, ness, made the dough stick to the peel as well.  It made a huge mess trying to get it off the peel and then made a huge BURNED mess on the pizza stone and oven.  Ugh.  I highly recommend that if you choose to make this, use a prebaked pizza crust, like a Boboli.

We enjoyed this nonetheless, but M commented that, "although this one is very good, of all the fancy pizzas you make, my favorite is the BBQ pizza."


Malaysian Chicken Pizza
From Cooking Light MagazineIngredients
·         3/4  cup  rice vinegar
·         1/4  cup  firmly packed brown sugar
·         1/4  cup  low-sodium soy sauce
·         3  tablespoons  water
·         1  tablespoon  minced peeled fresh ginger
·         2  tablespoons  chunky peanut butter
·         1/2  to 3/4 teaspoon crushed red pepper
·         4  garlic cloves, minced
·         Cooking spray
·         1/2  pound  skinless, boneless chicken breasts, cut into bite-sized pieces
·         1/2  cup  (2 ounces) shredded reduced-fat, reduced-sodium Swiss cheese (such as Alpine Lace)
·         1/4  cup  (1 ounce) shredded part-skim mozzarella cheese
·         (12-inch) Basic Pizza Crust
·         1/4  cup  chopped green onions
Preparation
Preheat oven to 500°.
Combine first 8 ingredients in a bowl; stir well with a whisk.
Heat a nonstick skillet coated with cooking spray over medium heat. Add chicken, and sauté 2 minutes. Remove chicken from pan.
Pour rice vinegar mixture into pan, and bring to a boil over medium-high heat. Cook mixture 6 minutes or until slightly thickened. Return chicken to pan; cook 1 minute or until chicken is done. (Mixture will be consistency of thick syrup.)
Sprinkle cheeses over prepared crust, leaving a 1/2-inch border, and top with chicken mixture. Bake at 500° for 12 minutes on bottom rack in oven. Sprinkle with green onions. Place pizza on a cutting board; let stand 5 minutes.

Tuesday, March 22, 2011

Takeout at Home: Patrizia makes Egg Drop Soup


When Patrizia signed up to take part in the Takeout at Home Challenge, she did so she could make soup for her healing daughter.  She chose to make Egg Drop Soup.  It looks delicious and seems like a super easy recipe!
Thanks, Patrizia!  I hope your daughter is feeling better! 
Go check out her blog, Mangia!

Monday, March 21, 2011

Spaghetti with Hearty Beef Ragu


We don't eat a lot of beef around here.  While I enjoy it, my husband only likes beef that "doesn't taste like beef."  But sometimes, I try stuff using full on beef just to see what happens.  Sometimes it works, and sometimes it doesn't.
This time around, I used full on ground beef because I seek an awesome meat sauce like what you'd find in a checkered tablecloth Italian restaurant.  In fact, I found "locally" grown beef (locally being in quotes because the next state over isn't quite local, but it's also not a no name farm.), which I thought super cool though a bummer that it was expensive, and I thought this tasted more beefy than typical ground beef.  I was nervous when I took my first taste that it would be too beefy for the hubs.

It wasn't; he said he liked it (though he didn't rave about it, he did eat his whole plateful).  The three year old liked it.  The 11 month old liked it.  I liked it.  That is a big score around here, when everyone enjoys the meal (or, in some cases, everyone even TRIES the meal!)

This is no way, no how, a weeknight meal.  I started cooking around 4:30, and while I'm not a great chef or a fast cook by any stretch of the imagination, we didn't eat until after 6.  The sauce simmers away for a LONG time.  Surely, you could make this on Sunday and eat it during the week, but we didn't do that.

Spaghetti with Hearty Beef Ragu adapted from Confections of a Foodie Bride

1 Tbsp olive oil
1 small yellow onion, finely chopped
3 large garlic cloves, minced
1 carrot, finely chopped
1 celery stalk, finely chopped
1 tsp minced fresh rosemary
12 oz ground beef, extra lean
2/3 cup red wine (I used a Shiraz)
3 Tbsp tomato paste
28oz can  crushed tomatoes
1/2 tsp freshly ground pepper
Italian seasoning, to taste
1 bayleaf
Crushed red pepper, to taste
1 lb whole wheat pasta
Heat the olive oil over medium-low heat in a large pot. Add the onion, garlic, carrot, celery and rosemary and cook until the vegetables are softened, 8-10 minutes.
Brown the ground beef, stirring often. Add the wine and tomato paste, and cook about 4 minutes, stirring occasionally.
Reduce the heat to low and add the tomatoes, pepper, and other spices. Cover partially and cook, stirring occasionally, until the sauce is thick and a consistency you like, about 60 minutes.
Before the sauce is finished, cook the pasta according to the package instructions. Drain the pasta. Remove the rind and add the pasta to the sauce, stirring to combine. Season with salt and pepper and serve immediately.

Mexican Rice

We had friends coming for dinner, along with their two kids, and so the meal I had planned was not going to make enough.  So, I turned to my handy dandy blog and decided to make Chicken Enchiladas from Annie's Eats.  While I was there, I decided to make her version of Mexican Rice instead of the one I'd made previously, which is here.


This might just be the first time that Annie's way isn't the best way, for me at least.  First, the one I tried previously was MUCH easier, with fewer ingredients, steps, and time.  But more importantly, I had a very hard time getting the rice to cook properly Annie's way, and after waiting way longer than planned for it to cook, put it on the table still underdone.  So, Annie's version also lost in the taste category too, perhaps as the result of my own incompetence at cooking rice.

I freely and openly admit; it's probably my own incompetence at cooking rice.

Mexican Rice taken from Annie's Eats
Ingredients:
2 ripe tomatoes, cored and quartered
1 medium white onion, peeled, trimmed and quartered
2 cups long grain white rice
1/3 cup canola oil
4 cloves garlic, minced or pressed through a garlic press
3 medium jalapenos, ribbed, seeded and minced
2 cups low-sodium chicken broth
1 tbsp. tomato paste
1 1/2 tsp. salt
1/2 cup minced fresh cilantro (optional)
1 lime, cut into wedges for serving
Directions:
Preheat the oven to 350 degrees F and move a rack to the middle position.  Process tomatoes and onions in the food processor until smooth and thoroughly pureed, about 15 seconds, scraping down the bowl if necessary.  Transfer the mixture a liquid measuring cup; you should have 2 cups (if necessary, spoon off excess or add water so that the volume equals 2 cups).
Place the rice in a large fine mesh strainer and rinse under cold running water until the water runs clear, about 1 1/2 minutes.  Shake rice vigorously in strainer to remove all excess water.
Heat the oil in a heavy-bottomed oven-safe Dutch oven or straight-sided sauté pan with a tight-fitting lid over medium-high heat, 1 to 2 minutes.  Add the rice and fry, stirring frequently, until it is golden and translucent, 6 to 8 minutes.  Reduce the heat to medium; add the garlic and minced jalapenos; cook, stirring constantly, until fragrant, about 1 1/2 minutes.  Stir in pureed tomatoes and onions, chicken broth, tomato paste and salt; increase heat to medium-high and bring to a boil.  Cover the pan an transfer to the oven; bake until the liquid is absorbed and rice is tender, 30 to 35 minutes, stirring well after 15 minutes.
Stir in cilantro (if desired) and serve with lime wedges.
Source: adapted from Dinner and Dessert, originally from Cook’s Illustrated, September 2004

Takeout at home: Lauren Makes Chicken and Broccoli

For the Takeout at Home Challenge, my buddy Lauren chose to make the popular Chicken and Broccoli (Is it really popular, or is it that I just know a handful of devotees?), putting her own twist on the original Beef and Broccoli recipe.


Here's what she had to say about it!
We absolutely loved this dinner. It didn't taste really like our local restaurant, and I might decrease the amount of ginger next time, but this was a huge success. Luckily, this was on a night when I was cooking late so the kids had already eaten; the two of us alone finished it so there wouldn't have been enough. Next time I'll for sure double it. Isn't one of the best parts about Chinese take out the leftovers?


So go check out Lauren's lovely blog; it's one of my top visits when I'm stumped for meal planning!

Saturday, March 19, 2011

Takeout at Home: Melissa Makes Chinese Beef with Noodles


The recipe for Chinese Beef with Noodles was a popular one; I had three friends who wanted to make it for the Chinese Takeout at Home.  Not wanting to limit people who were helping me out, I let everyone give it a whirl.  Melissa made a very different meal than Rachel did, despite using the same base recipe.

Here's what Melissa had to say about the recipe:
I lightened this dish up a bit so it differs from the original recipe.  Also, I added edamame for some more protein and crunch.  If you haven't tried it, pick some up...you can buy it frozen and shelled at Whole Foods.  Not only is it a great addition to certain dishes, it's a great snack, too.

I'm so pleased that so many of you are finding new recipes to make at home and that you're enjoying them too!  Thank you, Melissa, for a great looking meal, and for participating in the challenge!  Everyone else, go check out her blog, which has some awesome recipes and lots of giveaways too!

Friday, March 18, 2011

Eggplant Parm

Photobucket
Cheesy Goodness

I'm always looking for meat free recipes for health and financial reasons, but whenever the Lenten season comes around, I feel like looking for meat free recipes becomes a mission.  So, when a group of local ladies start swapping recipes of the vegetarian variety, I'm on board.

This came from Gianna, and it's her own recipe.  I made a few modifications, which I mentioned below.  I've made Eggplant Parm lots of times; here, here, and here.  Each version has its merits.  I think this one made the best (of the homemade, at least) eggplant cutlets and was also pretty easy; I seem to recall the other versions taking a LONG time.

Photobucket

I thought this was really delicious.  The eggplant was tender, its flavor was great, and I love anything that is so veggie full that I don't have to think about a side dish.  A REFUSED to touch his; I don't know why.  He typically loves eggplant parm, but wouldn't even try, not even to get a piece of coveted garlic bread.  E, however, dug in, eating almost as much as me:
Photobucket


Thanks, Gianna, for a delicious dinner!

Eggplant Parmesan  (this is my own recipe)
**I don’t have exact measurements, I usually wing it, and flavor to taste!
Olive oil
Garlic
1 large eggplant
2 eggs
Fresh breadcrumbs, mixed with Italian seasoning, black pepper, and garlic powder
Tomato Sauce (I used homemade, following Giada de Laurentiis's recipe) **Gianna's recipe below
Mozzarella cheese  (shredded)
Parmesan Cheese  (grated)

Preheat Oven to 350.
Peel eggplant, and slice it (into circles).....not too thin, but not too thick either.

Sprinkle eggplant with salt and place in colander (in sink) for 20 minutes.  Rinse, and squeeze water out of slices, and dry them with paper towels.

Dip eggplant in egg then breadcrumbs.  
Heat olive oil in a large saute pan over medium high heat until oil is shimmering.  Add garlic and heat until it "speaks."
Fry eggplant until the slices are tender and golden brown.  (if a fork goes in easily, they are done.)
Remove from oil and place on paper towels to drain excess oil.

Once you fry all your eggplant, layer in a baking dish!  Depending on how much eggplant you have you can use any size.
Sauce, eggplant, Parmesan cheese and mozzarella cheese (use as much cheese and sauce as you’d like).

And Layer again...sauce, eggplant, parmesan and mozzarella.   Continue layering until you use all of your eggplant.

Cover with Foil and Cook at 350 until cheese gets bubbly..approx. 20-30 minutes!   I usually take my foil off with about 5-10 minutes left to go!   Baking times may vary! 
Enjoy!

MY SIMPLE TOMATO SAUCE RECIPE  (I always end up with extra)
2 large cans crushed tomatoes
4 TBSP olive oil
4 cloves of garlic
basil
onion powder (or some chopped vidalia onion)
oregano
parmesan cheese
Sauté oil and garlic in a sauce pan (if using real onion throw that in too) for about 5 minutes.  Add cans of crushed tomato, basil, oregano, onion powder and cheese.  Bring to boil and then lower to simmer for at least 30 minutes.    Stir often.

Thursday, March 17, 2011

Mild Island Ziti

Photobucket

A frequent complaint heard from the mouth of 3 year olds around here is that dinner is "too spicy," even if said spice is Italian.  So, I toned this down substantially; I used mild Italian sausage and barely any crushed red pepper.

Alas, said 3 year old was loaded up on St Patrick's Day treats from school, and barely ate his meal.  M and I really liked ours, though I'd have preferred a little bit more spice.  I thought it would be very similar to a meal I used to make frequently, Broccoli and Sausage Cavatelli from allrecipes, but it wasn't at all.  This is a very light and almost summery dish, while the allrecipes version I remember being much heavier and wintery.

The 10 month old really enjoyed his too, though the broccoli went on the floor (his frequent complaint is throwing stuff he doesn't like on the floor.  Or when he's done, it goes on the floor.  It's nice).

Next time, I think I will just remove the casings and break up the sausage.  The casings were just gross to me, and while I prefer the sliced sausage, I couldn't slice it properly; don't know what I did wrong there.

This came from Taste of Home Magazine, by way of A Taste of Home Cooking.  Since the only fresh tomatoes in the house are grape tomatoes, I appreciated Sarah's substitution of canned diced tomatoes.  I also made a few minor modifications to meet our (garlic loving) needs.

Fire Island Ziti
Modified from Taste of Home, via A Taste of Home Cooking

1 15oz can diced tomatoes, undrained
2 tablespoon olive oil
2 garlic cloves, minced
1 teaspoon salt (omitted)
8 ounces uncooked ziti (I used a 12oz box of whole wheat)
2 broccoli crowns cut into florets (I used one head and half a bag of frozen)
1 pound Italian sausage links, cut into 1/2-inch slices
1/4 teaspoon crushed red pepper flakes
Grated Parmesan cheese

Cook ziti according to package directions, adding broccoli during the last 4 minutes.

Meanwhile, in a large skillet over medium heat, heat oil until shimmering.  Heat garlic until it "speaks," then cook sausage in oil until no longer pink. Add pepper flakes; cook 1 minute longer. Stir in tomatoes with the juice; simmer until the sauciness you like (I like it saaaucy!).

Drain ziti mixture; toss with sausage mixture. Sprinkle with cheese.  Serve hot.

Red Makes: Chinese Braised Beef and Noodles

Another guinea pig for the Takeout at Home Challenge!  I still seek people to make recipes and cook along!

One thing for which Asian food is known is being sodium laden (and maybe even monosodium glutamate, to which many folks are allergic).  If you're getting takeout, you know you're probably getting your salt intake for the next three days in one meal.  Making at home, however, allows you to reduce the salt substantially.  When my college buddy Rachel made this, she discovered the leftovers were way too salty.

Here's what she had to say about the meal:
The prep time on the recipe said 10 minutes.  The person who wrote this recipe must be a whiz with a knife.  It took me 15-20 mins just to chop the beef (thank you Kelsey Nixon's show on knives).  The measuring of the spices and chopping/measuring of everything else took little time which I love.    I think it took me 30 minutes total to make a wonderful meal that my husband loved and we have enough for another meal, since the original recipe is for 4-6 ppl and there are only 2 of us.

For me, the only thing missing is a veggie from this dish but you can easily steam some broccoli which would be a great addition...not sure there is enough room in the pot for anything else.


Thanks, Red, for helping me out in my little project!  Go check out her blog, Ginger and Licorice, named for her cats and dog!

Wednesday, March 16, 2011

Spicy Shrimp

Photobucket 

One thing every girl needs is a meal she can make without a recipe.  I don't have one, however, this is my husband's memorized recipe.  It came from a cookbook I picked up from the clearance aisle at Barnes and Noble when we first started living together, and for one reason or another, it became his signature dish.

We learned early on that this meal needs to be served over pasta, typically spaghetti, and that we love the garlic sauce so much, that garlic bread is necessary as well.  It's a super quick meal that's ready in about the time it takes to make the pasta.


1lb shrimp, peeled and deveined
1/4c your favorite oil
heaping of minced garlic
1/4t crushed red pepper
1/4c white wine

Mix the shrimp, oil, garlic, and red pepper in a medium bowl and marinate at least 15 minutes.  Cook in a large skillet over medium heat until shrimp curl and are pink.  Remove from pan, add white wine to deglaze pan over medium-low heat.  Pour over shrimp.

Serve with pasta and garlic bread.

Bacon Pierogie Bake

Photobucket 

This may not look pretty on the plate, but I assure you that it's a delicious meal.

Along with frozen ravioli, frozen pierogie is one standby in the Mad Men freezer.  It's a favorite of BAJ's, and easy when things go haywire and dinner just isn't going to happen.  When I saw that Stephanie had made a "souped up" version of a pierogie casserole and raved about it, I knew I would make it too.

I find it nuts that this recipe appeared in Cooking Light, since there's no way this is a light recipe (using Neufchatel cheese a light recipe does not make when one is frying in bacon).  Perhaps what makes it light is that it's supposed to be an appetizer, but who can deny the ease of this quick dinner meal?  I took Stephanie's plan to make it as an entree, though she served with salad and I served with green beans.  Speaking of those green beans, we topped them with the very awesome sauce for the pierogies, make the green beans that much more awesome.

Is it wrong to admit I was almost licking my plate?

This one was great, though if I serve it as a main again, I will double it, in addition to serving with a side dish.  This is so versatile; you could use any kind of pierogie, add in some steamed broccoli, or pretty much anything you like.

Source: Stephanie Cooks, who Slightly adapted from Cooking Light

Ingredients:
1 (16 oz) package frozen potato and onion pierogies
2 slices center-cut bacon, chopped
2 garlic cloves, minced
1/3 cup 1/3-less-fat cream cheese
1/2 cup chicken broth
1/2 cup shredded cheddar cheese
1/4 cup thin sliced green onions
1 small plum tomato, seeded, and diced  (I used an handful of grape tomatoes, which I diced)
Pepper
Cooking spray

Directions:
1- Preheat the oven to 400.
2- Spray a baking dish with cooking spray. Arrange the frozen pierogies in the dish.
3- In a medium saucepan, cook the bacon until crisp. Remove the bacon from the pan.
4- Add garlic to the drippings, cook for 30 seconds. Add the cream cheese, stirring until it melts. Add the broth, stir continuously until it's all incorporated.
5- Pour the sauce mixture over the pierogies. Top with the cheddar cheese.
6- Bake for 15 minutes. Remove from the oven, top with the tomatoes and bacon, and return it to the oven. Bake for 5 additional minutes.
7- Remove from the oven sprinkle with green onions and black pepper. Serve hot.

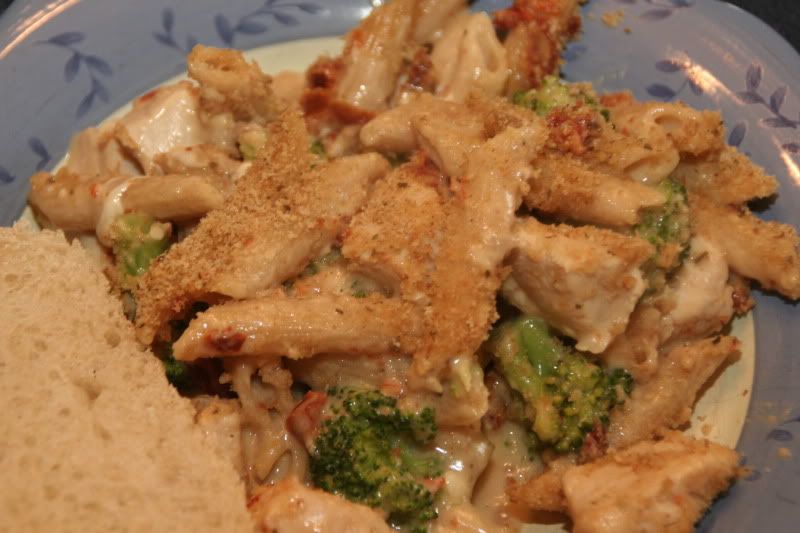
Baked Penne with Chicken, Broccoli, and Smoked Mozzarella


Even though spring is right around the corner, there's still a chill in the air that made me want something hearty and warm for dinner tonight.  Luckily, this one has been floating in my meal plan for a few weeks now, and I actually had the forethought to take out and start preparing the meal early.

At its core, this is a one pot meal.  All your cooking is done in one pot.  Nonetheless, it made a lot of dishes in MY kitchen, because that's how I roll.  I dirtied:  the pasta pot, the baking dish, a cutting board, a colander, a bowl for the cooked broccoli, the plate into which I shredded the cheese, and I'm sure others.

I thought at first that the expense of smoked mozzarella probably wouldn't be worth it, and actually wondered how it would taste with cheddar instead.  The smoke, however, adds a definite (and delicious) flavor to the meal and is totally worth it (though I do still want to check out the flavor of the cheddar in the meal, though I'd remove the sun dried tomatoes).  I enjoyed that I didn't have to think about a side dish.  I also like that, in addition to being hearty, this meal made a good amount.  In the future, I will make in two 8x8 pans, bake one and freeze the other.

As far as the fam, BAJ liked it, saying "This can go into the rotation!"  A seemingly enjoyed his first two or three bites, but then said, "I don't like it."  SIGH.  E dug right in, and ate as much as A should have.

Another hit from Mel's Kitchen Cafe!

*Serves 6-8
Topping:
3/4 cup bread crumbs (store-bought or make your own)
2 tablespoons butter, melted
Filling:
1 bunch broccoli (about 1 ½ pounds), stalks cut off, florets trimmed into 1-inch pieces
12 ounces penne pasta
2 tablespoons olive oil
1 medium onion, minced omitted because mine went BAD!
6 medium garlic cloves, finely minced or pressed through a garlic press
1 teaspoon dried thyme
¼ cup all-purpose flour
2 cups low-sodium chicken broth
1 cup heavy cream
1 teaspoon salt
½ teaspoon pepper
1 ½ pounds boneless skinless chicken breasts (about 3), trimmed and cut into bite-size pieces
3 ounces smoked mozzarella, shredded
8 ounce jar oil-packed sun-dried tomatoes, drained and chopped into pieces
In a small bowl, combine the bread crumbs and butter and set aside. Lightly grease a 9X13-inch baking dish and set aside.
Preheat the oven to 400 degrees and make sure the oven rack is placed in the middle of the oven. In a large pot, bring the water for the pasta to a boil. Stir in one tablespoon salt and the broccoli. The broccoli cooks quickly so stay close! Cook the broccoli for 1 minute, until it is bright green. Quickly remove the broccoli with a slotted spoon to a plate. Return the water to a boil and add the pasta and cook until al dente, about 1-2 minutes less than how you would eat it normally (it will cook a bit more in the oven while baking). Drain the pasta in a colander and toss with 1 tablespoon olive oil. Leave it in the colander and set it aside.
Wipe the pot dry. Add the remaining 1 tablespoon oil and return to medium heat until shimmering. Add the onion and cook until softened and beginning to brown, about 5 minutes. Stir in the garlic and thyme; cook until fragrant, about 30 seconds, stirring constantly. Add the flour, salt and pepper, and cook, stirring constantly, until golden, about 1 minute. Slowly whisk in the broth and cream; bring to a simmer, whisking often. Add the chicken and cook, stirring occasionally, until cooked through, about 6-7 minutes. Stir in the sun-dried tomatoes and smoked mozzarella.
Add the cooked pasta and broccoli to the sauce; stir to combine. Transfer the pasta mixture to the prepared baking dish and sprinkle with the bread crumb topping. Bake until the casserole is bubbling and the crumbs are lightly browned, about 15 minutes. Serve immediately.
*The casserole can be prepared in advance with the following steps: after the broccoli is removed from the boiling water, plunge it into a bowl of ice water and cool completely. Assemble the casserole following the directions in the recipe. After the casserole is spread in the prepared baking pan, let it cool for 5-10 minutes before covering with plastic wrap and refrigerating for up to 8 hours. To bake, preheat the oven to 375 and bake uncovered for 30 minutes.
Recipe Source: adapted from Cook’s Illustrated Cover and Bake

Friday, March 11, 2011

Chicken and Cheddar Souffle

Photobucket 

I am a self admitted book nerd.  I've never before made a souffle, largely because some book I read as a kid talked about how difficult they are and that you can't even sneeze when you have a souffle baking or it would fall.  I have no idea how true this is.

I made this recipe from Giada to go along with Pancetta and Saffron Rice, and it came out awesome.  I was sort of nervous about what my boys would think, since it's an egg dish and M doesn't like eggs.  He said it was pretty good.  A wouldn't eat the chicken, but liked the rest.  E devoured it... every bite.

Instead of buying a rotisserie chicken, I went ahead and baked chicken breasts in the oven.  I brushed them with oil, sprinkled black pepper and Italian seasoning over, and baked for 20ish minutes on 350. 

Photobucket 

So, after being so daunted by souffle, this one turned out great.  Don't be put off by the directions calling for a souffle dish; who has a souffle dish?  I used an 8x8 Pyrex dish, which I sprayed with canola spray.  It made a TON of dishes, though, so be aware of that.  I also was thinking it would be pretty tasty with the addition of mushrooms.  Really, this is a great big open book of a recipe--don't like spinach?  Add in something else, take out chicken, etc etc.

Chicken and Cheddar Souffle
from Giada De Laurentiis

  • Unsalted butter for greasing the souffle dish, plus 1/2 stick (4 tablespoons), at room temperature
  • 1/4 cup all-purpose flour
  • 1 1/2 cups whole milk, at room temperature
  • 1/2 teaspoon ground nutmeg
  • Kosher salt and freshly ground black pepper
  • 1 1/2 cups shredded mild Cheddar
  • 1/2 cup grated Parmesan
  • 2 packed cups baby spinach leaves
  • 1 store-bought, rotisserie chicken, breast meat only, skinned and cut into 1/2-inch cubes (about 2 cups)
  • 6 egg yolks, at room temperature, lightly beaten
  • 2 (1/2-inch thick) slices country-style white bread, crusts removed, cut into 1/2-inch cubes
  • 6 egg whites, at room temperature

Directions

Special equipment: a 2-quart (8-cups) souffle dish

Arrange an oven rack in the center of the oven. Preheat the oven to 400 degrees F. Butter the bottom and sides of a 2-quart souffle dish. Set aside.

In a medium saucepan, heat 1/2 stick of butter over medium-low heat. Add the flour and cook, stirring constantly, for 2 minutes. Slowly whisk in the milk until the mixture is smooth and creamy. Bring the mixture to a simmer and cook, stirring constantly, until the mixture coats the back of a spoon, about 8 to 10 minutes. Stir in the nutmeg and season with salt and pepper, to taste. Remove the pan from the heat and add the cheeses, the spinach, chicken, egg yolks, and bread cubes. Stir until combined (mixture will be thick).

In a large bowl, using an electric mixer, beat the egg whites at high speed until they hold stiff peaks, about 2 minutes. Stir 1/4 of the egg whites into the chicken mixture. Using a spatula, fold in the remaining egg whites. Spoon the batter into the prepared dish and bake until the souffle is puffed and the top is firm and golden, about 55 to 60 minutes. Remove from the oven and serve immediately.

Pancetta and Saffron Rice

Photobucket

Once again, I participated in a recipe swap; this time around, the challenge was side dishes.  Around here, side dishes are more often than not an afterthought...  I'll heat up some frozen vegetables and call it a day.  So, while I really didn't have much to offer, I was excited to try something that would take me out of my comfort zone.

This one was sent by my friend Lishie, and comes originally from Giada.  I can't recall ever having tasted saffron, so really had no idea how it tasted, or what this would be a good compliment to, so went ahead and made Giada's whole meal, excepting the dessert.

I cheapened this one up by subbing 4 slices of bacon for the one slice of pancetta, and a 10oz package of yellow rice (which contains saffron) for basmati rice and saffron.

Other than having some difficulty getting the rice cooked properly (because I used a smaller amount of rice than was called for in the recipe, I used the amount of liquid suggested by the package, but followed Giada's directions.  I have a problem cooking rice properly anyway), this was delicious.  the flavor was great, and it was a great accompaniment to the souffle.  It would be great alongside chicken!

Pancetta and Saffron Rice
From Giada de Laurentiis

Ingredients

  • 1 tablespoon olive oil
  • 1 (8-ounce) piece pancetta, cut into 1/4-inch pieces
  • 2 tablespoons unsalted butter, at room temperature
  • 1 medium onion, finely chopped
  • 2 1/4 cups white basmati rice
  • 4 cups low-sodium chicken stock
  • 2 teaspoons kosher salt
  • 3/4 teaspoon saffron threads

Directions

In a medium (3-quart) saucepan, heat the olive oil over medium-high heat. Add the pancetta and cook, stirring frequently, until brown and crispy, about 6 to 8 minutes. Remove the pancetta to paper towels to drain. Set aside. Discard any cooking juices in the pan.

In the same pan, over medium heat, add the butter. Add the onion and cook for 5 minutes until soft. Add in the rice and stir until the rice is lightly toasted and coated with the butter, about 1 minute. Stir in the stock, salt and saffron. Bring the mixture to a simmer and, with a wooden spoon. scrape up the brown bits that cling to the bottom of the pan. Cover the pan with a tight-fitting lid and cook until the rice is tender and all the liquid has been absorbed, about 20 to 25 minutes Let the rice stand for 5 minutes. Using a fork, fluff the rice and transfer to a serving bowl. Top with the cooked pancetta and serve.

Tuesday, March 8, 2011

Takeout at Home: Lishie makes Pot Stickers, Korean style

I'm so excited that a good number of folks are so excited about the Takeout at Home Challenge (you can find out what I'm talking and sign up here) and want to cook multiple recipes from the original article.  Woo!

Lishie is one example of those folks.  The other day, she posted Sweet and Sour Chicken, and today she posted her take on Pot Stickers, Korean Dumplings!

They sound awesome!  Go check out Lishie's blog and see her take on Korean Dumplings!

Takeout at Home: Wonton Soup

Photobucket 

I love wonton soup, so it was a no brainer as my first Takeout at Home recipe.   I took a look at the recipe suggested by the article, and have to admit I wasn't nuts about it, so I turned to the handy dandy allrecipes for one.  I found this one and decided to roll with it.

I was going to make it last night, but then I realized I didn't have any ground meat.  Oops.  So, tonight was a do-over.  I asked hubby to pick up some ground pork, chicken, or turkey, whatever was cheapest.  He came home with turkey.  It worked, but I'm pretty sure it would be much more tasty with ground pork as directed.

I couldn't figure out how to properly seal the wonton, so that it would come out like the delicious restaurant soup.  I found this tutorial, and while it's not the shape I remember, it worked just great!

Additionally, the recipe suggests a splash of sesame oil and a splash of soy sauce as optional.  Do it.  It absolutely MADE the broth into something special.  I do wish I could find a way to get those little pieces of pork the Chinese restaurants add, but in the meantime, this is an awesome at home version of wonton soup!  It really made me crave an eggroll.


Photobucket 

Homemade Wonton Soup
From Allrecipes

Ingredients

  • 1 bunch green onions, cut into 1/2-inch pieces, divided
  • 6 fresh mushrooms, sliced
  • 1 pound ground pork
  • 1 tablespoon sesame oil
  • 1 tablespoon soy sauce
  • 1 egg
  • 1/4 cup dry bread crumbs
  • 1/4 teaspoon salt
  • 1/2 teaspoon ground black pepper
  • 1 (16 ounce) package wonton wrappers
  • 8 cups chicken broth
  • 16 uncooked medium shrimp, peeled and deveined (optional)
  • 1 medium head bok choy, torn into 2-inch pieces
  • 16 snow peas
  • 1 dash soy sauce, or to taste (optional)
  • 1 dash sesame oil, to taste (optional)

Directions

  1. Dice the green onions, and set aside all but 1 tablespoon. Slice the mushrooms, and set aside all but 1 tablespoon. Finely chop the 1 tablespoon of green onions and 1 tablespoon of sliced mushrooms, and place in a bowl with the ground pork, 1 tablespoon sesame oil, 1 tablespoon soy sauce, egg, bread crumbs, salt, and pepper. Stir to thoroughly mix the pork filling.
  2. Spoon about 1 tablespoon of the pork filling onto the center of each wonton wrapper. Use your finger or a pastry brush to lightly moisten the edges of the wonton wrappers with water. Fold one corner of the wrapper over the filling onto the opposite corner to form a triangle. Press the edges together to seal. Moisten the two long ends of the triangle, fold them together, and press them firmly to seal.
  3. Bring the chicken broth to a boil in a large saucepan over medium heat. Drop the wontons, one by one, into the broth, and let them cook for 3 to 5 minutes, until they float to the surface. Reduce heat to a simmer, and gently stir in the shrimp, bok choy, and reserved sliced mushrooms. Let the soup simmer 2 more minutes, until the shrimp turn pink, and then drop in the snow pea pods. Garnish with the remaining green onions and a dash of soy sauce and sesame oil, and serve immediately.

Monday, March 7, 2011

Takeout at Home: Lishie make Sweet and Sour Chicken


  Lishie has a great cooking blog, and she offers chuckle worthy tips that are super helpful for the meals she offers.  She's the second guinea pig for this takeout at home project, and I **THINK** is making two recipes for the project.  This time around, she made Sweet and Sour Chicken using a homemade sauce. 

Here are some of her thoughts:

This was so flavorful & delicious I'd definitely recommend it. It's much healthier, "clearer" & has less sodium than bottled sauces. We ate it without a carb but next time, I'll make it with white rice on the side.My hubby said, "All you need is the white box." Awesome.

I love the look of this meal, and I think I'm definitely going to steal this one from Lishie, following her rewrite of the directions.  It looks so awesome, combining the deliciousness of takeout with the homemade packed full of veggie.

Thank you, Lishie, for making what looks like a very tasty takeout at home!  Please go check out Lishie's blog; you'll be sure to find something that is DeLish!

Caramelized Onion, Mushroom (but not) Gruyere Tartlets

Photobucket 

My girl loves her some mushrooms, so when I saw this as one of the recipes made for Annie's virtual baby shower, I knew it would be the perfect appetizer for my girl's baby shower too.

First, you can see I needed to chop the mushroom a little bit smaller.  Next, you can see there's no cheese on top.  I had to pack up all my stuff to leave by 8:30am to get to the party and set up...  it turns out I didn't do a great job of packing up.  Among other things that got forgotten and/or left behind, I grabbed a container of shredded coconut when I meant to grab a container of shredded Gruyere.  Oy.  As one of the other ladies said, at least I realized my mistake BEFORE adding the "cheese" to the tartlet.  I used beef broth instead of wine/chicken broth, and I had but one sheet of puff pastry.  I used a 3" cookie cutter, and it probably made about 15, especially after using the leftover dough.

As I said, though, I was able to prep the meal ahead of time, so all I had to do was put it together when it was party time.  This is essential for any party host/ess, whether he/she is hosting at home or at the home of someone else. 

They were absolutely delicious.  I pretty much couldn't stop eating them.  Mine didn't come out nearly as gorgeous as Michelle's, but they were very pretty nonetheless (especially since they weren't sitting right next to Michelle's, then I'd have been in trouble) and more importantly, super duper tasty.

These came my way from Michelle at Brown Eyed Baker.

Caramelized Onion, Mushroom & Gruyere Tartlets

Yield: 16 3-inch tartlets
Prep Time: 1 hour | Bake Time: 20 minutes
1 tablespoon olive oil
1 large yellow onion, thinly sliced
1 tablespoon unsalted butter
16 ounces white button mushrooms, thinly sliced
1 clove garlic, chopped
½ teaspoon dried thyme
Salt and pepper, to taste
¼ cup white wine (can substitute chicken or vegetable broth)
2 sheets puff pastry (thawed according to directions on package)
1 cup shredded Gruyere cheese (can substitute any variety of Swiss cheese)
1 egg + 1 tablespoon water, beaten together (for the egg wash)
Handful of parsley, chopped
1. Preheat oven to 400 degrees F and line two baking sheets with parchment paper.
2. Heat the olive oil in a wide, heavy-bottomed pan over medium-low heat and add the onions. Cook, stirring occasionally, until they begin to caramelize, about 20 minutes.
3. Add the butter to the pan. Once melted, add the mushrooms and saute, stirring occasionally, until they are completely soft and all of the liquid evaporates, about 20 minutes.
4. Add the garlic and the thyme and saute until fragrant, about 1 minute. Season with salt and pepper to taste.
5. Add the wine, scraping the bottom of the pan to pull up all of the browned bits, and cook until all of the liquid has evaporated. Remove from heat.
6. Unfold the thawed sheets of puff pastry and cut out circles from the dough, placing them evenly spaced on the baking sheets. Using a very sharp knife, make four small scores around the perimeter of the dough, about ¼ to ½-inch from the edge.
7. Top the rounds of puff pastry with a small spoonful of the onion and mushroom mixture, trying to keep the filling within the score marks. Top with the shredded Gruyere cheese. Brush the edges of the dough rounds with the egg wash.
8. Bake until the pastry is golden brown, about 15 to 25 minutes. Garnish with fresh chopped parsley.
(Recipe adapted from Closet Cooking)

Roasted Artichoke Dip

Photobucket 

I've had a lot of artichoke dip.  I've made it a few times, sometimes with spinach, but none has come close to this artichoke dip.  The first thing that's different is that I took Cook's Illustrated's advice to use frozen artichokes rather than canned; they suggest that they maintain the flavor of real artichokes better this way.  The next thing is that the first step is to roast the artichokes; anything that's roasted is automatically so much tastier and, I dare say, more complex.

I made this for a baby shower, and was very surprised it didn't move more than it did; about half the 8x8 pan was eaten by about 20 women.  Surprised, but also a little bit ecstatic because...more leftovers for me!  On that note, the leftovers are delicious!

So, the next time you're thinking of making a dip, definitely consider this one.  I assure you, it will be the best artichoke dip you've ever tasted.

Roasted Artichoke Dip
The Best Make-Ahead Recipe, From The Editors of Cook's Illustrated

Topping
2 slices high quality white sandwich bread, quartered (I used whole grain white)
2T grated Parmesan cheese
1T unsalted butter, melted

Dip
2 (9oz) packages frozen artichokes
2T olive oil
S&P
1 medium onion, minced
2 medium garlic cloves, minced
1c mayo
4oz cream cheese, at room temp
1oz Parmesan cheese, grated (omitted)
2T juice from 1 lemon
1T minced fresh thyme leaves (I used dried)
Pinch cayenne pepper

1.  Make the topping by food processing the bread using the pulse setting.  Mix bread crumbs with butter and Parmesan cheese.
2.  Heat the oven to 450 degrees.  Combine artichokes with 1T oil, 1/2t salt, and 1/4t pepper, and spread on a baking sheet lined with foil.  Roast in the oven, stirring occasionally, about 25 minutes.  Let cool then chop.
3.  Meanwhile, heat remaining oil in a medium skillet until shimmering.  Cook the oven until softened, about 5 minutes.  Add garlic and cook until fragrant, about 30 seconds.  Transfer to a large bowl and set aside.
4.  Add the remaining ingredients to the onion mixture and stir until uniform, making sure all the lumps of cream cheese are spread out.  Gently stir in the artichokes and season to taste.  Transfer to an 8x8 baking dish and smooth.  Top with bread crumbs.
5.  Bake at 400 degrees for 20-25 minutes.  Let cool 5 minutes before serving.
Related Posts with Thumbnails