Friday, July 30, 2010

Vanilla Cupcakes


I wanted to make a Spiderman colored cupcake for A for his birthday party. The chocolate cupcakes I was making weren't going to work, so I found this recipe, colored the batter, and also used leftover strawberry frosting, which I also colored. These came out really tasty, and were a big hit with the birthday boy!

Vanilla Cupcakes Recipe
Vanilla Cupcakes:
1/2 cup (113 grams) unsalted butter, room temperature
2/3 cup (130 grams) granulated white sugar
3 large eggs
1 teaspoon pure vanilla extract
Zest of 1 large lemon (optional)
1 1/2 cups (195 grams) all purpose flour
1 1/2 teaspoons baking powder
1/4 teaspoon salt
1/4 cup (60 ml) milk
Buttercream Frosting:
2 cups (230 grams) confectioners sugar (icing or powdered sugar), sifted
1/2 cup (113 grams) unsalted butter, room temperature
1 teaspoon pure vanilla extract
2 tablespoons milk or light cream
Assorted food colors (if desired)

Vanilla Cupcakes: Preheat oven to 350 degrees F (177 degrees C) and line 12 muffin cups with paper liners.
In the bowl of your electric mixer, or with a hand mixer, beat the butter and sugar until light and fluffy. Add the eggs, one at a time, beating well after each addition. Scrape down the sides of the bowl as needed. Beat in the vanilla extract and lemon zest.
In a separate bowl whisk together the flour, baking powder, and salt.
With the mixer on low speed, alternately add the flour mixture and milk, in three additions, beginning and ending with the flour. Scrape down the sides of the bowl as needed.
Evenly fill the muffin cups with the batter and bake for about 18-20 minutes or until nicely browned and a toothpick inserted into a cupcake comes out clean. Remove from oven and place on a wire rack to cool. Once the cupcakes have completely cooled, frost with icing. If you want flat topped cupcakes then slice off the dome of each cupcake, with a sharp knife, before frosting. If you want to pipe the frosting, I like to use a large Wilton 1M star decorating tip.
For the Frosting: In an electric mixer, or with a hand mixer, cream the butter until smooth and well blended. Add the vanilla extract. With the mixer on low speed, gradually beat in the sugar. Scrape down the sides of the bowl. Add the milk and beat on high speed until frosting is light and fluffy (about 3-4 minutes). Add a little more milk or sugar, if needed. Tint the frosting with desired food color (I use the paste food coloring that is available at cake decorating stores and party stores).
Makes about 12 cupcakes

Wednesday, July 28, 2010

Angie's Dad's Best Cabbage Coleslaw

From allrecipes. From our co-op, I had a large cabbage, some onions, and some carrots taking up room in my fridge. With a birthday party coming, and needing room in my fridge, I decided to make a cole slaw. This one sounded delicious. I made it today, and tasted it right after making it. It tasted pretty good, but the true verdict will be how it tastes on Saturday!

I am not a cole slaw fan, in general. If it's there, I will try it, but I almost never really like it. This cole slaw, however, was so delicious. Our party guests even commented on it being delicious and wanted to know how I made it (which, of course, I couldn't remember at all). It was nice and tangy but also had that wonderful sweetness from the sugar. I will definitely be making this again, but in the future will use a much smaller cabbage because this made sooo much cole slaw.

As an aside, many of the allrecipes users mentioned that they used cole slaw mix to save time. I just went ahead and sliced my cabbage and it really didn't take that long. One of the guests suggested that it wouldn't taste the same if I had used one of those bagged mixes, so I will probably use a regular cabbage again in the future. I followed the directions here with very good results.


Ingredients

  • 1 medium head cabbage, shredded
  • 1 large red onion, diced I used a white onion
  • 1 cup grated carrots
  • 2 stalks celery, chopped
  • 1 cup white sugar
  • 1 cup white vinegar
  • 3/4 cup vegetable oil
  • 1 tablespoon salt
  • 1 tablespoon dry mustard
  • black pepper to taste

Directions

  1. In a large bowl, combine cabbage, onion, carrots, and celery. Sprinkle with 1 cup sugar, and mix well. In a small saucepan, combine vinegar, oil, salt, dry mustard, and pepper. Bring to a boil. Pour hot dressing over cabbage mixture, and mix well.

Monday, July 26, 2010

Classic Italian Lasagna

Photobucket

I remember that my grandfather LOVED my mom's lasagna. After his passing, I don't think she's made it again, preferring the much easier baked ziti.


Mamma's lasagna wasn't like this.

I discovered this recipe by checking out Emily's blog. It originally came from Mel's blog.

My husband actually did most of the cooking for this lasagna, bringing his lasagna total to 4. Definitely allot yourself a good two hours from start to finish. My original plan was to put this together last night then bake it today, but that just didn't happen. I started putting it together around 4 this afternoon. Then, I discovered my block of mozzarella had gone bad and was thrown out. Oops. So, I went to the store only to hit traffic on my way back. Add in a baby feeding, and things didn't get started until almost 5. Bedtime starts in these parts around 7. Oy.

But, we went forward and made this. It was worth it. I asked M, "Was it worth all the work?" and he replied that it was...definitely what I was expecting him to say. We both thought it was delicious. The Boy was being...stubborn? He could only be persuaded to eat by saying it was the only way he could go to the playground after dinner. Yep, we bribe our son. He said it was good, but really wouldn't eat it.

Anyway. Go make this. I suggest you do it sooner rather than later. But definitely make sure you give yourself the time!

Oh! Some changes to the recipe:
  • Put some of the red sauce on the bottom of your pan. We found that the bottom layer of pasta didn't cook properly and stuck to the spatula as it came out of the pan. This resulted in some ugly food photography.
  • Also leading to some ugly food photography was that things were a little too gooey. We waited the 15 minutes that were suggested, but I think it could have used another 5 minutes to cool properly. (It also helps to explain the kind of ugly picture of the lasagna).
Edited to add: This was quite tasty as leftovers too! YUM! Next up is, how did it freeze? :)

Classic Italian Lasagna
Printable Version

Printable Version with Picture

*Makes one 9X13-inch pan of lasagna (and requires the use of several pots and skillets…but don’t worry, you can wash those up in a snap while the lasagna is baking)

Red Sauce:
2 tablespoons olive oil
1 tablespoon butter
4 cloves fresh garlic, finely minced (see garlic tutorial here)
1/2 large onion, diced (about 1/2 cup)
8 ounces mushrooms, chopped
2 (8-ounce) cans tomato sauce
1 (6-ounce) can tomato paste
1 (14.5-ounce) can diced tomatoes, undrained
2 teaspoons Italian seasoning (or a mix of dried oregano and basil)
1/2 teaspoon salt
1/2 teaspoon pepper

White Sauce:
3 cups milk (not skim, I used 1%)
5 tablespoons flour
4 tablespoons butter
1/2 teaspoon salt
1/2 teaspoon pepper

9 lasagna noodles, boiled for half the time on the box (or use 12 of the no-boil noodles, of which I far prefer the Barilla brand)
1 pound ground turkey
1 pound mozzarella cheese, shredded
8 ounces Parmesan cheese, shredded

Preheat the oven to 350 degrees. Lightly grease a 9X13-inch baking pan with cooking spray or with a napkin dipped lightly in olive oil and set aside.

In a large skillet, brown the ground turkey over medium-high heat, breaking the meat apart into pieces with a wooden spoon. When turkey is cooked through, drain the grease and set aside.

In a medium-size saucepan over medium-high heat, add 2 tablespoons olive oil and one tablespoon butter. Add a pinch of salt and pepper. When oil/butter is hot, add the garlic, stirring constantly. When the garlic is lightly browned, but NOT burned, add the onion and mushrooms. Continue cooking on medium-high heat until the vegetables are soft and browned and the fluid has mostly cooked out. Remove from heat and either using a handheld immersion blender or transferring the vegetables to a blender, blend the vegetables to a paste-like mixture. Return the pot to the heat (pour the pureed vegetables back in, if using a stand-alone blender) and add the tomato sauce and tomato paste. Stir to combine. Then add the diced tomatoes, Italian seasoning, salt and pepper. Stir. Cover and let the sauce sauce simmer for 30 minutes over medium-low heat, stirring occasionally. Right before using the red sauce in the lasagna, stir in the reserved ground turkey.

While the red sauce simmers, if using lasagna noodles that need to be boiled, bring a large pot of salted water to a boil and boil the noodles for half the time suggested on the box. Once the noodles are cooked, drain, but do not rinse. Add a dab of olive oil to keep them from sticking together. If you are using no-boil noodles, you can skip this step.

Also while the red sauce is cooking, melt the four tablespoons butter and when melted, add the flour, stirring constantly to combine and letting the mixture cook, while stirring, for a minute or two. Gradually add in the milk, whisking constantly. Add the salt and pepper. Slowly whisk the white sauce, ensuring it doesn’t burn on the bottom of the pan, while cooking it over medium heat. Continue slowly stirring or whisking while the white sauce cooks and thickens quite a bit, about 5-7 minutes. Add a pinch of mozzarella for good luck, if you wish!

To begin layering the lasagna, keep in mind that you’ll have three layers of noodles as well as three layers of the sauces and cheese – so plan on splitting all the sauce and cheese piles into thirds so you don’t run out at the end! On the bottom of your lightly greased baking pan, layer three pre-boiled noodles or four no-boil noodles, slightly overlapping the no-boil noodles. Layer the red sauce, white sauce, Parmesan and mozzarella cheeses, spreading all to the edges and top with another layer of noodles. Again, layer the red sauce, white sauce, Parmesan and mozzarella cheeses and top with the final layer of noodles. Layer the sauces and cheeses again.

Cover the lasagna with a greased layer of aluminum foil and bake for 30 minutes. Remove the foil and let the lasagna sit for 15 minutes before cutting and serving.

Sunday, July 25, 2010

Cherry Coke Cupcakes

Photobucket
The frosting here reminds me of a little beret.


After baking three types of cupcakes for A's third birthday party trials, we finally have a winner. BAJ EXCLAIMED when he tried the batter that these were by far the best yet (I believe he mouthed Effing Awesome). These Cherry Coke cupcakes from Annie's Eats were really good, and they look pretty too!

They really don't have a whole lot of Coke flavor, but they are delicious anyway. I wasn't, however, a big fan of the frosting here. It was pretty thin and a little runny, so for the birthday party, I'm going to make a buttercream frosting to go with it (which will be dyed Spiderman-esque!). This time, we used three cherries in each cupcake, and pressed them all the way down. Three is probably a good number, but next time, I won't press them all the way in.

Photobucket
So, go make these because they're awesome!!!


Cherry Coke Cupcakes
Printer-Friendly Version
Yield: 10-12 cupcakes
Ingredients:
For the cupcakes:
1½ cups all-purpose flour
3 tbsp. cocoa powder
½ tsp. baking soda
¼ tsp. salt
¾ cup sugar
8 tbsp. unsalted butter, at room temperature
1 large egg
½ cup buttermilk
¾ cup Coca-Cola
¼ tsp. maraschino cherry juice
2 tsp. vanilla extract
Maraschino cherries, stemless
For the glaze (optional):
1 cup confectioners’ sugar
2 tbsp. Coca-Cola
For topping:
2/3 cup heavy cream
3-4 tbsp. powdered sugar
Maraschino cherries
Directions:
Preheat the oven to 350° F. Line a muffin pan with foil or paper liners. In a medium bowl combine the flour, cocoa powder, baking soda and salt. Stir together and set aside. In the bowl of an electric mixer fitted with the paddle attachment, combine the sugar and butter. Mix on medium-high speed until light and fluffy. Mix in the egg until incorporated. In a bowl or large measuring cup, combine the buttermilk, Coke, maraschino cherry juice, and vanilla extract; stir to combine. (This mixture may look disgusting and/or curdled – it’s okay!)
Mix the dry ingredients into the butter-sugar mixture on low speed, alternately with the liquid ingredients, beginning and ending with the dry ingredients and mixing just until incorporated. Divide the batter evenly between the cupcake liners. Drop 4 or 5 stemless maraschino cherries into each cupcake well and push them down into the batter. Bake for about 18 minutes, or until a toothpick inserted in the center comes out clean. Allow to cool in the pan 5 minutes, then transfer to a wire rack to cool completely.
To make the optional glaze, combine the confectioners’ sugar and Coke in a small bowl and whisk until smooth. Spoon or drizzle a small amount of the top of each cupcake. Allow to set.
To make the whipped cream topping, add the heavy cream to the bowl of a stand mixer fitted with the whisk attachment. Begin whipping on medium speed, slowly adding the confectioners’ sugar and gradually increasing the speed to high as the cream holds soft peaks. Whip until the cream holds stiff peaks, being careful not to overbeat. Spoon or pipe the whipped cream on top of the cupcakes and top each with a maraschino cherry.

Cookies n Cream Cupcakes

Photobucket

I was perusing my Google Reader and came across these yummy looking cupcakes on my friend Lauren's blog, and thought these would be great for A's birthday party. He loved the idea of "Cookie cupcakes," and was very excited about the whole idea.
As you can sort of see in the picture, I had some trouble with the frosting--maybe the heat caused the runniness of it, but it wasn't super awesome. I liked the flavor of them, though, although M suggested that it was too much of the same thing throughout (he said they might be better with a strawberry frosting or something like that).
When we offered a taste to A (we offered: a whole cookie cupcake, a whole chocolate cupcake, or half a cookie cupcake and half a chocolate cupcake), he went all out for the cookie cupcake. He really liked it too, but I'm sure how much of a commentary an almost 3 year old is on sweets of any kind!

Ingredients

  • 30 Oreo cookies
  • 1 package (18.25 ounces) plain white cake mix
  • 1 cup sour cream
  • 1/2 cup vegetable oil
  • 3 Large eggs
  • 1 teaspoon vanilla
1. Place a rack in the center of the oven and preheat the oven to 350F. Line 24 cupcake cups with paper liners. Set the pans aside.
2. Count out 12 Oreos and separate the top and bottom wafers. Make sure each has some of the icing on it. Place one wafer, icing side up, in the bottom of each paper liner. Set them aside. Place the remaining 18 Oreos between sheets of waxed paper or in a large, closed zipper-lock bag and crush them by rolling over them with a rolling pin. Set these crumbs aside.
3. Place the cake mix, sour cream, oil, eggs, and vanilla in a large mixing bowl. Blend with an electric mixer on low speed for 30 seconds. Stop the machine and scrape down the sides of the bowl with a rubber spatula. Increase the mixer speed to medium and beat 1 1/2 minutes more, scraping down the sides again if needed. Measure out 1 1/2 cups of the crushed Oreos and fold these into the batter until well incorporated. Set aside the remaining crushed Oreos for the frosting. Spoon or scoop 1/3 cup batter into each lined cupcake cup, filling it three quarters of the way full. (You will get between 22 and 24 cupcakes; remove the empty liners, if any.) Place the pans in the oven.
4. Bake the cupcakes until they are lightly golden and spring back when lightly pressed with your finger, 18 to 20 minutes. Remove the pans from the oven and place them on wire racks to cool for 5 minutes. Run a dinner knife around the edges of the cupcake liners, lift the cupcakes up from the bottoms of the cups using the end of the knife, and pick them out of the cups carefully with your fingertips. Place them on a wire rack to cool for 15 minutes before frosting.
Store these cupcakes, in a cake saver or under a glass dome, at room temperature for up to 3 days or in the refrigerator for up to 1 week. If you plan to freeze them, don't add the cookie-crumb topping. Wrap them I in aluminum foil or in a cake saver and freeze for up to 6 months. Thaw the cupcakes overnight in the refrigerator and top with cookie crumbs before serving.
COOKIES AND CREAM FROSTING
1/2 cup (1 stick) unsalted butter, at room temperature
1 3/4 cup confectioners sugar, sifted
a pinch of salt
1/3 cup whipping cream
1/2 tsp vanilla extract
remaining crushed Oreos
Mix together butter, confectioners sugar, and a pinch of salt until creamy. Increase your mixer speed to high and beat until its light and fluffy. Add whipping cream and vanilla. Beat until its smooth. Fold in crushed Oreos. Makes enough to frost 24 cupcakes.

Strawberry Cupcakes


Photobucket

I made lots of trial cupcakes in preparation for my son's 3rd birthday party, and when I saw that this recipe came from Candace Nelson, owner of Sprinkles and judge on Cupcake Wars, I knew I had to give it a go.

I enjoyed this one a lot, though the cake seemed a little more dense than I would prefer.  I liked how the frosting came out; it looks really pretty as I swirled it with a pastry bag.  Woot; it almost looks like the contestants' on Cupcake Wars!

Makes enough for 1 dozen cupcakes
  • 1/2 cup whole frozen strawberries, thawed
  • 1 cup (2 sticks) unsalted butter, firm and slightly cold
  • Pinch of coarse salt
  • 3 1/2 cups confectioners' sugar, sifted
  • 1/2 teaspoon pure vanilla extract

Directions

  1. Place strawberries in the bowl of a small food processor; process until pureed. In the bowl of an electric mixer fitted with the paddle attachment, beat together butter and salt on medium speed until light and fluffy. Reduce mixer speed and slowly add confectioners' sugar; beat until well combined. Add vanilla and 3 tablespoons strawberry puree (save any remaining strawberry puree for another use); mix until just blended. Do not overmix or frosting will incorporate too much air. Frosting consistency should be dense and creamy, like ice cream.


Read more at Marthastewart.com: Sprinkles' Strawberry Frosting - Martha Stewart Recipes 

http://www.marthastewart.com/recipe/candace-nelson-strawberry-frosting
Makes 1 dozen
  • 2/3 cup whole fresh or frozen strawberries, thawed
  • 1 1/2 cups all-purpose flour, sifted
  • 1 teaspoon baking powder
  • 1/4 teaspoon coarse salt
  • 1/4 cup whole milk, room temperature
  • 1 teaspoon pure vanilla extract
  • 1/2 cup (1 stick) unsalted butter, room temperature
  • 1 cup sugar
  • 1 large egg, room temperature
  • 2 large egg whites, room temperature
  • Sprinkles' Strawberry Frosting

Directions

  1. Preheat oven to 350 degrees. Line a 12-cup muffin tin with cupcake liners; set aside.
  2. Place strawberries in a small food processor; process until pureed. You should have about 1/3 cup of puree, add a few more strawberries if necessary or save any extra puree for frosting; set aside.
  3. In a medium bowl, whisk together flour, baking powder, and salt; set aside. In a small bowl, mix together milk, vanilla, and strawberry puree; set aside.
  4. In the bowl of an electric mixer fitted with the paddle attachment, cream butter on medium-high speed, until light and fluffy. Gradually add sugar and continue to beat until well combined and fluffy. Reduce the mixer speed to medium and slowly add egg and egg whites until just blended.
  5. With the mixer on low, slowly add half the flour mixture; mix until just blended. Add the milk mixture; mix until just blended. Slowly add remaining flour mixture, scraping down sides of the bowl with a spatula, as necessary, until just blended.
  6. Divide batter evenly among prepared muffin cups. Transfer muffin tin to oven and bake until tops are just dry to the touch, 22 to 25 minutes. Transfer muffin tin to a wire rack and let cupcakes cool completely in tin before icing.


Read more at Marthastewart.com: Sprinkles' Strawberry Cupcakes - Martha Stewart Recipes


http://www.marthastewart.com/recipe/candace-nelson-strawberry-cupcakes

Pan Fried Chicken with Corn and Tomatoes

Photobucket

I've tried this recipe once before and was fairly successful (although I commented then that I overcooked the chicken). This time around, the chicken was cooked perfectly, and we enjoyed it a lot. We loved the fresh flavors of corn, basil, and tomatoes from our co-op box, and I was really happy to use several things from the box in one meal. I actually used yellow tomatoes, so the presentation isn't as pretty as it would have been if I'd used red ones. But it was pretty anyway!

I served with peas and something else (that I cant remember).

Wahoo, summer!

From Everyday with Rachael Ray August 2009. See original here
  • 4 Servings
  • Prep 20 min
  • Cook 5 min

Ingredients:

  • 1 cup breadcrumbs
  • 1/4 cup chopped fresh basil
  • 1 cup buttermilk
  • 1/2 cup flour
  • 4 chicken breast cutlets (about 1 1/4 pounds total)
  • Salt and pepper
  • 5 tablespoons extra-virgin olive oil
  • 1 1/2 cups fresh corn kernels (from about 3 ears)
  • 2 tomatoes, cored and chopped
  • 1/2 red onion, thinly sliced
Easy does it
Stand an ear of corn upright in a large bowl and run a knife down the length of the cob to remove the kernels.

Directions:

  1. In a shallow dish, stir together the breadcrumbs and 2 tablespoons basil. In a separate shallow dish, add the buttermilk; in a third dish, add the flour. Season the chicken with salt and pepper. Working with 1 piece at a time, coat the chicken in the flour, then dip into the buttermilk and coat with the breadcrumbs, shaking to remove any excess.
  2. In a large skillet, heat 1/4 cup olive oil over medium-high heat. Add the chicken and cook, turning once, until golden-brown, about 5 minutes; drain on paper towels.
  3. In a large bowl, stir together the corn, tomatoes, onion, the remaining 2 tablespoons basil and 1 tablespoon olive oil; season with salt and pepper. Serve over the chicken.

Carrots

Photobucket

This is a wonderful recipe that comes from my America's Test Kitchen cookbook. I chose it to accompany the Chicken Saltimbocca I made because I had a ton of carrots, and the flavors in both were similar (thyme, lemon). These were delicious! My husband actually made these while I took care of other things.

Sea Bass Baked in Foil

Photobucket

This comes from Giada's cookbook, but she calls for Salmon. We had sea bass that my parents caught, so I was looking for something to use and in her notes, she mentioned that Italians typically use sea bass but that she was changing it up. The recipe can also be found on the food network's website.

This was...ok. We didn't love it, although we really loved the small amount of clean up. The fish was really nicely cooked, it was just that we weren't crazy about its flavor.

Ingredients

  • 4 (5 ounces each) salmon fillets
  • 2 teaspoons olive oil plus 2 tablespoons
  • Salt and freshly ground black pepper
  • 3 tomatoes, chopped, or 1 (14-ounce) can chopped tomatoes, drained
  • 2 chopped shallots
  • 2 tablespoons fresh lemon juice
  • 1 teaspoon dried oregano
  • 1 teaspoon dried thyme

Directions

Preheat the oven to 400 degrees F.

Sprinkle salmon with 2 teaspoons olive oil, salt, and pepper. Stir the tomatoes, shallots, 2 tablespoons of oil, lemon juice, oregano, thyme, salt and pepper in a medium bowl to blend.

Place a salmon fillet, oiled side down, atop a sheet of foil. Wrap the ends of the foil to form a spiral shape. Spoon the tomato mixture over the salmon. Fold the sides of the foil over the fish and tomato mixture, covering completely; seal the packets closed. Place the foil packet on a heavy large baking sheet. Repeat until all of the salmon have been individually wrapped in foil and placed on the baking sheet. Bake until the salmon is just cooked through, about 25 minutes. Using a large metal spatula, transfer the foil packets to plates and serve.

Chicken Saltimbocca

Photobucket

This comes from Giada de Laurentiis's cookbook, but can also be found on the food tv
website.

I kind of hate making chicken rolls. You have to shove toothpicks in, and then find a way to brown all sides (with toothpicks) in a skillet. Kinda tough, plus I usually splatter myself. But, I made these anyway.
They were pretty good, although not really all that outstanding. I served with pasta (although it would have been better if I'd served the chicken OVER the pasta) and glazed carrots.

Ingredients

  • 6 (3-ounce) chicken cutlets, pounded to evenly flatten
  • Salt and freshly ground black pepper
  • 6 paper-thin slices prosciutto
  • 1 (10-ounce) box frozen chopped spinach, thawed
  • 3 tablespoons olive oil
  • 1/4 cup grated Parmesan
  • 1 (14-ounce) can low-salt chicken broth
  • 2 tablespoons fresh lemon juice

Directions

Place the chicken cutlets flat on the work surface. Sprinkle the chicken with salt and pepper. Lay 1 slice of prosciutto atop each chicken cutlet.

Squeeze the frozen spinach to remove the excess water. Season the spinach with salt and pepper. In a small bowl, toss the spinach with 1 tablespoon of oil to coat.

Arrange an even, thin layer of spinach atop the prosciutto slices. Sprinkle the Parmesan evenly over each. Beginning at the short tapered end, roll up each chicken cutlet as for a jellyroll. Secure with a toothpick.

Heat the remaining 2 tablespoons of oil in a heavy large skillet over high heat. Add the chicken and cook just until golden brown, about 2 minutes per side. Add the chicken broth and lemon juice, and scrape the browned bits off the bottom of the pan with a wooden spoon. Bring the liquid to a boil. Reduce the heat to medium. Cover and simmer until the chicken is just cooked through, about 8 to 10 minutes. Transfer the chicken to a platter. Simmer the cooking liquid over high heat until it is reduced to about 2/3 cup, about 5 minutes. Season the cooking liquid with salt and pepper, to taste. Remove toothpicks from the chicken. Drizzle the reduced cooking liquid over the chicken and serve immediately.

Tuesday, July 20, 2010

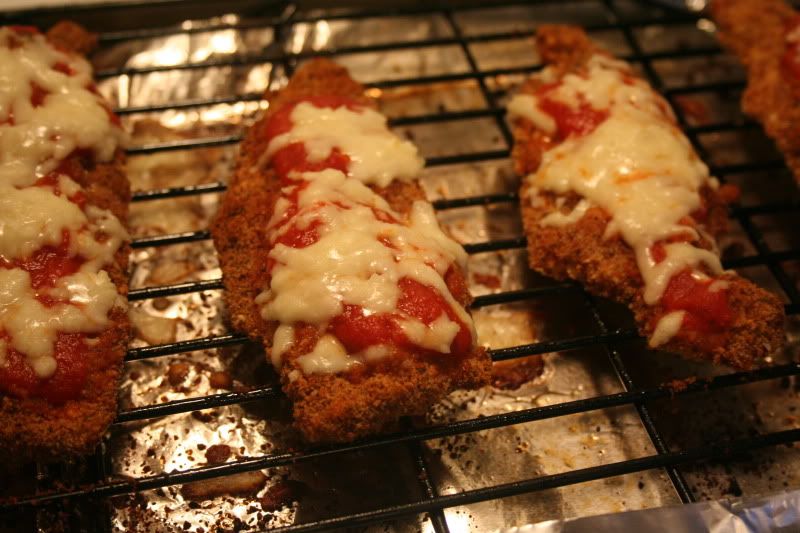
Chicken Parm sandwich

PhotobucketI've blogged about this one before. My husband didn't remember that I've made this, though, and was downright impressed.

It's from my ATK cookbook, but I also found it posted here. I went and put them on hero rolls.

Good.

These were so darn tasty. They definitely aren't corner pizza place good, but they are pretty close, and certainly better for you.

Further proof that the Cooks Illustrated folks know what they are doing! YUM!


Lighter Chicken Parmesan
(Source: Cook’s Illustrated, October 2006)

1 1/2 cups panko (Japanese-style bread crumbs) I used regular bread crumbs
1 tablespoon olive oil
1 ounce grated Parmesan cheese (about 1/2 cup), plus extra for serving
1/2 cup unbleached all-purpose flour
1 1/2 teaspoons garlic powder
Table salt and ground black pepper
3 large egg whites
1 tablespoon water
Vegetable cooking spray
3 large boneless, skinless chicken breasts (about 8 ounces each), trimmed of excess fat and sliced into cutlets
2 cups tomato sauce , warmed
3 ounces shredded part-skim mozzarella cheese (about 3/4 cup)
1 tablespoon minced fresh basil

1. Adjust an oven rack to the middle position and heat the oven to 475 degrees. Combine the bread crumbs and oil in a 12-inch skillet and toast over medium heat, stirring often, until golden, about 10 minutes. Spread the bread crumbs in a shallow dish and cool slightly; when cool, stir in the Parmesan.

2. In a second shallow dish, combine the flour, garlic powder, 1 tablespoon salt, and 1/2 teaspoon pepper together. In a third shallow dish, whisk the egg whites and water together.

3. Line a rimmed baking sheet with foil, place a wire rack on top, and spray the rack with vegetable oil spray. Pat the chicken dry with paper towels, then season with salt and pepper. Lightly dredge the cutlets in the flour, shaking off the excess, then dip into the egg whites, and finally coat with the bread crumbs, Press on the bread crumbs to make sure they adhere. Lay the chicken on the wire rack.

4. Spray the tops of the chicken with vegetable oil spray. Bake until the meat is no longer pink in the center and feels firm when pressed with a finger, about 15 minutes.

5. Remove the chicken from the oven. Spoon 2 tablespoons of the sauce onto the center of each cutlet and top the sauce with 2 tablespoons of the mozzarella. Return the chicken to the oven and continue to bake until the cheese has melted, about 5 minutes. Sprinkle with the basil and serve, passing the remaining sauce and Parmesan separately.


Balsamic Chicken

Photobucket
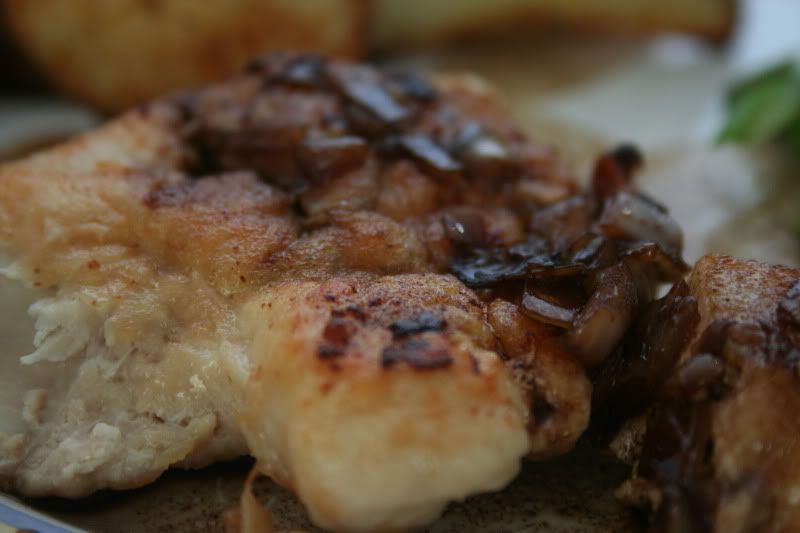
This is a recipe that was shared on a message board of which I am a part several years ago. Everyone raved about it, so I figured I would give it a try. We enjoyed it a lot, and the best part is that it comes together really quickly.

This was attributed to Cooking Light, although I can't find a similar recipe on their website.


This is delicious. The chicken is so tender, and it has so much flavor. I usually serve with mashed potatoes, but this time, served it with frozen roasted potatoes.

Balsamic Chicken
(Cooking Light)
1/2 cup fat-free, less-sodium chicken broth
1/2 cup balsamic vinegar
2 teaspoons honey
1 tablespoon butter
1 tablespoon vegetable oil
4 (5-ounce) skinless, boneless chicken breast halves Make sure these are thin cut or pounded thin
1/4 teaspoon salt
1/4 teaspoon freshly ground black pepper
1/4 cup all-purpose flour
2 tablespoons finely chopped shallots I used a yellow onion
Chopped parsley (optional)

Combine broth, vinegar, and honey.
Melt butter and oil in a large nonstick skillet over low heat.
While butter melts, sprinkle chicken with salt and pepper. Place flour in a shallow dish. Dredge chicken in flour; shake off excess flour.
Increase heat to medium-high; heat 2 minutes or until the butter turns golden brown. Add chicken to pan; cook 4 minutes on each side or until golden brown. Remove chicken from pan; keep warm. Add shallots, and sauté 30 seconds. Add the broth mixture, scraping to loosen browned bits. Bring to a boil, and cook until reduced to 1/2 cup (about 3 minutes). Serve sauce over chicken. Garnish with chopped parsley, if desired.

Aloha Pork Chop Skillet

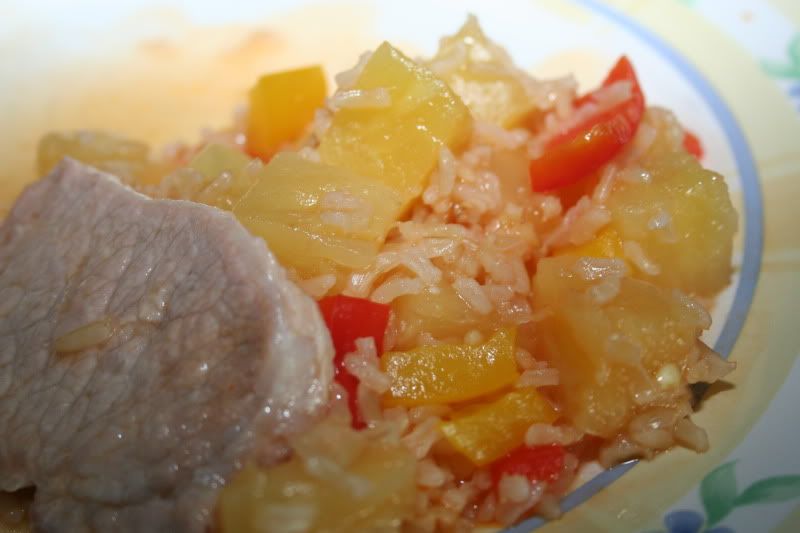
Photobucket
I believe I found this (it was several years ago) on the Betty Crocker website, but I found it today here.

This is something I really enjoyed, and it was really easy to make it too. The husband, well, he's not a pork chop fan. The Boy dug right in, as one might expect with the amount of pineapple and other sweetness that was in this!

I found thin sliced pork chops, which were the cheapest unit price they had. These worked out great because they were a great size serving for The Boy, and they cooked very quickly. I ended up making 5 chops, just in case (for 2 adults and one almost 3 year old), and we did have a few leftover. This was a nice change for us!


Ingredients:

1T vegetable oil
4 pork chops
1 red bell pepper, cut into chunks
1 yellow bell pepper, cut into chunks
2 cans (8oz each) pineapple chunks in juice, undrained
1/2 c. fat free reduced sodium chicken broth
1/4c. Catalina dressing
1-1/2 t garlic powder
1-1/2 c white rice, uncooked


Directions:

HEAT oil in large nonstick skillet over medium-high heat. Add chops; cook 5 minutes on each side or until browned. Remove chops; cover to keep warm.
ADD bell peppers, pineapple, broth, sauce and garlic powder to skillet; mix well. Bring to a boil.
STIR in rice. Top with chops; cover. Reduce heat to medium-low; simmer 5 minutes or until chops are cooked through (160°F.) Remove from heat; let stand 5 minutes.

Thursday, July 15, 2010

Scallops Provencal

PhotobucketJulie Powell commented in Julie and Julia that she shared with Julia Child a love of butter, and attributed the amount of butter she consumed during her project for her weight gain. It's true, butter makes everything delicious and delightful (says the girl who was raised on margerine...) This dish is no exception; the addition of 4T of butter makes an amazing sauce to accompany the lightness of the scallops. This was heavenly and creamy.

After his first bite of scallop, A said "Mmmmmm" (as in yummy), but wouldn't eat it after that. Dunno.

I served this over whole wheat thin spaghetti, which was a great choice. I didn't have much in the freezer for veggies (I think broccoli would work perfectly), so went with corn.

Definite keeper! I could definitely have gone back for seconds, thirds, if I wasn't concerned about all that butter!

Ingredients

  • 1 pound fresh bay or sea scallops
  • Kosher salt and freshly ground black pepper
  • All-purpose flour, for dredging
  • 4 tablespoons (1/2 stick) unsalted butter, divided
  • 1/2 cup chopped shallots (2 large)
  • 1 garlic clove, minced
  • 1/4 cup chopped fresh flat-leaf parsley leaves
  • 1/3 cup dry white wine
  • 1 lemon, cut in 1/2

Directions

If you're using bay scallops, keep them whole. If you're using sea scallops, cut each 1 in half horizontally. Sprinkle with salt and pepper, toss with flour, and shake off the excess.

In a very large saute pan, heat 2 tablespoons of the butter over high heat until sizzling and add the scallops in 1 layer. Lower the heat to medium and allow the scallops to brown lightly on 1 side without moving them, then turn and brown lightly on the other side. This should take 3 to 4 minutes, total. Melt the rest of the butter in the pan with the scallops, then add the shallots, garlic, and parsley and saute for 2 more minutes, tossing the seasonings with the scallops. Add the wine, cook for 1 minute, and taste for seasoning. Serve hot with a squeeze of lemon juice.


Wednesday, July 14, 2010

Fettucine with Sausage and Kale

Photobucket
We joined a vegetable co-op recently. We got our first box, and it contained some ingredients I've definitely never used in my cooking before, and in some cases have never eaten before. One of these things was kale. So, to the internet I went. I found this recipe and decided it was a good one to go with. As I was working with it, it occurred to me that kale is probably the green stuff in Italian Wedding soup, so yes, I have in fact had kale before.

I was really unsure how my boys would respond to this one; I feared A wouldn't try it since he doesn't so much like meat plus I got spicy sausage and I wasn't sure how he'd do with it, and I had a feeling M would turn his nose up at the kale. Low and behold, they BOTH ate it, the BOTH liked it, and I did too!

It was a little on the heavy side, so not such a great summer meal, but it was definitely a keeper (should I ever encounter kale again!)

  • 3 tablespoons olive oil
  • 1 lb hot turkey or pork sausage, casings discarded and sausage crumbled
  • 1/2 lb kale, tough stems and center ribs discarded and leaves coarsely chopped
  • 1/2 lb dried egg fettuccine I used whole wheat thin spaghetti
  • 2/3 cup reduced-sodium chicken broth
  • 1 oz finely grated Pecorino Romano (1/2 cup) plus additional for serving
print a shopping list for this recipe

Preparation

Heat oil in a 12-inch heavy skillet over moderately high heat until hot but not smoking, add some minced garlic and some diced onion; cook till onion is translucent, then cook sausage, breaking up any lumps with a spoon, until browned, 5 to 7 minutes.

Meanwhile, blanch kale in a 6-quart pot of boiling salted water , uncovered, 5 minutes. Remove kale with a large sieve and drain. Return cooking water in pot to a boil, then cook pasta in boiling water, uncovered, until al dente. Reserve 1 cup pasta-cooking water, then drain pasta in a colander.

While pasta cooks, add kale to sausage in skillet and sauté, stirring frequently, until just tender, about 5 minutes. Add broth, stirring and scraping up any brown bits from bottom of skillet, then add pasta and 1/2 cup reserved cooking water to skillet, tossing until combined. Stir in cheese and thin with additional cooking water if desired.

Serve immediately, with additional cheese on the side.


Read More http://www.epicurious.com/recipes/food/views/Fettuccine-with-Sausage-and-Kale-233976#ixzz0tnnfQwJB

Pasta Puttanesca

Whore's pasta. What a name for a yummy dish. Of course, "whore's pasta, whore's pasta" was going through my head as my son was chowing down. And anything he enjoys definitely gets an extra star for me. We enjoyed it too, and it is reasonably healthful too!
Photobucket
This is a recipe my mother in law gave me a long time ago. Actually, it was in our first apartment together that this was made for the first time, and in fact, BAJ made the recipe that first time. I went for it this time, and was so pleased that it was a pantry meal. No groceries necessary was so important because it was pouring rain yesterday and I nixed the grocery trip.

This came out so great, and it was really easy to put together too! I'll post the recipe soon.

Thursday, July 8, 2010

Coconut Shrimp

I need new baking sheets. Whenever long time ago, we bought an el cheapo set of 3, and they have finally met their maker. I know my mother would say to soak them in ammonia, but I've tried it and there's no rescue. So, I'm looking for a decent set. Hey you, yeah you, the only person looking at this--the one who found me by googling "Cat in the Hat Cake," do you have nice baking sheets? What kind are they?

The meal that broke the cookie sheet's back was Coconut Shrimp. I've made them before with success, and they came out well this time too, but one pan burned pretty badly while the other didn't burn, but stuck to the pan and made it not even worth flipping them. Nonetheless, this was so tasty, I'll definitely make it again. It was easy to put together, and we had fun dredging. Our soon to be 3 year old wouldn't taste his, though, which I thought a little strange since he has liked shrimp in other incarnations...


The All New Complete Cooking Light Cookbook, p 255

Shrimp:
28 large shrimp
1/3c cornstarch
3/4t salt
1/2-3/4t ground red pepper
3 large egg whites
1-1/2c flaked sweetened coconut
Cooking spray

Salsa:
1c finely chopped fresh pineapple
1/3c finely chopped red onion
1/4c finely chopped fresh cilantro
1/4c pineapple preserves
1-1/2T fresh lime juice
1T finely chopped seeded jalapeno pepper
1/4 black pepper

1. Preheat oven to 400.
2. To prepare shrimp, peel and devein, leaving tails intact. Rinse shrimp in cold water; drain on paper towels.
3. Combine cornstarch, salt, and red pepper in a shallow dish; stir with a whisk. Place egg whites in a medium bowl; beat with a mixer at medium high speed until frothy (about 2 min). Place coconut in a shallow dish.
4. Working with one shrimp at a time, dredge in cornstarch mixture. Dip in egg white, and dredge in coconut, pressing gently with fingers. Place shrimp on a baking sheet coated with cooking spray. Lightly coat shrimp with cooking spray. Bake for 20 min or until shrimp are done, turning after 10 min.
5. To prepare pineapple salsa, combine chopped pineapple and remaining ingredients in a medium bowl; stir to combine.

Tuesday, July 6, 2010

My milkshake brings all the boys to the...kitchen.

Hot in the suburbs. Hot in the suburbs tonight! I wanted a milkshake. So, decided to make them.

I used this recipe.

1 c ice cream (I used Blue Bunny Birthday Party)
1/2c ice (I used about a handful)
1/2c milk (I used enough to make the consistency I wanted)


Put all ingredients in blender. Blend on crush, then puree.
Serve, enjoy yummy goodness.

Empanada cookies

For the Fourth of July, we went to a party that had a Mexican fiesta theme. Strange, I know, but it was a lot of fun!

I really had no ideas as to what to make for a crowd, since guacamole was called, enchiladas were too, and the hostess was making taco fixins. I was going to make sopapillas, which I loved so much way back when I worked at the now defunct Chi Chi's, but they required a deep fryer. Instead, I moved to empanadas. I went to allrecipes, and found this recipe for empanadas. I realized they were cookies; score!!

These were REALLY tasty. I'd say the recipe makes about 15 cookies as written, and they went fast at this party, even though many had left for fireworks by the time dessert was served! I chose to use blackberry preserves and strawberry preserves, and both were an excellent choice.

One thing to note is to make sure you use lots of flour for your counter, rolling pin, and hands, because the cookies are fairly sticky (especially in the heat and humidity we're dealing with around here). Also, line your cookie sheets with parchment paper because they are really sticky and hard to clean without!

Ingredients

  • 1/2 cup butter, softened
  • 1 (3 ounce) package cream cheese
  • 1 cup sifted all-purpose flour
  • 1 cup fruit preserves
  • 1/3 cup white sugar
  • 1 teaspoon ground cinnamon

Directions

  1. DAY BEFORE: Cream butter and cream cheese together until smoothly blended. Beat in the flour. Shape dough into a smooth ball, wrap in foil or cling wrap, and refrigerate overnight or up to a week.
  2. AT BAKING TIME: Remove dough from refrigerator 30 minutes before using. Start heating oven to 375 degrees F (190 degrees C).
  3. Roll chilled dough thin. Cut with 3 or 4 inch round cookie cutter. Place small spoonful of jam in center of each round, moisten edges with water.
  4. Fold round over and press edges together. Bake on ungreased cookie sheet 15 to 20 minutes. Immediately roll in sugar mixed with cinnamon (traditional) OR in confectioners' sugar if preferred.

Thursday, July 1, 2010

Grilled Corn

We had impromptu dinner company last night, so I decided to stretch our new grill's muscles a little bit. I grilled hot dogs, hamburgers, and corn--all for the first time!

We used Omaha Steaks hamburgers. They came out great. I also had some kind of turkey hot dogs in the fridge, so I used those.

Here's how I made the corn:
Preheat the grill to medium. Unhusk corn, remove all the silks. Brush olive oil over the ear. Sprinkle garlic powder, salt, and pepper all over the ear. Roll up in aluminum foil. Grill for about 15 minutes, rotating often. Don't overcook!

Delicious! It was so sweet, and we didn't need to add any butter. Devoured by everyone!
Related Posts with Thumbnails