Monday, March 18, 2013

Not so spicy Roasted Vegetable Macaroni and Cheese

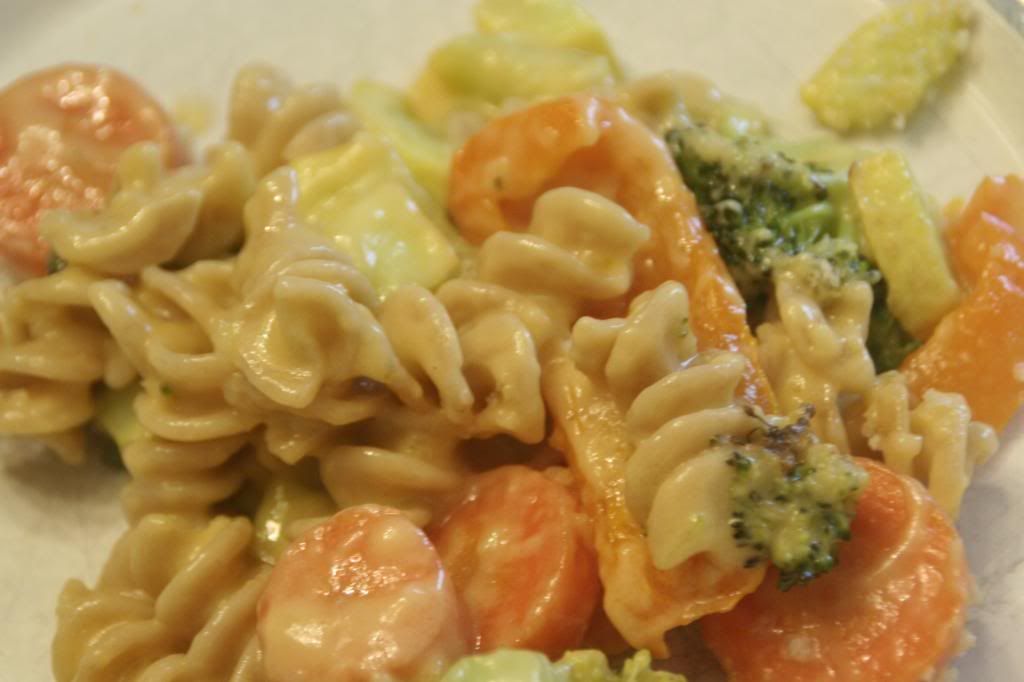
My sons are huge mac and cheese fans.  In fact, a recent diner trip resulted in a slight tantrum when they did not have mac and cheese on the menu.  So when I found this recipe that combined the deliciousness of roasted vegetables with the comfort of macaroni and cheese, I jumped on the opportunity.

It earned a "it's ok" rating from my husband, who does not like macaroni and cheese, but I enjoyed it very much.  The boys had mixed reactions, between super happy to have mac and cheese to "I refuse to eat vegetables," which a quickly forced no apple until you eat some veggies fixed when he realized they were sweet and delicious.

I will admit that this made a lot of dishes, which didn't really make anyone happy, but I was really happy with the outcome and will probably double it for leftovers next time.

Roasted Vegetable Macaroni and Cheese Adapted from  The Comfort of Cooking
Ingredients
1 cup broccoli florets, chopped into small chunks
1/2 red pepper, sliced
1 yellow squash, quartered and diced
2 carrots, sliced thinly
2 cups whole wheat pasta (elbow macaroni, rotini, penne, etc.)
1/4 cup plus 1T olive oil, divided
1 garlic clove, minced
3 Tbsp. all-purpose flour
1 1/2 cups milk
2 cups (8oz) shredded cheddar cheese
Salt and pepper, to taste
2 Tbsp. panko breadcrumbs

Directions
Preheat oven to 400 degrees F. Cook pasta according to package directions; drain and set aside.  Prepare a baking sheet by either covering it with silpat or foil.

Toss veggies with 1T olive oil on the baking sheet. Bake for 20 minutes, or until vegetables have softened, stirring occasionally. Remove from oven and set aside.
  
Meanwhile, heat remaining oil in a large skillet over medium heat. When shimmering, add garlic and cook 30 seconds. Whisk in flour and cook 1 minute (careful it doesn't burn). Gradually whisk in milk, stirring constantly until mixture is slightly thickened. Remove from heat. Stir in cheddar cheese until well distributed and melted, then add macaroni and vegetables.

Place mixture in a large casserole dish and sprinkle with panko breadcrumbs. Place under the broiler in your oven (500 degrees) for 3-4 minutes, or until the top is golden brown.

Dig in!

Friday, March 15, 2013

Cheese Enchiladas with Tomatillo Sauce


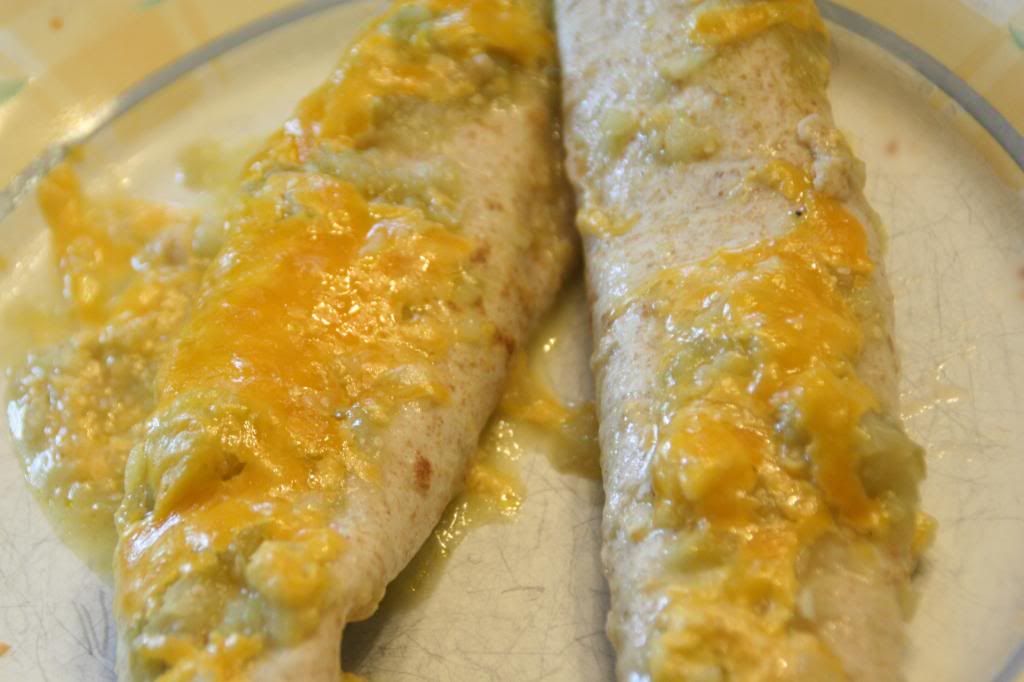
Enchiladas are a favorite meal in our house.  We've tried a whole lot of kinds and ways and sauces, but I think this was the first time I've made them vegetarian.  It's funny, because back in the day when we used to eat at On the Border often, I always ordered cheese and onion enchiladas.

We did miss the "heft" of chicken since I did not make Mexican rice to go alongside these, but they are super tasty, though they do look messy above (I cannot for the life of me figure out how to serve enchiladas in a visually pleasing way; anyone with help on this?).

This Martha Stewart recipe offered three choices for enchilada sauces and I obviously chose the tomatillo, though I seriously cut the amount of jalapeno in it.  I look forward to trying the other sauces on enchiladas sometime soon!

Cheese Enchilada Casserole with Tomatillo Enchilada Sauce Source:  Everyday Food March 2011


Ingredients

  • 1 1/2 cups Tomatillo Enchilada Sauce (see below)
  • 8 fajita sized flour tortillas
  • 2 cups shredded cheddar cheese
  • Diced onion, avocado, chopped cilantro, cheese, or sour cream (optional), for serving

Directions

  1. Preheat oven to 350 degrees. Pour 1 cup sauce into a wide, shallow bowl. Working with one at a time, dip tortillas in sauce, shaking off excess, then sprinkle 1/4 cup cheese down center. Roll tortilla around cheese and arrange, seam side down, in 8-inch square baking dish. Top with 1/2 cup sauce. Cover tightly with foil and bake until heated through, 10 minutes. Serve with desired toppings.


For Sauce
  • 1 pound tomatillos, husks removed
  • 1 cup diced white onion
  • 1 garlic clove
  • 1 jalapeno, quartered (seeded if desired)
  • 1 cup water
  • Coarse salt and ground pepper
  • 1 tablespoon vegetable oil
  • 1/4 cup chopped fresh cilantro
  • 1 teaspoon white vinegar
  • Pinch of sugar

Directions

  1. In a medium pot of boiling salted water, cook tomatillos until tender, 10 to 15 minutes. Drain tomatillos and transfer to a blender; add onion, clove, jalapeno, and water. Puree until smooth. (Use caution when blending hot liquids: Remove cap from lid and cover opening with a dish towel.) Season with salt and pepper. In pot, heat oil over high until shimmering. Add tomatillo mixture and simmer, stirring occasionally, until thickened, 5 to 10 minutes. Remove from heat and stir in cilantro, vinegar, and sugar. Season to taste with salt and pepper.

Thursday, March 14, 2013

Baked Ziti with Italian Salad and Garlic Bread

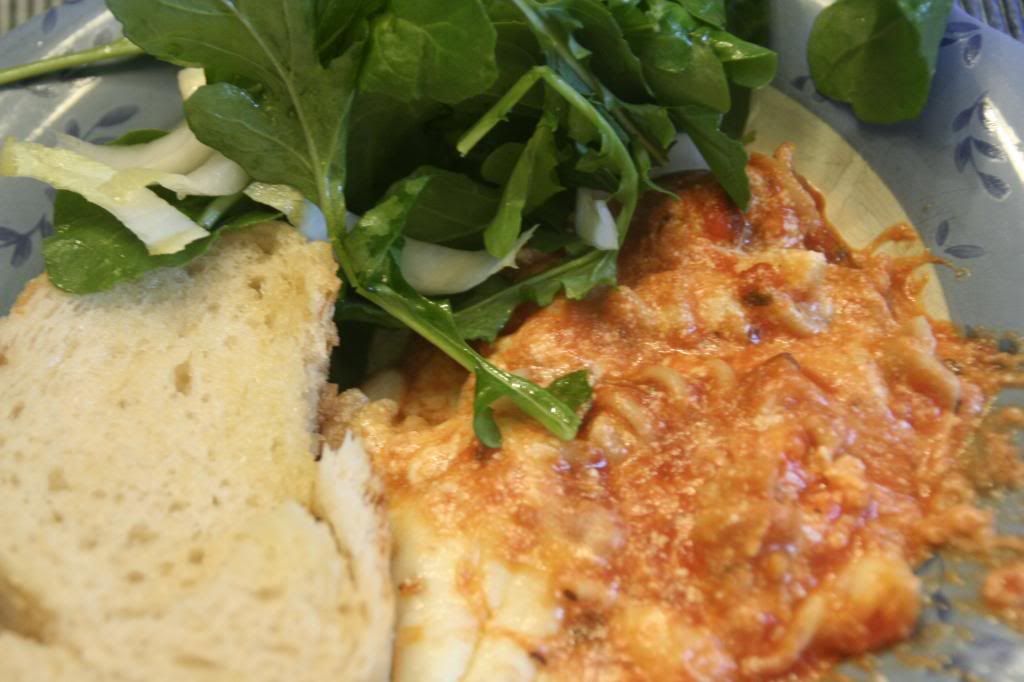
My husband doesn't like baked ziti.  He'll get it down, but it isn't a favorite.  Nevertheless, I love it and add it to the meal plan on occasion.  So you know it was a hit when he declared it delicious and that I could make it again.

It's surprising to me, since there's really not much that's different from my typical method of making baked ziti, although it could be as simple as the choice of sauce (I used our store's brand of tomato basil sauce), but I agreed that this was particularly tasty.  It could also be that I used a bit more than normal of mozzarella inside the ziti.

The salad, on the other hand, was not a hit.  I felt the peppery flavor of the arugula was too much and there wasn't anything else in there to balance it out.  The dressing, of course, was easy and delicious, and this meal serves to demonstrate how easy it can be to get a good and balanced meal while making the best use of your cooking time. 

Speaking of which, I recently read in Rachael Ray Everyday magazine that it takes less time to make garlic bread from scratch than it does to prepare frozen premade garlic bread.  The magazine DIDN'T note the difference in hands-on time, which is important, but in this meal, there's plenty of time while things are cooking to handle the bread preparation as well as the salad work.

Baked Ziti with Italian Salad and Garlic Bread Source:  Martha Stewart
  • Coarse salt and ground pepper
  • 8 ounces ziti rigate (ridged) or other short pasta
  • 1 cup part-skim ricotta
  • 1 large egg
  • 3/4 cup finely grated Parmesan
  • 1-1/2 cup shredded part-skim mozzarella
  • 1 jar (24 to 26 ounces) best-quality tomato sauce (about 3 1/2 cups)
  • 1/2 loaf Italian bread (5 ounces)
  • 2 tablespoons butter, melted
  • 2 garlic cloves, minced
  • 1 tablespoon sherry vinegar or red-wine vinegar
  • 1 tablespoon olive oil
  • 1 head Belgian endive, stem end trimmed, thinly sliced
  • 3/4 of a bag of baby arugula

Directions

  1. Preheat oven to 450 degrees. Cook pasta according to package directions for al dente or less soft.  Set aside.
  2. Combine ricotta, egg, 1/4 cup Parmesan, and 1 cup of the mozzarella; set aside.
  3. In the bottom of a square casserole dish, make a layer of tomato sauce with about half the jar. Layer cooked pasta, cheese mixture, then remaining sauce. Top with remaining cheeses. Cook in preheated oven until melty and bubbly; 25-30 minutes.
  4. Meanwhile, prepare garlic bread: Cut the bread, without cutting through the bottom, into slices that are about 1/2" thick. Combine melty butter and chopped garlic, then brush garlic butter between cuts in bread. Wrap in aluminum foil; bake during last 10 minutes of baking the casserole.
  5. Next, make the salad:  Make dressing by whisking together vinegar and oil; season with salt and pepper. Add endive and arugula, and toss to coat.
     
  6.  Serve altogether and enjoy!

Sunday, March 10, 2013

Stir Fried Pork and Snow Peas with Sweet and Sour Sauce

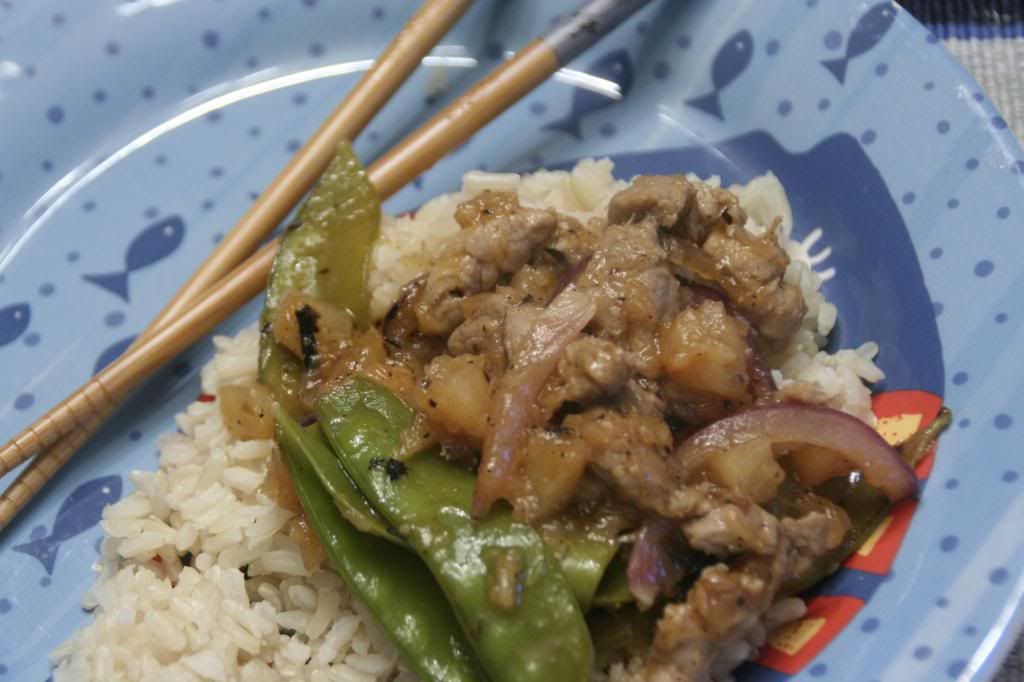
I've blogged this one before, but the photo wasn't great and it's been quite awhile so here we go.


That time, I tried doing the whole stir fry by myself, only to discover I kept burning stuff after following the instructions to multitask.  This time, I got wise and asked my husband to man the stove while I did some of the other prep work.  As a result, this turned out perfect!

It was super sweet; next time, I will probably cut the sugar in the sauce by half.  Because it was sweet, though, my sons seemed to really enjoy it.  So, we'll mark it as a kid pleaser!

Stir Fried Pork and Snow Peas with Sweet and Sour SauceSource:  The Best 30 Minute Recipe Cook's Illustrated, viaSearchable Recipe Database
1 pound  Pork tenderloin, cut into thin strips
    2 teaspoons  soy sauce
    2 tablespoons  vegetable oil
    1 recipe  Sweet-and Sour Sauce (see below)
    1  red onion, sliced thin
    6 ounces  snow peas, strings removed
    1 20-ounce can  diced pineapple, drained
    3 cloves  garlic, minced
    1 tablespoon  fresh ginger, grated
Making the minutes Count:

Prepare the suce while the pork cooks. Mince the garlic and grate the ginger while the vegetables cook.

Stir-fry Pork and prepare sauce: Toss pork with soy sauce. Heat 2 teaspoons of oil in 12 inch nonstick skillet over high heat until just smoking. Add pork and cook, stirring occasionally and breaking up clumps, until lightly browned, about 3minutes. (While pork cooks, prrepare sauce.) Transfer pork to clean bowl

Stir-Fry Vegetables and Pineapple. Add 1 more tablespoon of oil to pan and return to high heat until shimmering. Add onion and snow peas and cook, stirring frequently, until softened, about 3 minutes. Add pineapple and cook until warmed through

Combine and Simmer: Clear center of pan and add remainineg 1 teaspoon oil, garlic, and gingner. Cook, mashing garlic mixture into pan with bakck of spatula, until fragrant, about 30 seconds. Stir in cooked pork. Whisk sauce to recombine, add it to pan, and bring to simmer. Cook until sauce thickens, 1 to 2 minutes. Serve immediately.


Sweet and Sour Sauce 
6T red wine vinegar
6T orange juice
6T sugar
3T ketchup
1t cornstarch
1/2t salt

Using a medium bowl, mix all ingredients.
  

Saturday, March 9, 2013

Slow Cooker Pineapple Chicken and Quesadilla!


Ah Pinterest, what a joy to play and find new foods!

While I've been trying to eat "clean" (no extra or processed stuff in our food), it hasn't always been tasty, easy, or fun.  But when I saw this recipe on Pinterest, I knew I'd be trying it soon.  I wasn't sure what I'd do with the zucchini since my husband does not eat it, but went ahead and made it easy by chunking it; next time, I will grate it since neither my husband NOR my children ate it and I noted that it really didn't have a zucchini flavor.

This was so easy to toss together that I was able to make it in the always crazy before work morning (of course, grating the zucchini will take longer).  It came out very tasty, but we both felt that it wasn't very filling.  My husband got the awesome idea to drain some of the liquid off, add some grated Monterey Jack cheese, and turn it into a quesadilla.  Not as much on the clean eating side, but way better than a lot of other meals we could have had instead!  And it was super delicious this way too, as well as way more appealing to the kidlets.

So, give this easy and tasty chicken a try... and turn your leftovers into a tasty quesadilla for lunch!

Slow Cooker Pineapple Chicken Source:  The Gracious Pantry


  • 2 large boneless, skinless chicken breasts, trimmed 
  • 1 (12 ounce) jar of your favorite salsa (I used Spike's medium and it worked well; even for my "it's too spicy" boys!)
  • 1 raw zucchini, halved, quartered, then sliced (shredding works too)
  • 1/4 medium, fresh pineapple, cut into chunks

Directions:

  1. Cook chicken and salsa together in your slow cooker on low for 4-6 hours, until chicken shreds easily.
  2. Pull the chicken apart using two forks and stir in your raw zucchini and fresh pineapple.
  3. Serve!

Friday, March 8, 2013

Artichoke Pasta

I am good at meal planning and grocery list making.  Sticking to the meal plan, however, tends to be a problem.  The other night, I planned to make something and came home to discover I forgot to buy one ingredient and had planned (and forgotten) to go to another store for a different one.  Nothing was defrosted and frozen ravioli looked to be the night's meal.


Then I remembered my friend Lishie having posted a delicious looking meal for which I had all ingredients earlier in the day.  Like many pasta based dishes, it seemed like it would be fast, so I took out everything and started cooking.

The kids weren't super enthused about this one, but my husband and I enjoyed it a lot.  Not only was it delicious, but it was also super fast.  Like 15 minutes fast.  I omitted the bacon, which surely would make this even more fantastic though would also add to the cooking time.  I loved the artichoke, the flavors, and the cheesiness.  I wish I'd used less pasta, though, because it was sort of overwhelming and made a TON of leftovers.  No complaints from this girl, who will be enjoying this one for lunches for a few days!

This would be delicious with some cream......

Artichoke Pasta very slightly adapted from Delish


  • 1 lb. medium pasta shells
  • 1 T olive oil
  • 1 shallot, chopped
  • 1 package frozen artichokes, defrosted
  • 1 can diced tomatoes with juice
  • 1 clove of garlic, minced
  • 1/4 c shredded mozzarella
  • grated parmesan, optional
Cook the pasta as directed, to al dente.

Meanwhile, heat the olive oil until shimmering over medium heat.  Add the shallot and cook for a minute. Add the artichokes; cook about three minutes. Add the tomatoes and the garlic. Allow to simmer for about fifteen minutes, stirring occesionally.  Stir in the mozzarella until melty and gooey. Top with grated parmesan and enjoy!


Monday, December 10, 2012

Meal Plan

Monday:
B
L:  Ladybug Pasta
D:  Chicken Parm Subs

Tuesday:
B:
L:  Apple Sandwich, Tortilla Pinwheel, Fruit Kabobs
D:  Sweet and Sour chicken

Wednesday:
B:
L:  Pita Pizza
D:  Chicken Nuggets

Thursday:
B:
L:  Veggie Quesadilla
D:  I'm going to Radio City!!  The boys are going to Pizza Hut (I guess the rest of the week is pretty healthful, so....)

Friday:
B:
L:  Caprese Pasta
D:  Separate ways

Saturday:
D:  Out at a party!

Sunday:
D:  Morrocan Fish with Mango and Couscous


Have a great week!  I'm shooting for at least one post this week.  We shall see!

Monday, November 19, 2012

Meal Plan Monday!

Another crazy week on tap, between my husband traveling on Monday and Tuesday, Thanksgiving, and Black Friday, our food is all over the place.

The plan:

Sunday:
Chicken Parm Casserole

Monday:
B:  English muffin
L:  Ladybug Pasta
D:  Stew

Tuesday:
B:  Carrot Cake Muffins
L:  Leftover Stew, hopefully!
D:  Crockpot Chicken Taco Soup

Wednesday:
B:  Overnight Oatmeal
L:  Leftover Stew, Ladybug Pasta, or Soup
D:  Pizza Night

Thursday:  Turkey Day!

Friday:
Ravioli Bake (Martha Stewart)

Saturday:
Weeknight Chicken Cacciatore

Have a fabulous week and a very happy Thanksgiving!

Monday, November 12, 2012

Meal plan Monday

I keep meaning to post what I've been making, but it just hasn't happened at all lately.  The combination of laziness and my new schedule's demands of staring at the computer all workday long have me not interested in the computer at all at night.  Hopefully this week will be different.

Anyway, here's what's on tap.  A lot of the meals planned for last week went out the window with me working only three days and two of the three boys staying home the whole week.  Monday looks like everyone will return to school so maybe our lives will return to normal.

Monday: 
B:  Fruit Smoothie with English muffin
L:  Salsa Chicken
D:  Chicken Parm Casserole

Tuesday:
B:
L:
D:  Vegetarian Fajitas

Wednesday
B:
L:  Quesadillas, using last night's veggies
D:  Cheesy Baked Shrimp with Roasted Tomato Quinoa

Thursday
B:
L:
D:  Pecan Crusted Chicken Tenders with Steamed Broccoli


Plus, these meals that didn't get made last week:
Swiss Mushroom Burger
Weeknight Chicken Cacciatore
Chicken Teriyaki Burger
White Cheese Lasagna


Have a great week; I hope it's normal for all of us!

Monday, November 5, 2012

Meal Plan Monday....

trying to get back to normal....

Sunday 11/4:
Lunch:  Greek Veggie Wraps
Dinner:  Swiss Mushroom Burger

Monday:
B:  English muffin with PB, banana, and blueberries
L:
D:  Eggplant Panini

Tuesday:
B:
L:
D:  Pressed Ham and Pear Sandwich (Everyday food)

Wednesday:
B:  Muffin Quiches
L:  Khalil's Turkey and White Bean Chili (Everday Food)

Thursday:
B:  Make ahead Oatmeal/Yogurt
L:  Egg Salad in Pita
D:  Chicken Teriyaki Burgers

Friday:
B:  Mini Pancake Muffin
L:  Southwest Quinoa Salad
D:  White Cheese Lasagna

Saturday:
B:
L:
D:  tortellini with Creamy Tomato Sauce

Sunday, October 21, 2012

Chicken Marsala Pasta

I stumbled across this recipe on Pinterest, and was surprised to find the pin pointing to What's Cooking, Chicago?, since I know of Joelen from a message board.  I was super happy to discover this comes originally from my heroes at America's Test Kitchen, so I knew it would rock.

Rock, indeed.  This was awesome.  It came together super fast (I love how accurate ATK is at getting even disorganized me with food on the table within 30 minutes) and the flavor is amazing.  Everyone in the family enjoyed it, and we're all looking forward to having the leftovers for lunch this week.

My photo is horrible, and for that I apologize, but go check out Joelen's photo, which is as amazing as the dinner!

Creamy Marsala Pasta Source:  America's Test Kitchen via What's Cooking, Chicago?
2 large boneless, skinless chicken breasts; cut into bite sized pieces
10-12 ounces sliced mushrooms
1 small onion, diced
3 cloves garlic, minced
3/4 cup Marsala cooking wine
1/2 cup chicken broth
1/2 cup heavy cream
1 pound dry pasta + water for cooking (I used penne, rigatoni is also good)
1 cup Parmesan cheese + more for serving
5 tablespoons unsalted butter
salt and pepper to taste
minced, chopped fresh parsley for garnish


Makes: 4-6 servings

Season chicken with salt and pepper. Melt 1 tablespoon butter in a large skillet until foaming. Cook chicken until lightly browned. Transfer to plate when done.

Boil water and cook pasta according to the directions.

Melt additional 1 tablespoon of butter in skillet, add garlic, mushrooms and onion and cook for about 6 minutes. Add cooked chicken back into the skillet. Add the Marsala, chicken broth and cream and bring to a boil. Simmer until sauce is is slightly thickened.

Drain pasta and reserve 1/2 cup cooking water. Return the pasta  to the pot with the remaining 3 tablespoons of butter. Add the mushrooms and chicken mixture and 1/2 cup of Parmesan cheese and cook until the pasta has absorbed some of the sauce, about 1 minute, adding the reserved cooking water as needed.

Season with salt and pepper and serve with additional Parmesan cheese and a garnish of chopped parsley.

Monday, October 15, 2012

Meal Plan Monday

**I don't know why this didn't post at 8am on 10/15, as planned...**

I resolve to post at least three times this week.  I have been cooking and photographing, but spending all day in front of a computer has kept it in my bag in the evening.  But I want to record the good stuff I've been making in the past few weeks, including a delicious apple cake!

Here's what's up this week...  a few things were on last week's menu, but didn't get made due to evening around here being SO CRAZY this year.  I hope we fall into a routine and things aren't so nuts sometime SOON.

Monday:
B:  Overnight Refrigerator Oatmeal
L: Lasagna Wontons
D: Stir Fried Pork and Snow Peas
Tuesday:
B:  English Muffins
L:  Leftover Roast Chicken
D: Hawaiian Chicken Sandwiches (Crock Pot)
Wednesday:
B:  Cottage Cheese and Fruit
L:  Pizza Quesadilla
D:  Monterey Chicken
Thursday:
B:  Apple Pancakes
L:  Sunbetter and Jelly
D:  Italian sliders
Friday:
B:  Waffles
L:  Chicken Ravioli Soup
D:  Pierogie Bake
Saturday:  Chicken Marsala Pasta
Sunday:  Jill Biden's chicken Parm

Have a great week!

Friday, September 28, 2012

Nectresse Review

This is a Sponsored post written by me on behalf of NECTRESSE™Sweetener for SocialSpark. All opinions are 100% mine.

I do not like artificial sweetener; I worry about the potential risks of the chemicals in the product and I HATE the taste.  Of course, I know there are risks associated with regular sugar too.  So I was both interested and skeptical when NECTRESSE™Sweetener arrived on my doorstep.


First, I tried the product in my tea.  I wasn't a huge fan, but must make a note that I usually drink tea without any sweetener at all.  I then tried it in coffee and while it wasn't bad, it would take me some getting used to.  I then had a friend over and offered it when she asked for a cup of tea; she is an artificial sweetener user and said she really enjoyed it.


Nectresse is an interesting blend of no calorie sweetener and all natural (read:  no artificial junk); it's made from "monk fruit," and seems to be 150x sweeter than sugar; this is the only 100% natural sweetener made from fruit in my grocery store.


also made a video about the product; you should check it out!


You can get a FREE sample of NECTRESSE™Sweetener by visiting the Nectresse sample site.  Also take a look at the Nectresse Facebook page.


Visit Sponsor's Site

Wednesday, September 26, 2012

Nectresse Review

I do not like artificial sweeteners; I worry about the potential risks of the chemicals in the product and I HATE the taste.  Of course, I know there are risks associated with regular sugar too.  So I was both interested and skeptical when Nectresse arrived on my doorstep.

First, I tried the product in my tea.  I wasn't a huge fan, but must make a note that I usually drink tea without any sweetener at all.  I then tried it in coffee and while it wasn't bad, it would take me some getting used to.  I then had a friend over and offered it when she asked for a cup of tea; she is an artificial sweetener user and said she really enjoyed it.

Nectresse is an interesting blend of no calorie sweetener and all natural (read:  no artificial junk); it's made from "monk fruit," and seems to be 150x sweeter than sugar; this is the only 100% natural sweetener made from fruit in my grocery store.

Lisa Ling also made a video about the product; you should check it out!


You can get a free sample by visiting the Nectresse sample site.  Also take a look at the Nectresse Facebook page.

Sunday, September 23, 2012

Meal Plan Monday!

A short week this week means easier breakfasts and lunches for an extra day; YAY!  This was LAST WEEK'S meal plan; I don't know why it didn't post.

Monday:
Dinner--Tempeh Tacos

Tuesday:
Breakfast--Overnight Oatmeal.  Really enjoyed the mango-almond combo last week.
Lunch:  Mac and Cheese.  I used the ATK skillet mac and cheese.
Dinner:  Stuffed Peppers (dangerous because I haven't found a recipe I plan to use)

Wednesday:
Breakfast--Egg Muffin
Lunch--Mini Burritos
Dinner--Meatballs

Thursday:
Breakfast--Waffles
Lunch--Meatballs
Dinner--Rotini with Summer Vegetables (America's Test Kitchen Best 30 Minute Meals)

Friday--MY BIRTHDAY!!!!
Breakfast--Hard boiled eggs and fruit
Lunch--Tomato Soup with Cheese and croutons
Dinner--Pineapple Glazed Chicken

Saturday:
Out with Mom and Dad

Sunday:
Pasta Norma

Monday, September 10, 2012

Meatless Monday--Cheese Tortellini Salad

My sons have not been eating dinner so much lately.  They wake up starving and their dad and I are frustrated.  So when I searched the trusty Google Reader for meatless meals, this recipe from Ezra Poundcake made the cut.  I knew that even if the boys didn't eat the salad itself, there was no doubt they'd eat the tortellini and the gorgeous cherry tomatoes from the CSA.

And that's exactly what happened.

This salad was tasty and surprisingly filling.  I wish I'd nixed the Parmesan and instead added chunks of mozzarella cheese.


Cheese Tortellini Salad Source Cooking Light Mix & Match Low-Calorie Cookbook via Ezra Poundcake
    1 (9-ounce) package fresh cheese tortellini
    2 cups halved cherry tomatoes
    2 cups fresh spinach leaves, coarsely chopped
    1/2 cup chopped pepperoncini peppers
    6 tablespoons (1.5 ounces) shredded fresh Parmesan cheese
    1/4 cup capers
    1/4 cup chopped fresh basil
    1 (16-ounce) can navy or Great Northern beans
    2 tablespoons fresh lemon juice
    1 1/2 tablespoons extra-virgin olive oil

    Cook the pasta according to package directions, omitting the fat.
    Meanwhile, combine the tomatoes, spinach, peppers, cheese, capers, basil, and beans in a large bowl.
    Drain pasta; rinse with cold water.
    Add pasta, lemon juice, and oil to the tomato mixture. Toss gently. Serve immediately.

Meal plan Monday!

Here we go, Week 2!

Monday:
B--Waffles and yogurt
L--PB&J, melon, veggie (TBD)
D-Eggplant Parm with Garlic Bread

Tuesday:
B--Mango Almond Refrigerator Oatmeal
L--Chili with Tortilla chips and fruit
D--Slow Cooker Greek Chicken

Wednesday:
B--Muffin (store bought?)
L--Egg Salad
D--Chicken Nuggets

Thursday:
B--Egg muffins
L--Leftover chicken nuggets with melon
D--Roasted Tomatoes with Burrata and Pesto

Friday:
B-- Banana Roll Ups
L--Mango and Black Bean Salad
D--Divine Chicken

Saturday and Sunday are currently up-in-the air!


Saturday, September 8, 2012

Recipe Swap: Buckeye Brownies


When it comes to brownies, I love the corner.  Yeah, the middle pieces are softer, but I like the crisp edges that comes with the corner pieces.

For this week's recipe swap theme of desserts, I was given Buckeye Brownies from Kickin it in the Kitch.

When I made the batter, I was VERY concerned; it was way thicker than brownie batters to which I am accustomed and I thought I must have missed an egg or something.  In reality, they were perfect!  Thick and rich and decadent, and I loved the soft layer made of condensed milk and peanut butter.  These were a big hit with me and my boys, and they'll be going in lunchboxes this week.

I considered doubling the recipe and making it in two pans so as to not have leftover condensed milk, which I might do next time, but this time I made the recipe as written and saved the milk in a jar in the fridge.


Thank you to Sarah for hosting another great swap and Stef for sharing a great recipe.  Apologies to both of you for the lateness of my post!

What about you; which part of the brownie pan is your favorite?


Buckeye Brownies
Source: Adapted from Cookies and Cups via Kickin it in the Kitch

Ingredients:
For the brownie portion (original recipe here)
1/2 cup (1 stick) unsalted butter

1 1/8 cups sugar
2 large eggs
1 1/8 cups Dutch-process cocoa (regular cocoa is fine too)
1/2 teaspoon salt
1/2 teaspoon baking powder
1/2 tablespoon vanilla extract
3/4 cup All-Purpose Flour
1/2 cup coarsely chopped peanuts


1/2 can sweetened condensed milk
1/4 cup peanut butter

Directions:

1. 
Preheat the oven to 350°F. Lightly grease an 8x8 baking pan.


2. In a microwave-safe bowl, melt the butter, then add the sugar and stir to combine.

3. Crack 2 eggs into a large bowl, then beat them with the cocoa, salt, baking powder, and vanilla until smooth. Add the hot butter/sugar mixture, stirring until smooth.

4. Add the flour and stir until smooth. Mix in the chopped peanuts.

5. Pour half of the brownie mixture into the pan.

6. Whisk together the sweetened condensed milk and peanut butter. Spread over the brownie mixture in the pan.

7. Drop the remaining brownie mixture over the top of the peanut butter mixture and press down gently.

8. Bake for 30-35 minutes.


Monday, September 3, 2012

Eggplant Panini with Pesto

I hope you're having a great Labor Day!

For a long time, I was hesitant to make panini sandwiches; with no panini press and no grill pan, I had no idea how I was going to make them.  I then read a book that explained a way to make them without a press.  Then, I made the sandwich on the stove and literally piled pans on top of it, flipped, and piled again.

It's so much easier since I was given cast iron pans.


 In other news, we had this gorgeous WHITE eggplant from the CSA.  I had no idea what to expect, but it tasted pretty much exactly like your standard purple eggplant.


I made these paninis complete on the grill.  The bread obviously got a little...cajun...  but even with the blackened parts, this was a delicious sandwich!  So easy, so fresh, so tasty, and so healthful!

Eggplant Panini with Pesto  Slightly adapted from Skinnytaste
    1 large eggplant, about 12-14 oz, sliced into 1/4" pieces
    kosher salt to taste
    olive oil
    12 oz french bread (or baguette), cut into 4 pieces
    4 slices part skim mozzarella cheese
    2 tbsp pesto
    8 thin sliced tomato


1.  Preheat your grill to medium.  You can salt the eggplant, if you'd like, but I read in Everyday with Rachael Ray that modern eggplants have been bred to have the bitter out.  Do what'cha like.
2.  Brush olive oil on each side of sliced eggplant then season with salt and pepper.  Grill on hot grill until soft, about 3-4 minutes a side.  Put aside.
3.   Build your sandwich:  spread pesto over one slice of bread, grilled eggplant, slice of mozzarella, a slice of tomato, and a second piece of bread.  Spray or brush with oil, place on hot grill, and smoosh the sandwich with a heavy pan.  After a minute or two, remove pan, flip sandwich, and repeat on the other side.
4.  Slice in half (on the diagonal!) and enjoy!!

Saturday, September 1, 2012

Mexican Pizza

When I told my husband we were having pizza for dinner, he told me to make sure I got spaghetti sauce and mozzarella when I went to the store.  Funny enough, I didn't need either for this version of pizza (well, I needed mozzarella, but I had a package in the fridge).

This was so incredibly tasty, and was a great end to a week chock full of delicious homemade meals.  My pizza turned out really ugly because, for some reason, we tend to have problems getting our pizza from the pizza peel to the pizza stone.  It didn't at all take away from the yum that was this pizza.

Make this for your next pizza night.  Dooooo it!!

Mexican Pizza Source:  Stephanie Cooks
Ingredients:
1 batch pizza dough
1 tsp. olive oil
1 bell pepper, sliced thin
1 clove garlic, pressed or minced
3 ounces chicken
1/2 tsp. taco seasoning
1 cup salsa
1/3 cup shredded cheddar cheese
1/3 cup shredded mozzarella cheese

Directions:
1- Preheat the oven to as hot as it will go with your pizza stone in the oven.
2- Prepare your dough, rolling it out on a surface coated in corn meal or parchment paper.
3- Heat the oil over medium heat in a skillet.  Add garlic and peppers, cooking until soft.
4- Rub the chicken breast with taco seasoning; dice the chicken. Add to the skillet, cooking until cooked through.
5-Add the salsa to the skillet, stirring well. Stir over medium heat for a couple minutes to warm through.
6- Top the pizza with the salsa mixture. Top with both cheesees. Bake 7-10 minutes on the pizza stone or until cheese is melted.
7- Serve hot.

Related Posts with Thumbnails