Monday, April 22, 2013
Meal Plan Monday
It has been astonishingly crazy around here lately. Dinners have been planned and then not made--I nearly cried when I once again threw away a pound of ground beef because it just didn't get used in time. I keep trying to be better about cutting down on our food waste....
Anyway, this is the plan for the week. I did a lot of planning from my own previously made recipes (which is kind of the point of my keeping a blog anyway). I must be craving pasta and chicken this week, since it's loaded up in the meal plan. I'm sharing this with the "official" MPM link at orgjunkie.com.
Monday
B--Fruit and Yogurt
L--Mango, Black Beans, and Rice
D--Crockpot Meatballs
Tuesday
B--Breakfast Burrito
L--Leftover Chili
D--Easy Mexi Chicken
Wednesday
B--Overnight Oatmeal
L--Leftover Meatballs
D--Unrolled Rollatini
Thursday
B--Crockpot Apple Oatmeal
L--Ladybug Pasta
D--Chicken and Bacon Ranch Mac and Cheese
Friday
B--Green Monster Smoothie
L--Leftover Mac and Cheese
D--Chicken Ranch Pizza
Saturday
B--?
L--?
D--Rigatoni di Gregorio
Sunday
B--?
L--??
D--Pasta Primavera
Have a great week!
Friday, April 12, 2013
Recipe Swap: Tropical Chicken Quesadillas with Pineapple-Avocado Salsa
I'm so sorry this is late; I've been struggling with the dates all week. Who walks around thinking Friday is Wednesday????
Anyway, this week for the Recipe Swap I was given the blog of our hostess, Sarah! She gave me her recipe for Tropical Chicken Quesadillas with Pineapple-Avocado Salsa , which sounded delightfully tropical for the lovely spring weather we've been having here in NJ. She modified a recipe that called for mango salsa with pineapple, which I happen to have on hand pretty much always, and I pretty much always have it spoil before I get around to cutting up the pineapple.
This was so good! My husband loved it, my sons loved it, and I thought it was delicious too. I never would have thought of mixing pineapple with avocado, but it made a fresh and delicious salsa to go along with the quesadilla. The flavors were decidedly best when you had a little bit of everything on your fork.
Tropical Chicken Quesadillas with Pineapple-Avocado Salsa
Adapted from Apple a Day via Taste of Home Cooking
For the salsa:
1 1/2 cups diced pineapple, cut into bite sized pieces
Enough pineapple juice to cover the chicken
1/2 avocado, peeled and diced
1 Roma tomato, seeded and diced
1 clove garlic, minced
1/4 cup chopped fresh cilantro
1/4 cup thinly sliceed red onion
Salt and pepper, to taste
For the quesadillas:
2 boneless chicken breasts
3 tablespoons dark brown sugar
2 tablespoons white sugar
2 tablespoons paprika
1 tablespoon kosher salt
1 tablespoon garlic powder
2 teaspoons ground black pepper
2 teaspoons ground ginger powder
2 teaspoons onion powder
1/2 teaspoons crushed dried rosemary
2 teaspoons oil, divided
1 onion, thinly sliced
8 medium/soft taco size tortillas
1 1/2 cups shredded Mexican or cheddar cheese
Cooking spray
To make the salsa, combine all ingredients in a nonreactive bowl. Taste and adjust seasonings. Refrigerate until ready to use.
Marinate the chicken breasts in the pineapple juice for at least 1 hour and up to 6 hours.
Combine the brown sugar through dried rosemary in a bowl. Mix well. Remove the chicken from the pineapple juice and sprinkle the dry rub on the chicken breasts, coating evenly.
Preheat oven (or toaster oven) to 350 degrees. Heat 1 teaspoon oil in a large skillet. Sauté chicken until browned on both sides, about 5 minutes per side. Transfer to a baking sheet lined with tinfoil and put in the oven. Bake for 30 minutes or until cooked through. Set aside to cool slightly, about 3 minutes. Cut into a small dice or shred.
While the chicken is cooking, heat the other teaspoon of oil in a nonstick skillet. Add the onions and saute until caramelized and brown, about 15 minutes.
Lay out four tortillas and assemble quesadillas in this order - cheese, onion, chicken, cheese. Top with remaining tortillas.
Spray a large nonstick skillet with cooking spray and heat over medium heat. Lay quesadilla in the skillet and let cook until the bottom of the tortilla is golden and crispy. Flip and let cook until the other side is also golden and crispy and the cheese is melted. Repeat cooking process with remaining quesadillas. Serve immediately with salsa.
Anyway, this week for the Recipe Swap I was given the blog of our hostess, Sarah! She gave me her recipe for Tropical Chicken Quesadillas with Pineapple-Avocado Salsa , which sounded delightfully tropical for the lovely spring weather we've been having here in NJ. She modified a recipe that called for mango salsa with pineapple, which I happen to have on hand pretty much always, and I pretty much always have it spoil before I get around to cutting up the pineapple.
This was so good! My husband loved it, my sons loved it, and I thought it was delicious too. I never would have thought of mixing pineapple with avocado, but it made a fresh and delicious salsa to go along with the quesadilla. The flavors were decidedly best when you had a little bit of everything on your fork.
Tropical Chicken Quesadillas with Pineapple-Avocado Salsa
Adapted from Apple a Day via Taste of Home Cooking
For the salsa:
1 1/2 cups diced pineapple, cut into bite sized pieces
Enough pineapple juice to cover the chicken
1/2 avocado, peeled and diced
1 Roma tomato, seeded and diced
1 clove garlic, minced
1/4 cup chopped fresh cilantro
1/4 cup thinly sliceed red onion
Salt and pepper, to taste
For the quesadillas:
2 boneless chicken breasts
3 tablespoons dark brown sugar
2 tablespoons white sugar
2 tablespoons paprika
1 tablespoon kosher salt
1 tablespoon garlic powder
2 teaspoons ground black pepper
2 teaspoons ground ginger powder
2 teaspoons onion powder
1/2 teaspoons crushed dried rosemary
2 teaspoons oil, divided
1 onion, thinly sliced
8 medium/soft taco size tortillas
1 1/2 cups shredded Mexican or cheddar cheese
Cooking spray
To make the salsa, combine all ingredients in a nonreactive bowl. Taste and adjust seasonings. Refrigerate until ready to use.
Marinate the chicken breasts in the pineapple juice for at least 1 hour and up to 6 hours.
Combine the brown sugar through dried rosemary in a bowl. Mix well. Remove the chicken from the pineapple juice and sprinkle the dry rub on the chicken breasts, coating evenly.
Preheat oven (or toaster oven) to 350 degrees. Heat 1 teaspoon oil in a large skillet. Sauté chicken until browned on both sides, about 5 minutes per side. Transfer to a baking sheet lined with tinfoil and put in the oven. Bake for 30 minutes or until cooked through. Set aside to cool slightly, about 3 minutes. Cut into a small dice or shred.
While the chicken is cooking, heat the other teaspoon of oil in a nonstick skillet. Add the onions and saute until caramelized and brown, about 15 minutes.
Lay out four tortillas and assemble quesadillas in this order - cheese, onion, chicken, cheese. Top with remaining tortillas.
Spray a large nonstick skillet with cooking spray and heat over medium heat. Lay quesadilla in the skillet and let cook until the bottom of the tortilla is golden and crispy. Flip and let cook until the other side is also golden and crispy and the cheese is melted. Repeat cooking process with remaining quesadillas. Serve immediately with salsa.
Friday, April 5, 2013
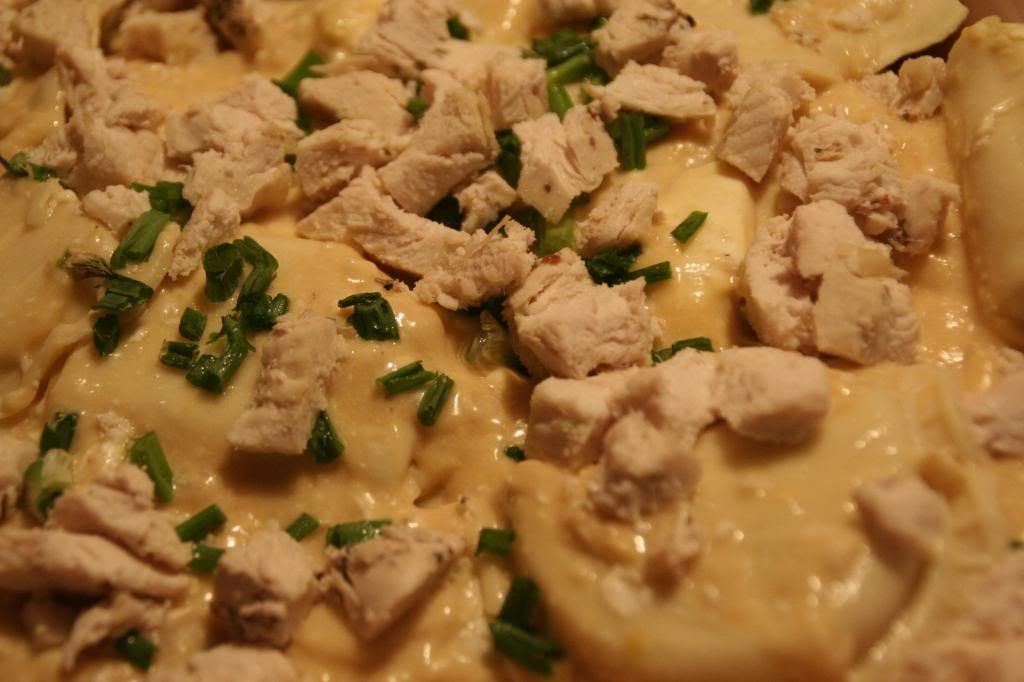
Lemon Chicken Pierogie Bake
Stephanie does a great job of not only making up her own recipes but also riffing on well known ones. Here's here interpretation of the internet famous Bacon Pierogie Bake.
I wish I had added the veggies as suggested, but was running low on time so skipped it. It definitely made for a much prettier plate for Stephanie than the sort of bland colors on mine, so I'm posting Stephanie's original directions so you can avoid the mistake I made! But the taste was quite good. It was nice and light, which is so nice as we're all itching for spring weather to arrive and match the calendar!
Lemon Chicken Pierogie Bake Source: Stephanie Cooks
Ingredients:
I wish I had added the veggies as suggested, but was running low on time so skipped it. It definitely made for a much prettier plate for Stephanie than the sort of bland colors on mine, so I'm posting Stephanie's original directions so you can avoid the mistake I made! But the taste was quite good. It was nice and light, which is so nice as we're all itching for spring weather to arrive and match the calendar!
Lemon Chicken Pierogie Bake Source: Stephanie Cooks
Ingredients:
1 tbsp butter
2 tbsp flour
2 cloves garlic
1 cup broth
juice from half a lemon
1 tsp lemon zest
4 tbsp cream cheese
3 green onions, sliced thin.
1 package frozen pierogies
1 cup cooked chicken, diced
1 cup cooked veggies, any kind
1/2 cup parmesan cheese
Directions:
1- Preheat the oven to 400.
2- In a skillet melt the butter. Stir in the garlic and allow to saute
until fragrant, about 2-3 minutes. Add the flour and stir well. Slowly
pour in the broth.
3- Bring the broth to a boil, then reduce the heat. Add the lemon juice,
zest, and cream cheese. Stir until cheese is melted. Stir in the
green onion.
4- In an oven safe dish lay the pierogies on the bottom. Add the chicken
and veggies, and pour the sauce over the whole dish. Top with the
parmesan cheese.
5- Cover with foil and bake 25 minutes. Remove the foil and bake an additional 5 minutes.
Thursday, April 4, 2013
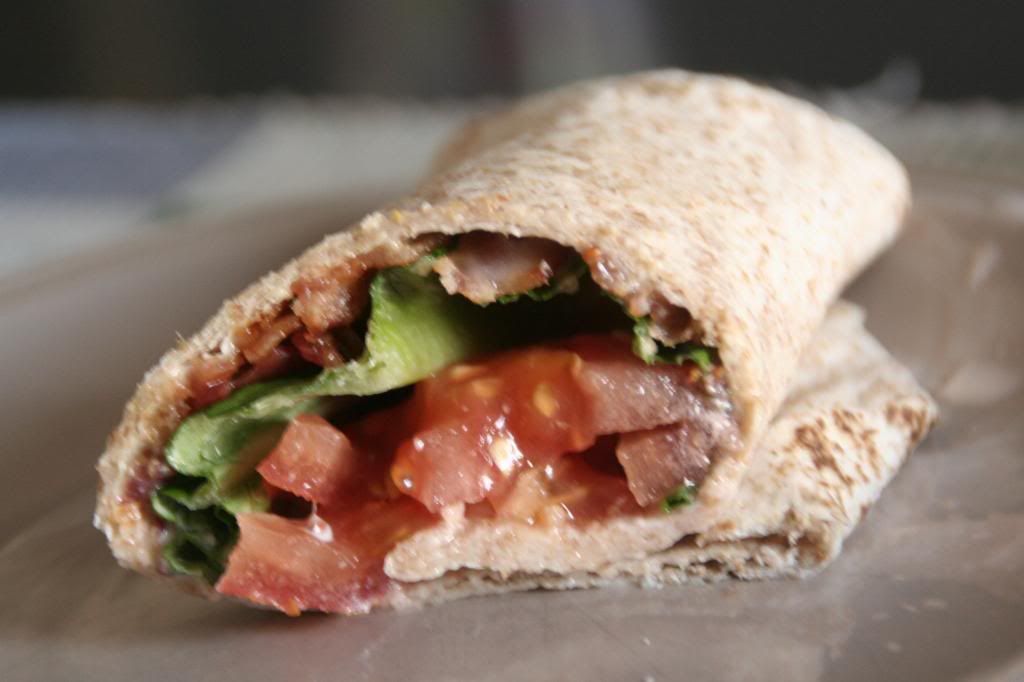
BLT Roll Ups
This one was made by my husband, and it was a lovely and delicious lunch. It also seems like an easy one to put together (after you cook the bacon, of course... definitely do it in the oven if you've never tried it that way!)
Instead of mayo like a typical BLT, the recipe uses a homemade honey mustard, which was an AMAZING choice. I don't know if I'll ever have mayo on a BLT again! I also like the choice of it as a wrap instead of white bread.
BLT Wraps by Paula Deen
Instead of mayo like a typical BLT, the recipe uses a homemade honey mustard, which was an AMAZING choice. I don't know if I'll ever have mayo on a BLT again! I also like the choice of it as a wrap instead of white bread.
BLT Wraps by Paula Deen
Ingredients
2 teaspoons honey
2 teaspoons Dijon mustard
4 tablespoons mayonnaise
4 (10-inch) flour tortillas
8 slices bacon, cooked crisp
8 green leaf lettuce leaves
8 slices tomato
Extra-virgin olive oil
Salt and freshly ground black pepper
Directions
Make the sauce by combining the honey, mustard, and mayonnaise in a small bowl. Spread evenly on the tortillas. Evenly divide bacon, lettuce leaves, and tomato over each. Drizzle each with olive oil then season with salt and pepper, to taste. Roll up and secure with a toothpick. Cut in half on the bias.
2 teaspoons honey
2 teaspoons Dijon mustard
4 tablespoons mayonnaise
4 (10-inch) flour tortillas
8 slices bacon, cooked crisp
8 green leaf lettuce leaves
8 slices tomato
Extra-virgin olive oil
Salt and freshly ground black pepper
Directions
Make the sauce by combining the honey, mustard, and mayonnaise in a small bowl. Spread evenly on the tortillas. Evenly divide bacon, lettuce leaves, and tomato over each. Drizzle each with olive oil then season with salt and pepper, to taste. Roll up and secure with a toothpick. Cut in half on the bias.
Enjoy!
Wednesday, April 3, 2013
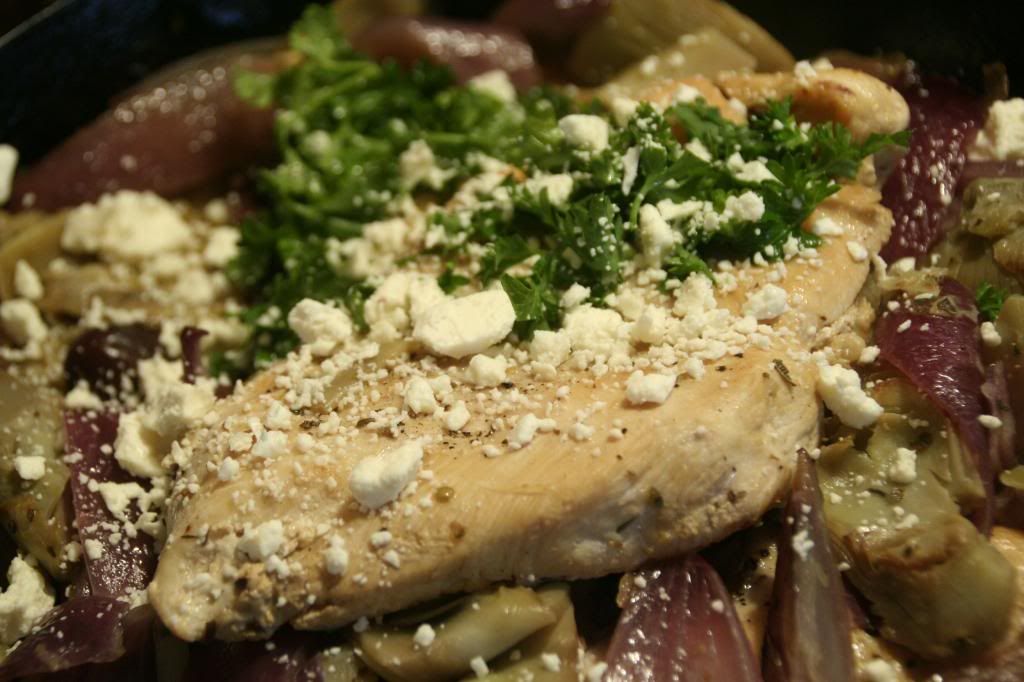
Skillet Chicken and Artichokes
You have to love a fast weeknight meal, even when you have a break from work. I'm on Spring Break (woohoo!) this week, which means I'm even less interested in making dinners. Enter this super fast dinner.
I'll admit it; I knew the kids probably wouldn't love it. The flavors are on the sophisticated side of the flavor palette, and my husband and I enjoyed it very much. The five year old said the chicken was really good, but wouldn't eat any of the artichokes or onions and the two year old wouldn't taste any of it, other than the feta. Yes, feta. For a two year old.
I did not add the Peppadew peppers because I realized too late that they had gone bad. Oops, but I guess that's what happens when you don't plan to use up what you have. Nevertheless, this was still quite tasty, with a salty, briny taste going on.
Skillet Chicken and Artichokes Source: Food Network Magazine
4 6-to-8-ounce skinless, boneless chicken breasts
Kosher salt and freshly ground pepper
3 tablespoons extra-virgin olive oil
1 9-ounce package frozen artichoke hearts, thawed and patted dry
1 small red onion, cut into wedges
3 cloves garlic, thinly sliced
1 teaspoon dried oregano
3/4 cup vegetable broth
1/4 cup pitted kalamata olives
1/4 cup chopped fresh parsley
1/4 cup crumbled feta cheese
1/4 cup sliced Peppadew peppers, plus 2 teaspoons brine from the jar
Directions
Pound the chicken (so it cooks evenly) until about 1/2 inch thick. Season with salt and pepper. Heat 1 tablespoon olive oil in a large nonstick skillet over medium-high heat, add the chicken and cook about 4 minutes until golden. Turn and cook until the other side is golden, 2 to 3 more minutes. Remove from the skillet and set aside.
Wipe out the skillet. Heat 2 tablespoons olive oil in the skillet until shimmering; add the artichoke hearts and red onion and cook about 1 minute, without stirring, until golden. Season with salt and pepper and cook about 2 minutes or until tender, stirring occasionally. Add the garlic and oregano and cook, stirring, 30 seconds.
Add chicken to the skillet; add the broth and olives. Bring to a gentle simmer, cover and cook until the chicken is cooked through, 4 to 6 minutes. Top with the parsley and feta.
Kosher salt and freshly ground pepper
3 tablespoons extra-virgin olive oil
1 9-ounce package frozen artichoke hearts, thawed and patted dry
1 small red onion, cut into wedges
3 cloves garlic, thinly sliced
1 teaspoon dried oregano
3/4 cup vegetable broth
1/4 cup pitted kalamata olives
1/4 cup chopped fresh parsley
1/4 cup crumbled feta cheese
1/4 cup sliced Peppadew peppers, plus 2 teaspoons brine from the jar
Directions
Pound the chicken (so it cooks evenly) until about 1/2 inch thick. Season with salt and pepper. Heat 1 tablespoon olive oil in a large nonstick skillet over medium-high heat, add the chicken and cook about 4 minutes until golden. Turn and cook until the other side is golden, 2 to 3 more minutes. Remove from the skillet and set aside.
Wipe out the skillet. Heat 2 tablespoons olive oil in the skillet until shimmering; add the artichoke hearts and red onion and cook about 1 minute, without stirring, until golden. Season with salt and pepper and cook about 2 minutes or until tender, stirring occasionally. Add the garlic and oregano and cook, stirring, 30 seconds.
Add chicken to the skillet; add the broth and olives. Bring to a gentle simmer, cover and cook until the chicken is cooked through, 4 to 6 minutes. Top with the parsley and feta.
Monday, April 1, 2013
Meal Plan Monday!
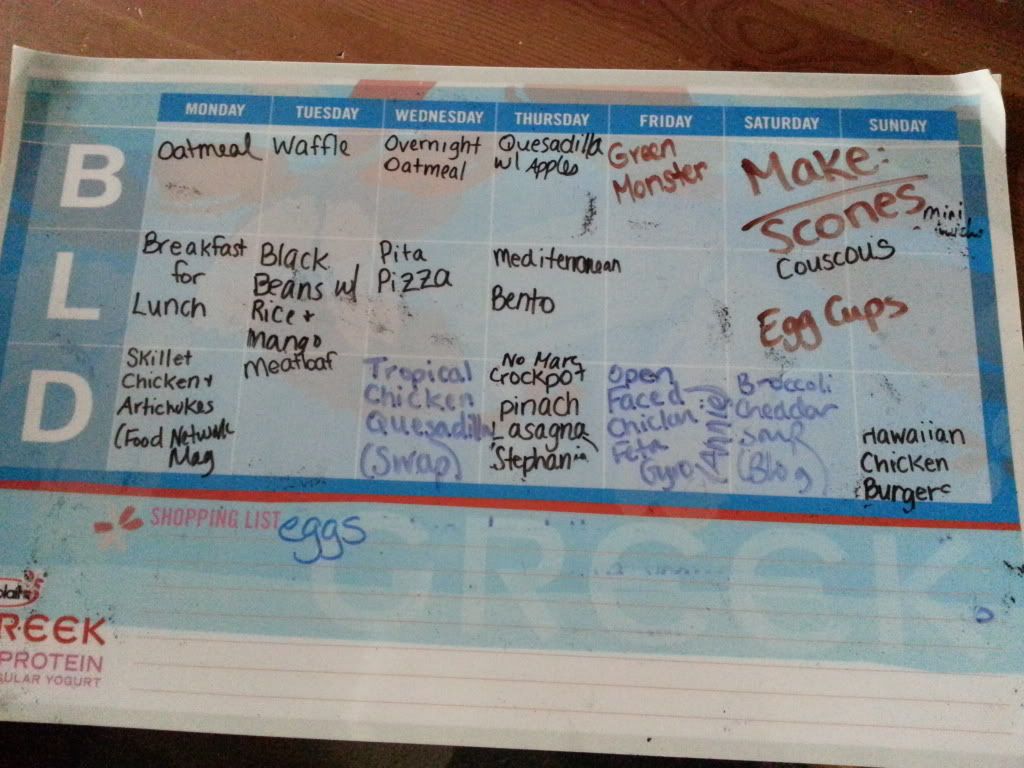
It's been a really long time since I've posted one of these. For me, this is a great way to keep track of my recipes. My meal planning works like this... on Friday (if possible; sometimes it's very early on Saturday morning) I plan out the meals for the week. For the past several weeks, breakfasts and lunches have pretty much stayed the same because I've been on a streak of planning stuff that was way too complicated for how I'm feeling after finally getting the boys to bed.
So I use this whiteboard meal planner I got from some freebie sample:
It works really well because I've trained myself to add the ingredients necessary to the lines at the bottom and have trained my husband to add whatever he wants or needs or runs out of there as well.
So I plan my meals here then transfer to a grocery list piece of paper (I've tried using apps on my phone to do this, but have not had success. I find I don't have it organized right and either end up forgetting to get something or having to traipse back and forth in the store. This works great, though, for quick trips to the store).
As you can see, I try to identify the source from which the recipe came to make finding it easier. But I also like to keep it here on the blog because it doesn't get lost (there's been more than one time that the dry erase has BEEN erased!), it makes an easy click, and is much easier if my husband is in charge of cooking dinner than finding the recipe while I am out and away from the board.
So, here's what the plan is for this week:
Monday: Skillet Chicken and Artichokes
Tuesday: Meatloaf
Wednesday: Tropical Chicken Quesadillas
Thursday: Crockpot Spinach Lasagna
Friday: Open Faced Chicken Gyro
Saturday: Broccoli Cheddar Soup
Sunday: Hawaiian Chicken Burgers
Have a great week!
So I use this whiteboard meal planner I got from some freebie sample:
It works really well because I've trained myself to add the ingredients necessary to the lines at the bottom and have trained my husband to add whatever he wants or needs or runs out of there as well.
So I plan my meals here then transfer to a grocery list piece of paper (I've tried using apps on my phone to do this, but have not had success. I find I don't have it organized right and either end up forgetting to get something or having to traipse back and forth in the store. This works great, though, for quick trips to the store).
As you can see, I try to identify the source from which the recipe came to make finding it easier. But I also like to keep it here on the blog because it doesn't get lost (there's been more than one time that the dry erase has BEEN erased!), it makes an easy click, and is much easier if my husband is in charge of cooking dinner than finding the recipe while I am out and away from the board.
So, here's what the plan is for this week:
Monday: Skillet Chicken and Artichokes
Tuesday: Meatloaf
Wednesday: Tropical Chicken Quesadillas
Thursday: Crockpot Spinach Lasagna
Friday: Open Faced Chicken Gyro
Saturday: Broccoli Cheddar Soup
Sunday: Hawaiian Chicken Burgers
Have a great week!
Follow me on Twitter!
When I started a Facebook page for this blog, I linked it to the only twitter account I had. I've begun to use that in a professional capacity, and it got sort of weird when professional contacts were responding to cooking related posts. Oops. I'm sure as well that the one or two of you who follow me there are overwhelmed by the large number of professional tweets you might see.
So, The Mad Men Kitchen has its own Twitter account as of right this very moment!
Follow me; you know you want to!
So, The Mad Men Kitchen has its own Twitter account as of right this very moment!
Follow me; you know you want to!
Friday, March 29, 2013
Apple and Cranberry Baked French Toast
| I'm having some trouble with my camera and flash; sorry this looks so terrible. |
In my attempts to get back to this blog, I committed to the Recipe Swap hosted by Sarah again (check out her blog, http://tasteofhomecooking.blogspot.com, to see the full recipe swap roundup). This go around was Blogger's Choice, which is always so much fun. I was again assigned The Jey of Cooking, and when I saw this yummy looking concoction, knew I'd be making a fancy breakfast.
This week, my husband and son have been on spring break. My amazing husband has been waking up early in order to make breakfast for me before I leave. I knew he (as well as the kiddos) would love this sweet breakfast.
I started by making Hawaiian bread in my bread machine (I used this recipe and will blog about it soon!), because despite seeing Hawaiian bread in stores often, I could not find it in two different grocery stores and it was way cheaper to just make it I'm sure!
This was OUTSTANDINGLY good. So sweet and delicious, though definitely a once in awhile kind of breakfast, but such a nice treat.
I ran into a few troubles, not due to the recipe, though. My husband has been home all week for his spring break, which means he's been doing some baking and breakfast making. So nice of him, but it also meant some supplies ran out unexpectedly. I only had 2 apples when I went to make this and two eggs; I made it anyway. It was completely fine on the apples side, but definitely needed more eggs--I don't know if SIX is necessary, though!
The Hawaiian bread was perfect here and I feel so accomplished having made it myself!
Thanks again to Sarah for hosting the swap and to Jey for yet another great recipe!
Here's Jey's take on the recipe!
Apple and Cranberry Baked French Toast as seen on The Jey of Cooking
Apple and Cranberry Baked French Toast.
Ingredients
- 1 Cup Brown Sugar
- 1/2 Cup (1 stick) Butter, melted
- 3 tsp. Cinnamon
- 3 Apples, peeled, cored and finely diced (I used Golden Delicious)
- 1/2 Cup Dried Cranberries
- 1 Loaf Hawaiian Bread, torn into pieces
- 6 Eggs
- 1 1/2 Cups Milk
- 1 Tbsp. Vanilla
Instructions
In a 9x13 baking pan, combine brown sugar, butter and 1 tsp. cinnamon. Add the diced apples and cranberries and toss to coat. Spread the mixture evenly across the bottom of the pan. Arrange torn bread pieces on top.
In a medium bowl, whisk together the eggs, milk, vanilla and remaining 2 tsp. cinnamon. Pour over the bread, making sure it is completely soaked.
Cover with foil and refrigerate overnight.
When ready to bake, preheat oven to 375. Bake covered for 40-50 minutes. Uncover and bake an additional 5 minutes. Allow to cool 5 minutes before serving.
Monday, March 25, 2013
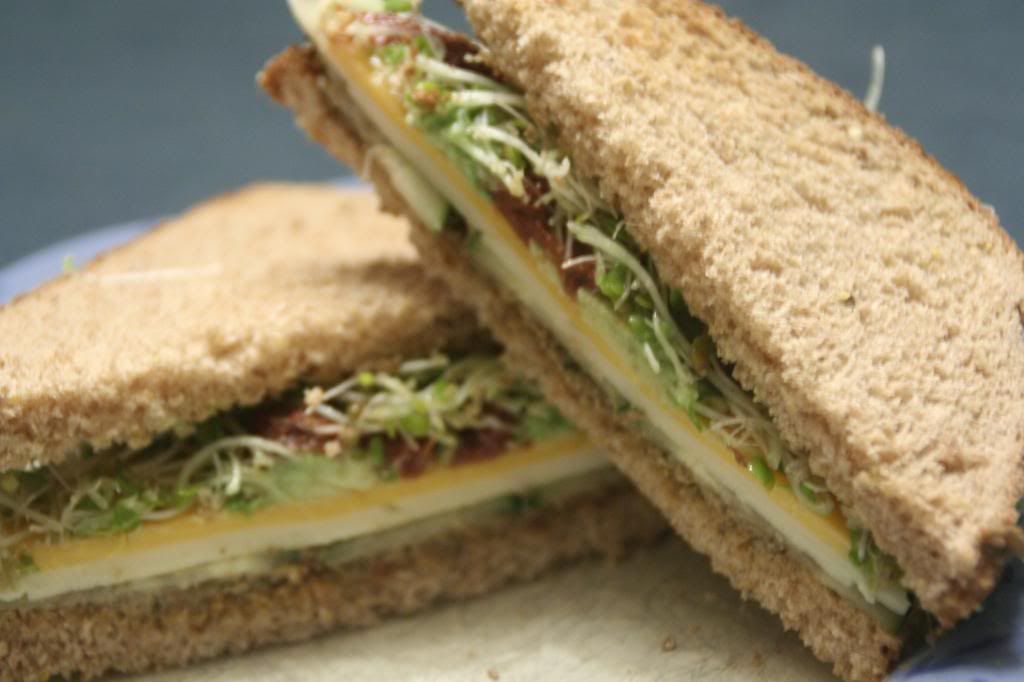
Meatless Monday: Emeril's 3 Cheese Veggie Sandwich
I'm not sure how I stumbled upon this recipe, which was shared by the #SundaySupper group, but it also introduced me to the book from which the recipe came, Emeril's Kicked Up Sandwiches.
This was so stinking delicious, and I just could not believe that my children and husband were eating sprouts. Willingly.
This was such a delicious lunch, and while we had it on a weekend afternoon, it's fast enough to put together that it would be great in a brown bag lunch at work too (or lunchbox for those sprout eaters I mentioned).
Three Cheese Veggie Sandwich Source: Emeril's Kicked Up Sandwiches via Cindy's Recipes
INGREDIENTS
- 8 slices seeded or multigrain bread(see page 301)toasted
- 1 cup Sun-Dried Tomato and Walnut Pesto (page 320)
- 1/2 cucumber sliced into 1/8-inch rounds
- Salt and freshly ground black pepper,for seasoning
- 4 slices provolone cheese
- 4 slices cheddar
- 4 slices Swiss
- 1/2 avocado, thinly sliced
- 1/2 cup thinly sliced sun-dried tomatoes
- 1 cup alfalfa or green leaf sprouts
- 1 teaspoon olive oil
1. Arrange the toast slices in a single layer on a work surface. Spread 2 Tablespoons of the Sun-Dried Tomato and Walnut Pesto on each slice of bread. On 4 of the slices, arrange the cucumber in a single layer, covering as much of the bread as possible, and season with just a pinch of salt and pepper. Place a slice each of provolone, cheddar and Swiss cheese on top of the cucumber. Divide the avocado slices evenly among the sandwiches and season with salt and pepper. Spread 2 Tablespoons of the sun-dried tomatoes evenly over the avocado.
2. In a small mixing bowl, toss the spouts with the olive oil and a pinch of salt and pepper. Spread 1/4 cup of the sprouts over the tomatoes on each sandwich. Complete the sandwiches with the remaining slices of toast.
Sun-dried Tomato and Walnut Pesto
Ingredients
- 1/2 cup walnut halves or pieces, toasted
- 1 teaspoon minced garlic
- 1/2 cup fresh basil leaves
- 1/4 cup parsley leaves
- 1/4 cup whole sun-dried tomatoes
- 1/4 cup finely grated Parmigiano-Reggiano cheese
- 1/2 teaspoon salt
- 1/4 teaspoon freshly ground black pepper
- Finely grated zest of lemon
- 1 teaspoon freshly squeezed lemon juice
- 1 Tablespoon balsamic vinegar
- 1/2 cup extra-virgin olive oil
Friday, March 22, 2013
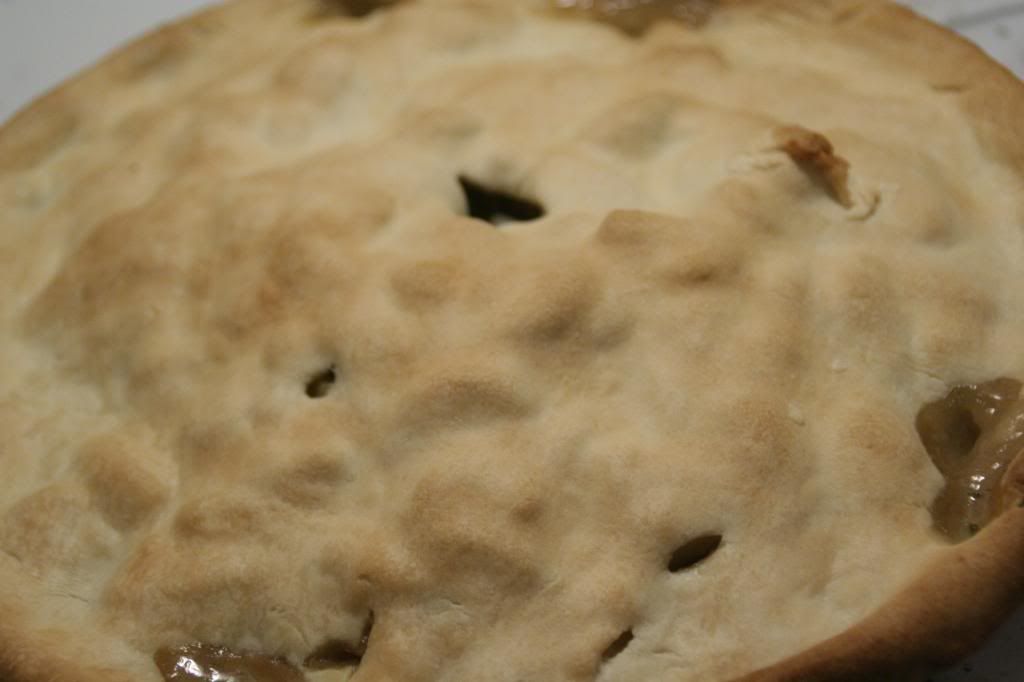
Veggie Pot Pie
I recently tried out a great cookbook, Cook without a Book: Recipes and Techniques for Part-Time and Full-Time Vegetarians. I really enjoyed flipping through the book because the recipes are "choose your own adventure" style--she gives a list of veggies and the instructions to choose two and a basic recipe as well as her favorite combos.
It was nervously that I made this one, though, because my husband isn't super into all veggie meals (although there are many he has really enjoyed) and is not a fan of chicken pot pie, but this ended up being really tasty. The boys weren't super crazy about the onions in there, but when I told them they are leeks, not onions, they were ok with it.
I really enjoyed this one, and my husband was pretty pleased with it too (I don't get why he isn't a fan of chicken pot pie--yummy goodness wrapped in a pie crust; how could you go wrong?) I used prewashed leeks, since I know that leeks have to be cleaned in a very particular way and it also made my life ever so slightly easier with all the slicing too.
Onion
1lb red potato, cut into quarters
2 carrots, sliced 1/2 inch
2 celery ribs, sliced 1/2 inch
1/2lb sliced cremini mushrooms
4T olive oil
3/4t dried tarragon
salt and pepper to taste
1c evaporated milk
1/4c flour
3T dry sherry
1/4c grated Parmesan
1/4c frozen peas
One 9 inch refrigerated pie crust
Preheat your oven to 425.
Toss all the produce with 2T olive oil, 1/2t herb, and some salt and pepper. Spread evenly on a baking sheet (lined with foil or silpat). Roast in the oven until tender, stirring occasionally, about 20 minutes. Remove from oven.
Meanwhile, combine the broth and milk in a microwave safe bowl for about 3 minutes or until steaming.
Heat 2T oil in a Dutch oven over medium heat. Whisk in flour and 1/4t tarragon; cook over heat about 1 minute or until golden. Add in milk mixture, whisking until sauce boils and thickens. Add in sherry and cheese; season with salt and pepper.
Add the sauce and frozen peas to the veggie mixture. Pour it all into a 9 inch pie plate. Cover this with the pie crust and seal (if you're me) or flute (if you have talent); cut some holes on top to vent the steam. Bake until bubbly, 25-30 minutes.
Let cool then enjoy!
Thursday, March 21, 2013
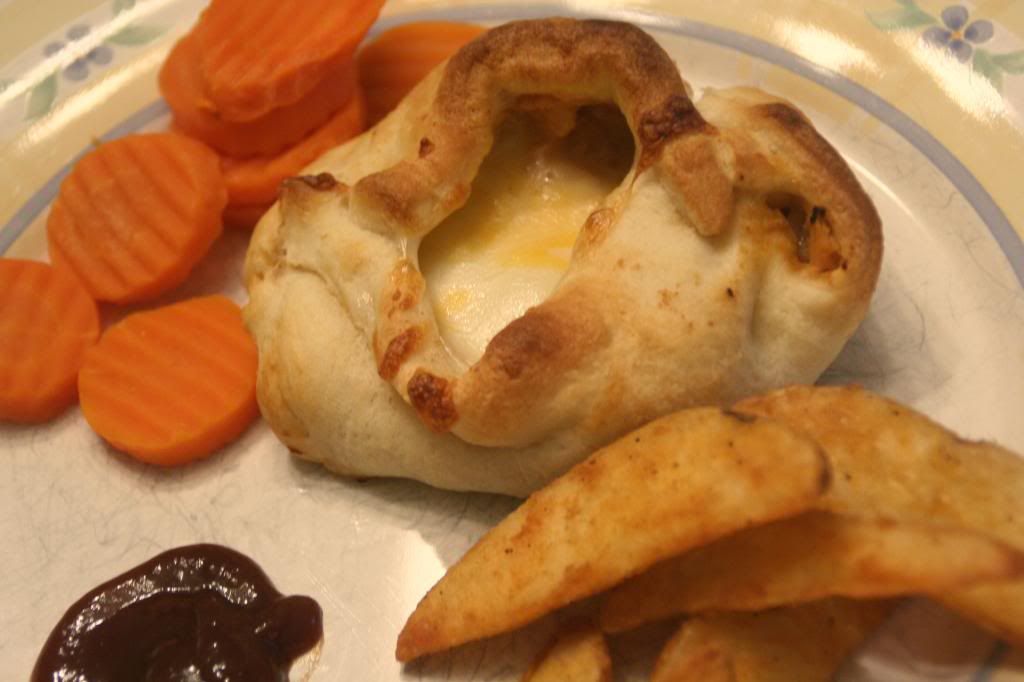
BBQ Chicken Pockets
Stephanie's Chicken Suiza pockets (which I, apparently, never blogged; see Stephanie's recipe here) were such a wild success around here, I knew we'd have another hit when she posted this recipe for BBQ Chicken Pockets.
And these were a big hit indeed! We all loved the flaky deliciousness and the tasty innards. I made mine like a pocket while Stephanie made them more like rolls; either way you make them, make sure you double the recipe (they freeze really well and make a fast meal) because the as written didn't feed my little family--they just could not get enough!
I served with steak fries and barbecue dipping sauce and some carrots on the side.
BBQ Chicken Pockets Source: Stephanie Cooks
Ingredients:
1 tsp olive oil
6 ounces cooked chicken, diced
Salt/pepper
BBQ sauce
1 can crescent rolls
Cheddar cheese
Mozzarella cheese
Cilantro, optional
Directions:
And these were a big hit indeed! We all loved the flaky deliciousness and the tasty innards. I made mine like a pocket while Stephanie made them more like rolls; either way you make them, make sure you double the recipe (they freeze really well and make a fast meal) because the as written didn't feed my little family--they just could not get enough!
I served with steak fries and barbecue dipping sauce and some carrots on the side.
BBQ Chicken Pockets Source: Stephanie Cooks
Ingredients:
1 tsp olive oil
6 ounces cooked chicken, diced
Salt/pepper
BBQ sauce
1 can crescent rolls
Cheddar cheese
Mozzarella cheese
Cilantro, optional
Directions:
- Preheat your oven to 400 degrees. Combine chicken and 2T BBQ sauce in a small skillet. Cook, stirring frequently, until warm and coated well. Set aside and keep warm.
- Form rectangles with the crescent roll dough by sealing two triangles together. Coat with BBQ sauce as thickly as you like (I wouldn't go too thick or they will be gooey).
- Place equal amounts of chicken on each rectangle. Top with cheeses.
- Form a pocket around the filling, making sure the filling can't escape through any holes. Place on a baking sheet, and bake in the preheated oven for about 12 minutes, until lovely and golden.
- Top with cilantro and enjoy!
Wednesday, March 20, 2013
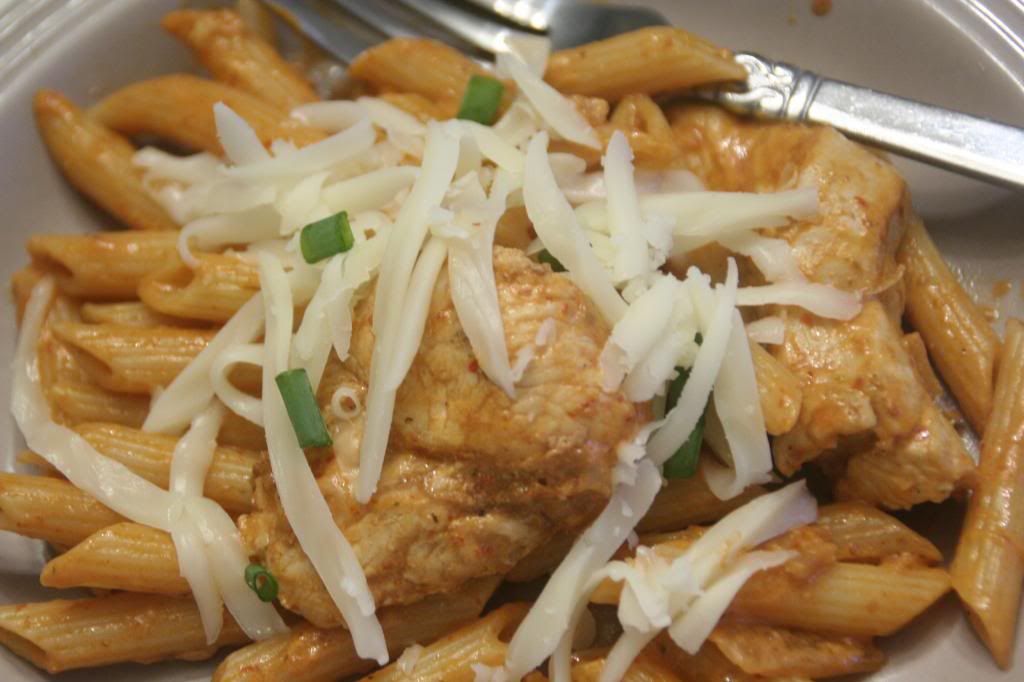
Chicken Enchilada Pasta
Ohhhh, this was so good. This is one of those meals where the photo caught my eye but I never really got around to looking at the recipe until one random out-of-ideas meal planning session, at which point I looked more closely at the recipe and discovered that not only is it one we'd probably like, but also inexpensive and fairly fast!
I made this one even LOWER in cost by growing my own scallions... what???? Yes, I learned (through Pinterest, of course) that if you save the roots after cutting them up and place in water, the scallion will grow again. Awesome!
This one completely rocked. It was a little bit on the spicy side for the kidlets, but adding in some sour cream helped that and they both enjoyed it. Score for the whole family!
Chicken Enchilada Pasta Source: Budget Bytes
Ingredients:
- 2 Tbsp vegetable oil
- 1 medium yellow onion, diced
- 2 cloves garlic, minced
- 1 lb. chicken breast, sliced into 1" strips
- 1 cup enchilada sauce
- 1/2 cup sour cream
- 12 oz. uncooked pasta
- 1 cup shredded monterrey jack
- 2-3 scallions, green and white parts sliced thinly
Directions:
- Cook pasta according to package. Drain well.
- Meanwhile, heat oil over medium heat until shimmering. Add garlic and onion and saute until soft; about 5 minutes. Add the chicken to the skillet and cook until cooked through; about 5 minutes.
- Warm up enchilada sauce, then whisk in the sour cream. Set aside.
- Combine the pasta, sauce, and chicken mixture. Season to taste with salt and pepper. Top with shredded cheese and scallions.
Enjoy!
Tuesday, March 19, 2013
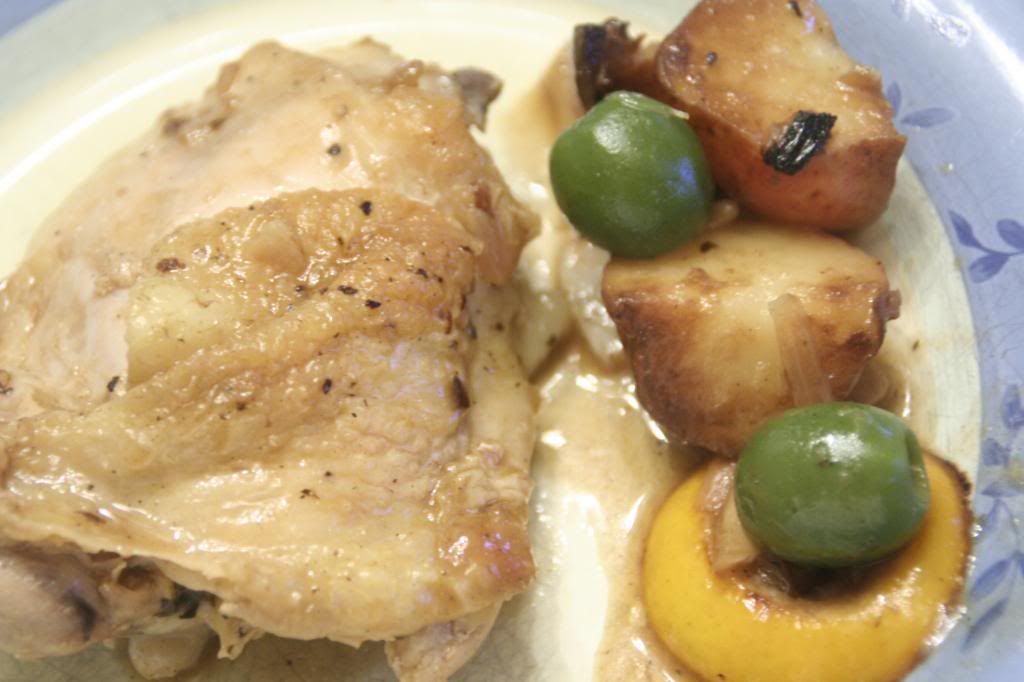
Meyer Lemon chicken with Baby Potatoes and Castelvetrano Olives
I always wonder what to do with Meyer lemons. They're such little cuties, but seem more suited to baking applications, so when I saw this recipe in a recent issue of Cooking Light, I wanted to make it right away. Not only are Meyer lemons in season right now, but I was also able to find the special green olives recommended (which my five year old gobbled up and requested as a snack in his lunch the next day).
This meal is bright and springy, which we really need in the gloomy transition from "in like a lion" to "out like a lamb." I don't think I made any changes, though the picture at My Recipes looks way prettier than mine.
Meyer Lemon Chicken Source: Cooking Light January 2013
This meal is bright and springy, which we really need in the gloomy transition from "in like a lion" to "out like a lamb." I don't think I made any changes, though the picture at My Recipes looks way prettier than mine.
Meyer Lemon Chicken Source: Cooking Light January 2013
Ingredients
- 2 skin-on, bone-in chicken breast halves, halved crosswise
- 2 skin-on, bone-in chicken thighs
- 1 teaspoon kosher salt, divided
- 3/4 teaspoon black pepper, divided
- Cooking spray
- 2 tablespoons olive oil, divided
- 1 pound small red potatoes, quartered
- 1 Meyer lemon, cut into 1/4-inch-thick slices and seeded
- 1/4 cup finely chopped shallots
- 4 garlic cloves, thinly sliced
- 1/2 cup dry white wine
- 1/2 teaspoon chopped fresh thyme leaves
- 1 cup unsalted chicken stock (such as Swanson), divided
- 1 teaspoon cornstarch
- 2 ounces pitted Castelvetrano olives
- 2 tablespoons fresh Meyer lemon juice
- 2 tablespoons butter
- 1 tablespoon fresh parsley leaves
Preparation
- Preheat oven to 400°.
- Heat a large ovenproof skillet over medium-high heat. Sprinkle chicken with 1/2 teaspoon salt and 1/2 teaspoon pepper; coat with cooking spray. Add chicken to pan, skin side down; cook 6 minutes or until skin is golden brown and crisp. Turn chicken over. Place pan in oven. Bake at 400° for 12 minutes or until a thermometer inserted in thickest portion of chicken registers 165°.
- Remove chicken from pan; keep warm. Discard pan drippings (do not wipe pan clean). Add 1 tablespoon oil to pan; swirl to coat. Add potatoes to pan; sprinkle with 1/4 teaspoon salt. Cook potatoes 3 minutes on each side or until browned. Remove potatoes from pan. Add lemon slices to pan; cook 1 minute on each side or until browned. Remove lemon from pan. Add remaining 1 tablespoon oil to pan; swirl to coat. Add shallots and garlic; sauté 2 minutes, stirring occasionally. Add wine and chopped fresh thyme; cook 1 minute or until liquid almost evaporates, scraping pan to loosen browned bits.
- Return potatoes and lemon slices to pan. Add 2/3 cup stock, remaining 1/4 teaspoon salt, and remaining 1/4 teaspoon pepper; cook 2 minutes or until potatoes are tender. Combine remaining 1/3 cup stock and cornstarch, stirring with a whisk. Add cornstarch mixture and olives to pan; bring to a boil. Cook 1 minute, stirring occasionally. Stir in lemon juice and butter, stirring until butter melts. Return chicken to pan, turning to coat; sprinkle with parsley.
Monday, March 18, 2013
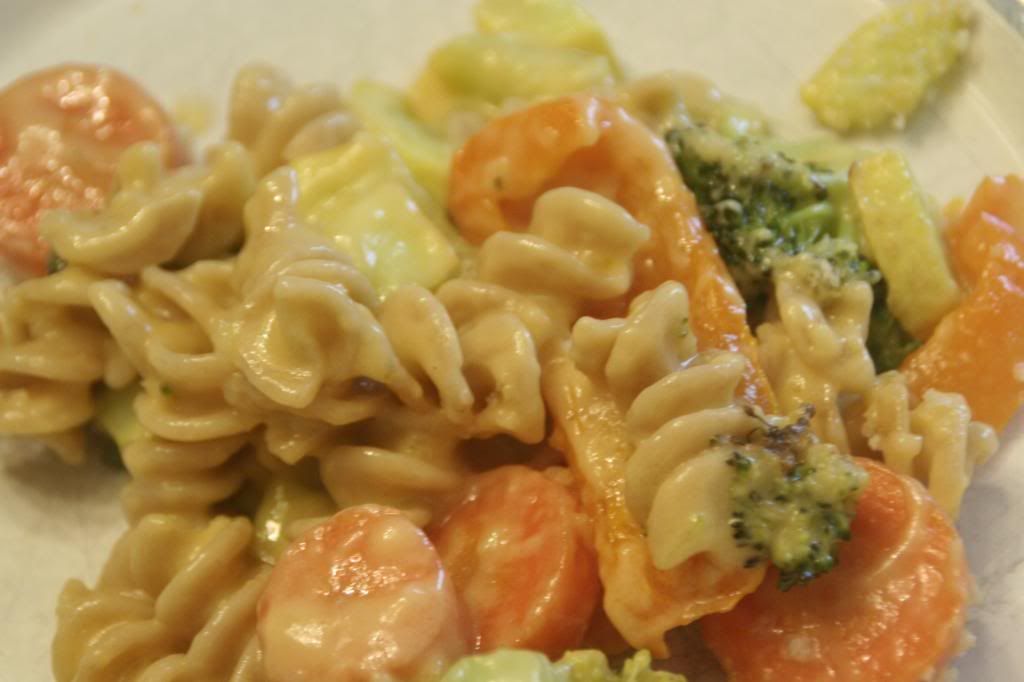
Not so spicy Roasted Vegetable Macaroni and Cheese
My sons are huge mac and cheese fans. In fact, a recent diner trip resulted in a slight tantrum when they did not have mac and cheese on the menu. So when I found this recipe that combined the deliciousness of roasted vegetables with the comfort of macaroni and cheese, I jumped on the opportunity.
It earned a "it's ok" rating from my husband, who does not like macaroni and cheese, but I enjoyed it very much. The boys had mixed reactions, between super happy to have mac and cheese to "I refuse to eat vegetables," which a quickly forced no apple until you eat some veggies fixed when he realized they were sweet and delicious.
I will admit that this made a lot of dishes, which didn't really make anyone happy, but I was really happy with the outcome and will probably double it for leftovers next time.
Roasted Vegetable Macaroni and Cheese Adapted from The Comfort of Cooking
Ingredients
1 cup broccoli florets, chopped into small chunks
1/2 red pepper, sliced
1 yellow squash, quartered and diced
2 carrots, sliced thinly
2 cups whole wheat pasta (elbow macaroni, rotini, penne, etc.)
1/4 cup plus 1T olive oil, divided
1 garlic clove, minced
3 Tbsp. all-purpose flour
1 1/2 cups milk
2 cups (8oz) shredded cheddar cheese
Salt and pepper, to taste
2 Tbsp. panko breadcrumbs
Directions
Preheat oven to 400 degrees F. Cook pasta according to package directions; drain and set aside. Prepare a baking sheet by either covering it with silpat or foil.
Toss veggies with 1T olive oil on the baking sheet. Bake for 20 minutes, or until vegetables have softened, stirring occasionally. Remove from oven and set aside.
Meanwhile, heat remaining oil in a large skillet over medium heat. When shimmering, add garlic and cook 30 seconds. Whisk in flour and cook 1 minute (careful it doesn't burn). Gradually whisk in milk, stirring constantly until mixture is slightly thickened. Remove from heat. Stir in cheddar cheese until well distributed and melted, then add macaroni and vegetables.
Place mixture in a large casserole dish and sprinkle with panko breadcrumbs. Place under the broiler in your oven (500 degrees) for 3-4 minutes, or until the top is golden brown.
Dig in!
It earned a "it's ok" rating from my husband, who does not like macaroni and cheese, but I enjoyed it very much. The boys had mixed reactions, between super happy to have mac and cheese to "I refuse to eat vegetables," which a quickly forced no apple until you eat some veggies fixed when he realized they were sweet and delicious.
I will admit that this made a lot of dishes, which didn't really make anyone happy, but I was really happy with the outcome and will probably double it for leftovers next time.
Roasted Vegetable Macaroni and Cheese Adapted from The Comfort of Cooking
Ingredients
1 cup broccoli florets, chopped into small chunks
1/2 red pepper, sliced
1 yellow squash, quartered and diced
2 carrots, sliced thinly
2 cups whole wheat pasta (elbow macaroni, rotini, penne, etc.)
1/4 cup plus 1T olive oil, divided
1 garlic clove, minced
3 Tbsp. all-purpose flour
1 1/2 cups milk
2 cups (8oz) shredded cheddar cheese
Salt and pepper, to taste
2 Tbsp. panko breadcrumbs
Directions
Preheat oven to 400 degrees F. Cook pasta according to package directions; drain and set aside. Prepare a baking sheet by either covering it with silpat or foil.
Toss veggies with 1T olive oil on the baking sheet. Bake for 20 minutes, or until vegetables have softened, stirring occasionally. Remove from oven and set aside.
Meanwhile, heat remaining oil in a large skillet over medium heat. When shimmering, add garlic and cook 30 seconds. Whisk in flour and cook 1 minute (careful it doesn't burn). Gradually whisk in milk, stirring constantly until mixture is slightly thickened. Remove from heat. Stir in cheddar cheese until well distributed and melted, then add macaroni and vegetables.
Place mixture in a large casserole dish and sprinkle with panko breadcrumbs. Place under the broiler in your oven (500 degrees) for 3-4 minutes, or until the top is golden brown.
Dig in!
Labels:
Meatless Monday,
Pasta,
Vegetarian,
Weeknight Meals,
Yum
Friday, March 15, 2013
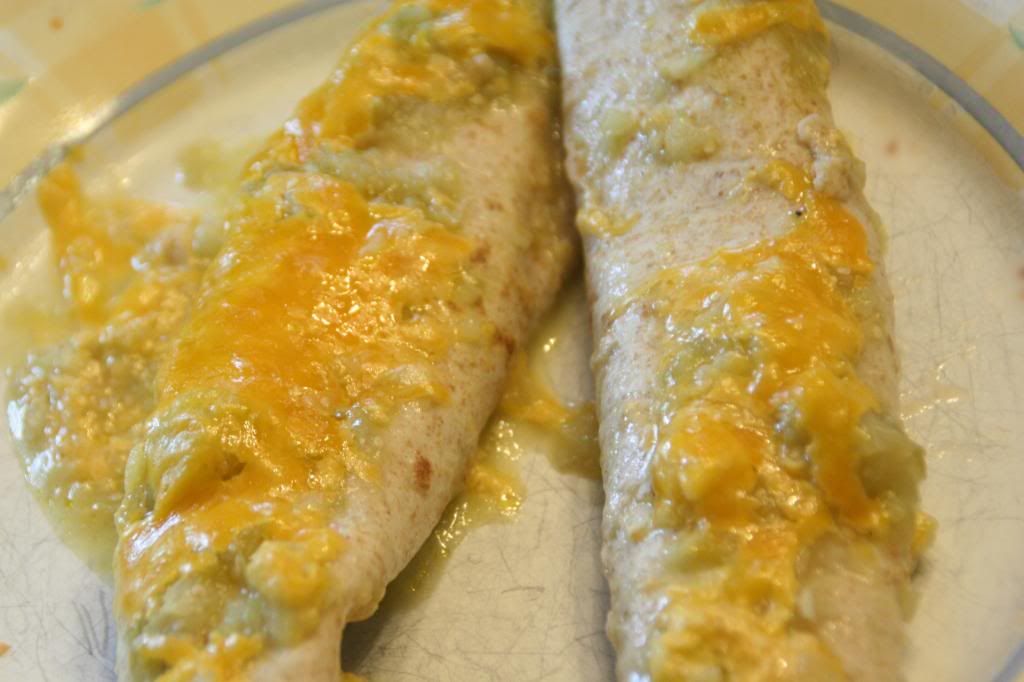
Cheese Enchiladas with Tomatillo Sauce
Enchiladas are a favorite meal in our house. We've tried a whole lot of kinds and ways and sauces, but I think this was the first time I've made them vegetarian. It's funny, because back in the day when we used to eat at On the Border often, I always ordered cheese and onion enchiladas.
We did miss the "heft" of chicken since I did not make Mexican rice to go alongside these, but they are super tasty, though they do look messy above (I cannot for the life of me figure out how to serve enchiladas in a visually pleasing way; anyone with help on this?).
This Martha Stewart recipe offered three choices for enchilada sauces and I obviously chose the tomatillo, though I seriously cut the amount of jalapeno in it. I look forward to trying the other sauces on enchiladas sometime soon!
Cheese Enchilada Casserole with Tomatillo Enchilada Sauce Source: Everyday Food March 2011
Ingredients
- 1 1/2 cups Tomatillo Enchilada Sauce (see below)
- 8 fajita sized flour tortillas
- 2 cups shredded cheddar cheese
- Diced onion, avocado, chopped cilantro, cheese, or sour cream (optional), for serving
Directions
- Preheat oven to 350 degrees. Pour 1 cup sauce into a wide, shallow bowl. Working with one at a time, dip tortillas in sauce, shaking off excess, then sprinkle 1/4 cup cheese down center. Roll tortilla around cheese and arrange, seam side down, in 8-inch square baking dish. Top with 1/2 cup sauce. Cover tightly with foil and bake until heated through, 10 minutes. Serve with desired toppings.
For Sauce
- 1 pound tomatillos, husks removed
- 1 cup diced white onion
- 1 garlic clove
- 1 jalapeno, quartered (seeded if desired)
- 1 cup water
- Coarse salt and ground pepper
- 1 tablespoon vegetable oil
- 1/4 cup chopped fresh cilantro
- 1 teaspoon white vinegar
- Pinch of sugar
Directions
-
In a medium pot of boiling salted water, cook tomatillos
until tender, 10 to 15 minutes. Drain tomatillos and transfer to a
blender; add onion, clove, jalapeno, and water. Puree until smooth. (Use
caution when blending hot liquids: Remove cap from lid and cover
opening with a dish towel.) Season with salt and pepper. In pot, heat
oil over high until shimmering. Add tomatillo mixture and simmer,
stirring occasionally, until thickened, 5 to 10 minutes. Remove from
heat and stir in cilantro, vinegar, and sugar. Season to taste with salt
and pepper.
Thursday, March 14, 2013
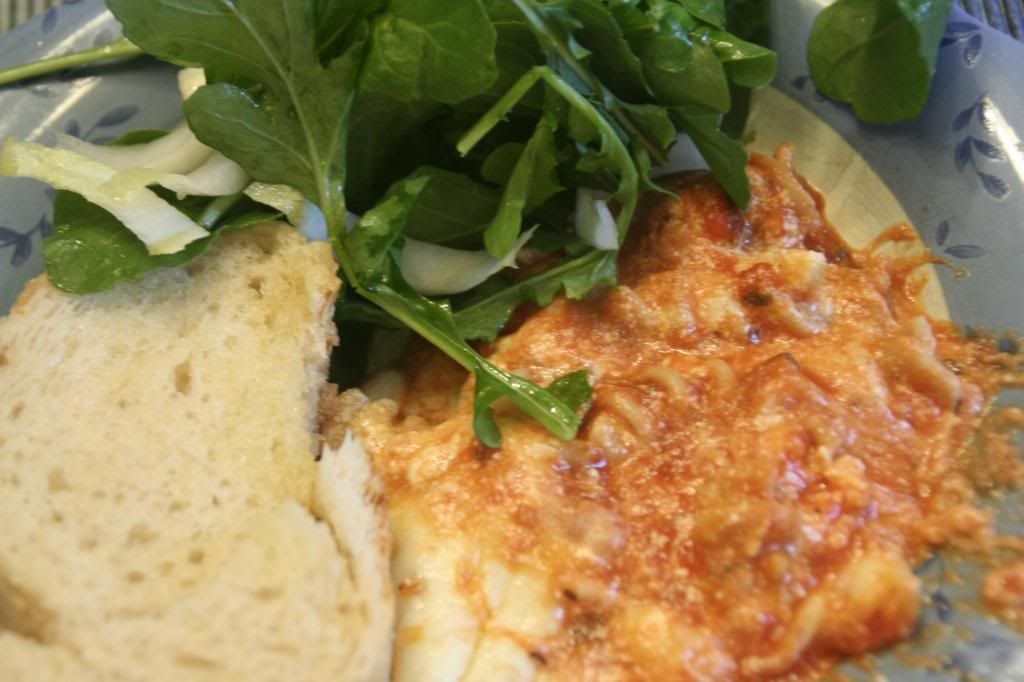
Baked Ziti with Italian Salad and Garlic Bread
My husband doesn't like baked ziti. He'll get it down, but it isn't a favorite. Nevertheless, I love it and add it to the meal plan on occasion. So you know it was a hit when he declared it delicious and that I could make it again.
It's surprising to me, since there's really not much that's different from my typical method of making baked ziti, although it could be as simple as the choice of sauce (I used our store's brand of tomato basil sauce), but I agreed that this was particularly tasty. It could also be that I used a bit more than normal of mozzarella inside the ziti.
The salad, on the other hand, was not a hit. I felt the peppery flavor of the arugula was too much and there wasn't anything else in there to balance it out. The dressing, of course, was easy and delicious, and this meal serves to demonstrate how easy it can be to get a good and balanced meal while making the best use of your cooking time.
Speaking of which, I recently read in Rachael Ray Everyday magazine that it takes less time to make garlic bread from scratch than it does to prepare frozen premade garlic bread. The magazine DIDN'T note the difference in hands-on time, which is important, but in this meal, there's plenty of time while things are cooking to handle the bread preparation as well as the salad work.
Baked Ziti with Italian Salad and Garlic Bread Source: Martha Stewart
It's surprising to me, since there's really not much that's different from my typical method of making baked ziti, although it could be as simple as the choice of sauce (I used our store's brand of tomato basil sauce), but I agreed that this was particularly tasty. It could also be that I used a bit more than normal of mozzarella inside the ziti.
The salad, on the other hand, was not a hit. I felt the peppery flavor of the arugula was too much and there wasn't anything else in there to balance it out. The dressing, of course, was easy and delicious, and this meal serves to demonstrate how easy it can be to get a good and balanced meal while making the best use of your cooking time.
Speaking of which, I recently read in Rachael Ray Everyday magazine that it takes less time to make garlic bread from scratch than it does to prepare frozen premade garlic bread. The magazine DIDN'T note the difference in hands-on time, which is important, but in this meal, there's plenty of time while things are cooking to handle the bread preparation as well as the salad work.
Baked Ziti with Italian Salad and Garlic Bread Source: Martha Stewart
- Coarse salt and ground pepper
- 8 ounces ziti rigate (ridged) or other short pasta
- 1 cup part-skim ricotta
- 1 large egg
- 3/4 cup finely grated Parmesan
- 1-1/2 cup shredded part-skim mozzarella
- 1 jar (24 to 26 ounces) best-quality tomato sauce (about 3 1/2 cups)
- 1/2 loaf Italian bread (5 ounces)
- 2 tablespoons butter, melted
- 2 garlic cloves, minced
- 1 tablespoon sherry vinegar or red-wine vinegar
- 1 tablespoon olive oil
- 1 head Belgian endive, stem end trimmed, thinly sliced
- 3/4 of a bag of baby arugula
Directions
-
Preheat oven to 450 degrees. Cook pasta according to package directions for al dente or less soft. Set aside.
-
Combine ricotta, egg, 1/4 cup Parmesan, and 1 cup of the mozzarella; set aside.
-
In the bottom of a square casserole dish, make a layer of tomato sauce with about half the jar. Layer cooked pasta, cheese mixture, then remaining
sauce. Top with remaining cheeses. Cook in preheated oven until melty and bubbly; 25-30 minutes.
-
Meanwhile, prepare garlic bread: Cut the bread, without cutting through the bottom, into slices that are about 1/2" thick. Combine melty butter and chopped garlic, then brush garlic butter between cuts in bread. Wrap in
aluminum foil; bake during last 10 minutes of baking the casserole.
-
Next, make the salad: Make dressing by whisking together vinegar and oil; season with
salt and pepper. Add endive and arugula, and toss to coat.
- Serve altogether and enjoy!
Sunday, March 10, 2013
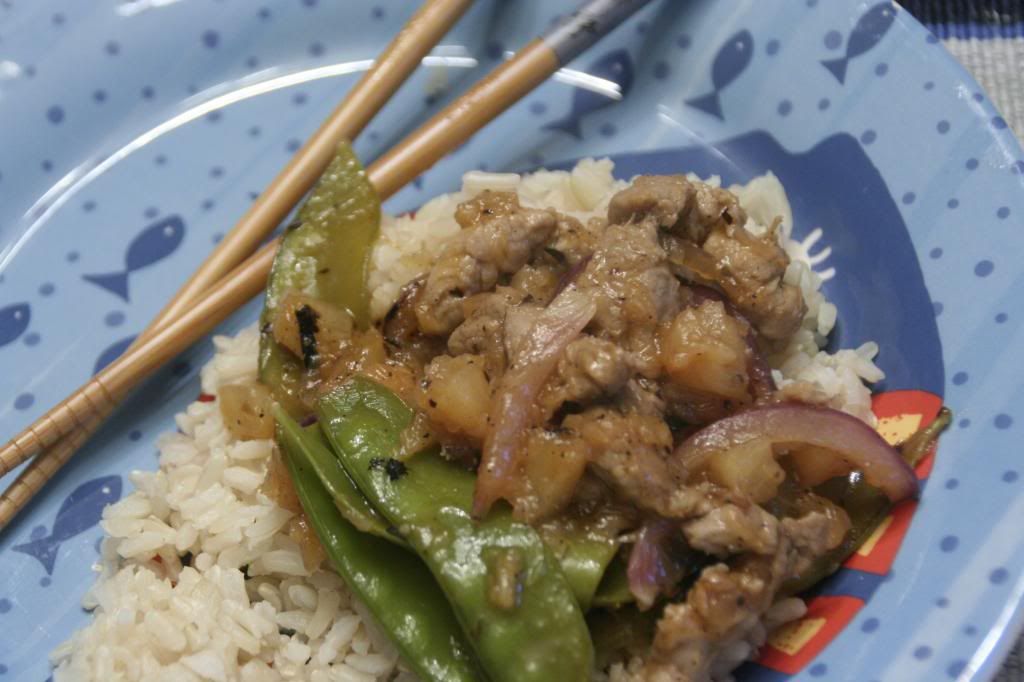
Stir Fried Pork and Snow Peas with Sweet and Sour Sauce
I've blogged this one before, but the photo wasn't great and it's been quite awhile so here we go.
That time, I tried doing the whole stir fry by myself, only to discover I kept burning stuff after following the instructions to multitask. This time, I got wise and asked my husband to man the stove while I did some of the other prep work. As a result, this turned out perfect!
It was super sweet; next time, I will probably cut the sugar in the sauce by half. Because it was sweet, though, my sons seemed to really enjoy it. So, we'll mark it as a kid pleaser!
Stir Fried Pork and Snow Peas with Sweet and Sour SauceSource: The Best 30 Minute Recipe Cook's Illustrated, viaSearchable Recipe Database
Making the minutes Count:
Prepare the suce while the pork cooks. Mince the garlic and grate the ginger while the vegetables cook.
Stir-fry Pork and prepare sauce: Toss pork with soy sauce. Heat 2 teaspoons of oil in 12 inch nonstick skillet over high heat until just smoking. Add pork and cook, stirring occasionally and breaking up clumps, until lightly browned, about 3minutes. (While pork cooks, prrepare sauce.) Transfer pork to clean bowl
Stir-Fry Vegetables and Pineapple. Add 1 more tablespoon of oil to pan and return to high heat until shimmering. Add onion and snow peas and cook, stirring frequently, until softened, about 3 minutes. Add pineapple and cook until warmed through
Combine and Simmer: Clear center of pan and add remainineg 1 teaspoon oil, garlic, and gingner. Cook, mashing garlic mixture into pan with bakck of spatula, until fragrant, about 30 seconds. Stir in cooked pork. Whisk sauce to recombine, add it to pan, and bring to simmer. Cook until sauce thickens, 1 to 2 minutes. Serve immediately.
Sweet and Sour Sauce
6T red wine vinegar
6T orange juice
6T sugar
3T ketchup
1t cornstarch
1/2t salt
Using a medium bowl, mix all ingredients.
That time, I tried doing the whole stir fry by myself, only to discover I kept burning stuff after following the instructions to multitask. This time, I got wise and asked my husband to man the stove while I did some of the other prep work. As a result, this turned out perfect!
It was super sweet; next time, I will probably cut the sugar in the sauce by half. Because it was sweet, though, my sons seemed to really enjoy it. So, we'll mark it as a kid pleaser!
Stir Fried Pork and Snow Peas with Sweet and Sour SauceSource: The Best 30 Minute Recipe Cook's Illustrated, viaSearchable Recipe Database
| 1 pound | Pork tenderloin, cut into thin strips |
| 2 teaspoons | soy sauce |
| 2 tablespoons | vegetable oil |
| 1 recipe | Sweet-and Sour Sauce (see below) |
| 1 | red onion, sliced thin |
| 6 ounces | snow peas, strings removed |
| 1 20-ounce can | diced pineapple, drained |
| 3 cloves | garlic, minced |
| 1 tablespoon | fresh ginger, grated |
Prepare the suce while the pork cooks. Mince the garlic and grate the ginger while the vegetables cook.
Stir-fry Pork and prepare sauce: Toss pork with soy sauce. Heat 2 teaspoons of oil in 12 inch nonstick skillet over high heat until just smoking. Add pork and cook, stirring occasionally and breaking up clumps, until lightly browned, about 3minutes. (While pork cooks, prrepare sauce.) Transfer pork to clean bowl
Stir-Fry Vegetables and Pineapple. Add 1 more tablespoon of oil to pan and return to high heat until shimmering. Add onion and snow peas and cook, stirring frequently, until softened, about 3 minutes. Add pineapple and cook until warmed through
Combine and Simmer: Clear center of pan and add remainineg 1 teaspoon oil, garlic, and gingner. Cook, mashing garlic mixture into pan with bakck of spatula, until fragrant, about 30 seconds. Stir in cooked pork. Whisk sauce to recombine, add it to pan, and bring to simmer. Cook until sauce thickens, 1 to 2 minutes. Serve immediately.
Sweet and Sour Sauce
6T red wine vinegar
6T orange juice
6T sugar
3T ketchup
1t cornstarch
1/2t salt
Using a medium bowl, mix all ingredients.
Saturday, March 9, 2013
Slow Cooker Pineapple Chicken and Quesadilla!
Ah Pinterest, what a joy to play and find new foods!
While I've been trying to eat "clean" (no extra or processed stuff in our food), it hasn't always been tasty, easy, or fun. But when I saw this recipe on Pinterest, I knew I'd be trying it soon. I wasn't sure what I'd do with the zucchini since my husband does not eat it, but went ahead and made it easy by chunking it; next time, I will grate it since neither my husband NOR my children ate it and I noted that it really didn't have a zucchini flavor.
This was so easy to toss together that I was able to make it in the always crazy before work morning (of course, grating the zucchini will take longer). It came out very tasty, but we both felt that it wasn't very filling. My husband got the awesome idea to drain some of the liquid off, add some grated Monterey Jack cheese, and turn it into a quesadilla. Not as much on the clean eating side, but way better than a lot of other meals we could have had instead! And it was super delicious this way too, as well as way more appealing to the kidlets.
So, give this easy and tasty chicken a try... and turn your leftovers into a tasty quesadilla for lunch!
Slow Cooker Pineapple Chicken Source: The Gracious Pantry
- 2 large boneless, skinless chicken breasts, trimmed
- 1 (12 ounce) jar of your favorite salsa (I used Spike's medium and it worked well; even for my "it's too spicy" boys!)
- 1 raw zucchini, halved, quartered, then sliced (shredding works too)
- 1/4 medium, fresh pineapple, cut into chunks
Directions:
- Cook chicken and salsa together in your slow cooker on low for 4-6 hours, until chicken shreds easily.
- Pull the chicken apart using two forks and stir in your raw zucchini and fresh pineapple.
- Serve!
Friday, March 8, 2013
Artichoke Pasta
I am good at meal planning and grocery list making. Sticking to the meal plan, however, tends to be a problem. The other night, I planned to make something and came home to discover I forgot to buy one ingredient and had planned (and forgotten) to go to another store for a different one. Nothing was defrosted and frozen ravioli looked to be the night's meal.
Then I remembered my friend Lishie having posted a delicious looking meal for which I had all ingredients earlier in the day. Like many pasta based dishes, it seemed like it would be fast, so I took out everything and started cooking.
The kids weren't super enthused about this one, but my husband and I enjoyed it a lot. Not only was it delicious, but it was also super fast. Like 15 minutes fast. I omitted the bacon, which surely would make this even more fantastic though would also add to the cooking time. I loved the artichoke, the flavors, and the cheesiness. I wish I'd used less pasta, though, because it was sort of overwhelming and made a TON of leftovers. No complaints from this girl, who will be enjoying this one for lunches for a few days!
This would be delicious with some cream......
Artichoke Pasta very slightly adapted from Delish
Meanwhile, heat the olive oil until shimmering over medium heat. Add the shallot and cook for a minute. Add the artichokes; cook about three minutes. Add the tomatoes and the garlic. Allow to simmer for about fifteen minutes, stirring occesionally. Stir in the mozzarella until melty and gooey. Top with grated parmesan and enjoy!
Then I remembered my friend Lishie having posted a delicious looking meal for which I had all ingredients earlier in the day. Like many pasta based dishes, it seemed like it would be fast, so I took out everything and started cooking.
The kids weren't super enthused about this one, but my husband and I enjoyed it a lot. Not only was it delicious, but it was also super fast. Like 15 minutes fast. I omitted the bacon, which surely would make this even more fantastic though would also add to the cooking time. I loved the artichoke, the flavors, and the cheesiness. I wish I'd used less pasta, though, because it was sort of overwhelming and made a TON of leftovers. No complaints from this girl, who will be enjoying this one for lunches for a few days!
This would be delicious with some cream......
Artichoke Pasta very slightly adapted from Delish
- 1 lb. medium pasta shells
- 1 T olive oil
- 1 shallot, chopped
- 1 package frozen artichokes, defrosted
- 1 can diced tomatoes with juice
- 1 clove of garlic, minced
- 1/4 c shredded mozzarella
- grated parmesan, optional
Meanwhile, heat the olive oil until shimmering over medium heat. Add the shallot and cook for a minute. Add the artichokes; cook about three minutes. Add the tomatoes and the garlic. Allow to simmer for about fifteen minutes, stirring occesionally. Stir in the mozzarella until melty and gooey. Top with grated parmesan and enjoy!
Monday, December 10, 2012
Meal Plan
Monday:
B
L: Ladybug Pasta
D: Chicken Parm Subs
Tuesday:
B:
L: Apple Sandwich, Tortilla Pinwheel, Fruit Kabobs
D: Sweet and Sour chicken
Wednesday:
B:
L: Pita Pizza
D: Chicken Nuggets
Thursday:
B:
L: Veggie Quesadilla
D: I'm going to Radio City!! The boys are going to Pizza Hut (I guess the rest of the week is pretty healthful, so....)
Friday:
B:
L: Caprese Pasta
D: Separate ways
Saturday:
D: Out at a party!
Sunday:
D: Morrocan Fish with Mango and Couscous
Have a great week! I'm shooting for at least one post this week. We shall see!
B
L: Ladybug Pasta
D: Chicken Parm Subs
Tuesday:
B:
L: Apple Sandwich, Tortilla Pinwheel, Fruit Kabobs
D: Sweet and Sour chicken
Wednesday:
B:
L: Pita Pizza
D: Chicken Nuggets
Thursday:
B:
L: Veggie Quesadilla
D: I'm going to Radio City!! The boys are going to Pizza Hut (I guess the rest of the week is pretty healthful, so....)
Friday:
B:
L: Caprese Pasta
D: Separate ways
Saturday:
D: Out at a party!
Sunday:
D: Morrocan Fish with Mango and Couscous
Have a great week! I'm shooting for at least one post this week. We shall see!
Subscribe to:
Posts (Atom)