Showing posts with label Pasta. Show all posts

Monday, February 10, 2014

Meatless Monday: Baked lemon orzo


It's no secret that my kids are gonzo for Mac and Cheese, so when I saw this recipe, I figured it would be a more sophisticated version of mac and cheese for us to try.  It also happened that I was reading a book, and "orzo" was the hip new thing, in the early 80s.  So, it was clearly Kismet for us to give this a go.

As for the result, I liked it, but wasn't super jazzed about it.  I took it for lunch leftovers (as written, it makes a LOT) but it was really missing some pizzazz.  Definitely a good side dish, though I'm certainly not likely to put this much time and effort into a side dish.

But, maybe it's for you or you can think of a way to get this suited to your family's tastes better!  (Side note:  I did skip the bread crumb topping, which could have been my problem here)

Baked Asiago and Lemon Orzo Source:  Sarcastic Cooking
Ingredients
  • For the Pasta:
  • 1 Pound Orzo Pasta
  • ¼ Cup Unsalted Butter, plus more for greasing
  • ½ Cup Diced Yellow Onion
  • 1 Clove Garlic, grated
  • ¼ Cup All-Purpose Flour
  • 1 Cup Milk
  • 1 ½ Cup Shredded Asiago Cheese, plus more for topping
  • Zest of 1 Lemon
  • 1 Tablespoon Fresh Chopped Dill
  • 2 Tablespoons Lemon Juice
  • 1 Teaspoon Salt
  • ½ Teaspoon Pepper
  • Pinch of Crushed Red Pepper Flakes
  • For the Topping:
  • 1 Cup Cubed Stale Bread
  • 3 Tablespoons Unsalted Butter
Instructions
  1. Preheat the oven to 350 degrees F.
  2. Bring a large pot of salted water to a boil. Add orzo, cook according to packaging.
  3. Melt butter in a small saucepan over medium heat. Add onion, sauté for two minutes until translucent. Add garlic, stir to combine. Sauté an additional minute.
  4. Add the flour to the saucepan. Whisk to combine flour and butter. Cook for one to two minutes.
  5. Slowly pour in the milk, while stirring/whisking. Stir/whisk until the sauce and roux are totally combined.
  6. At this time the pasta should be ready to be drained. Drain pasta and set off to the side.
  7. Add the cheese to the sauce, stir, and cook until completely melted. Turn off the heat and stir in all the seasonings, zest, dill, and lemon juice.
  8. Grease a large 9×11 inch baking dish with butter. Add pasta to the baking dish, pour sauce over the pasta, and stir to evenly coat all the orzo with sauce.
  9. In a food processor, pulse the stale bread until a medium/fine crumb is formed. It doesn’t have to be uniform.
  10. In a small skillet, heat butter over medium/high heat until it melts. The butter will crackle and foam and then start to slowly turn brown. Once the butter starts to turn brown, add in the breadcrumbs and stir. Cook for another minute or two and then remove from heat.
  11. Pour the brown butter breadcrumbs over the cheesy orzo along with a little bit more shredded asiago and parmesan cheese.
  12. Bake in the oven uncovered for 20 minutes. Let sit for three to five minutes before serving.
  13. Store pasta in an airtight container in the refrigerator for up to four days. Reheat in microwave or oven.

Saturday, February 8, 2014

Chili mac


Ah the days of school lunches.  According to my son, a lot of my favorite lunches still grace the cafeteria (chicken patty, anyone?), so it was with fond memories that I stumbled across this recipe in the midst of a clean eating challenge.  Of course my beloved chicken patty was not real food, and it's likely even worse now, but I can make chili mac with all real ingredients, and it will be delicious too.

All three boys enjoyed this too, though the two youngest of them have this thing about onions lately, and spent more time picking onions out than enjoying.  I enjoyed it for several days after as lunch, and the boys even asked for it in the lunchboxes one day.

Clean Eating Chili Mac Source:  The Gracious Pantry

Ingredients:

  • 1 1/2 pounds lean, ground turkey
  • 2 teaspoons coconut oil
  • 1 medium onion, diced
  • 1 tablespoon garlic powder (or 8 fresh cloves, minced)
  • 1 tablespoon chili powder
  • 1 tablespoon cumin
  • 1 teaspoon cinnamon
  • 1 teaspoon coriander
  • 1 (15 ounce) can tomato sauce, no sugar added, low sodium is best
  • 1 cup water
  • Whole grain macaroni, cooked to package directions (I used half a box)
  • Salt to taste
  • Parmesan cheese for garnish

Directions:

  1. In a medium to large soup pot, cook the turkey in the oil.
  2. When the meat is about half way cooked, stir in all the spices.
  3. When the meat is finished cooking, stir in the pasta and remaining ingredients.
  4. Serve topped with parmesan cheese.

Sunday, February 2, 2014

Shrimp Penne Rosa


Happy Super Bowl Sunday!  I hope you have great plans for Game Day; we'll probably watch a little of the game with the boys but otherwise have no plans.

I'm feeling in a food rut.  This is particularly true for my own breakfasts and lunches, but it's applying to dinners around here too.  So I turned to some past recipe swaps for inspiration.  This recipe, shared by Becoming Pigzilla seemed rut breaking so I gave it a go.  I liked that it called for some different ingredients than I've been using lately (though it seems like nearly everything has been served with pasta lately), and it's fairly clean too.  

This was pretty good, but probably would have been kicked up a notch if I'd added more red pepper flakes (which I don't do for my boys' sake, but could have amped up the flavor here) and I also used two rather than three tomatoes; I definitely wish I'd used three.

Shrimp Penne Rosa as seen on Becoming Pigzilla
Ingredients:
12 oz whole wheat penne pasta
olive oil
8 oz button mushrooms, sliced
4 cloves garlic, sliced thin
1/2 tbsp red pepper flakes
2 large or 3 medium tomatoes, chopped
salt and pepper
1 lb raw shrimp, peeled and deveined
1/2 cup dry white wine
9 oz fresh spinach, rinsed and dried
1/2 cup marinara sauce
1/3 cup plain non-fat Greek yogurt
handful of basil leaves, roughly chopped
1/4 cup parmesan cheese
Directions:
1. Cook penne according to package directions.  Drain and set aside.
2. In a large deep skillet, heat oil over medium-low heat.  Add mushrooms and cook until they begin to soften stirring frequently, about 5-8 minutes.  Add garlic, red pepper flakes and tomatoes and cook until garlic becomes fragrant, about 1 minute.  Salt and pepper to taste.
3. Increase heat to medium and add shrimp.  Add white wine and cook until shrimp become bright pink and are almost cooked through (don’t worry, they’ll continue to cook), about 4 minutes.  Turn off heat.  Stir in spinach and cover.
4. Meanwhile, in a small bowl, mix together marinara sauce and Greek yogurt.  Once spinach has wilted, add sauce to pan and turn heat back on low.  Add in pasta and stir until well combined.  Stir in basil.  Serve and garnish with parmesan cheese.

Saturday, July 13, 2013

Tortellini spinach Bake in Lemon Cream Sauce

I'm not sure how I stumbled across this one, but it's likely something I found on Pinterest.  It looks like a mess, but it's delicious.  I was actually talking with a man at the pizza place about it; he asked the checkout girl if people ordered a lemon cream sauce because it sounded strange, and I chimed in that I'd made one and that it was so light and fresh and summery.  A definite must try.

This is the same, but add in the freshness of spinach and you're in for a treat.  Then it also has bacon!  I billed this to my kids as special mac and cheese, and it is in a lot ways.  The preparation is basically the same, though the pasta and other add ins are a little different.

Tortellini Spinach Bake in Creamy Lemon Sauce Source:  Our Best Bites

12 oz bag Barilla Cheese & Spinach Tortelini
 4 oz bacon or pancetta, (about 4 strips bacon)*
3 cloves garlic, pressed in garlic press or finely minced
2 Tbs flour
2 C milk
¾ tsp kosher salt
⅛ tsp black pepper
1 1/2 tsp dry basil
¼ tsp red pepper flakes (1/2 tsp or more if you like spicy)
1 medium lemon, zested and juiced
2 C loosely packed fresh spinach, roughly chopped
¾ C grated mozzarella cheese, divided
¾ C grated Parmesan cheese, divided

  1. Preheat oven to 350 degrees.  Cook pasta according to package directions.  Drain.
  2. Cook bacon until crisp; drain on paper towels.  Reserve two tablespoons bacon grease and discard the rest.
  3. Add garlic to bacon grease and cook until fragrant, about 1 minute.  Whisk in flour and cook for about a minute.  Add milk, continuing to whisk until smooth.  Add basil, red pepper flakes, salt, and pepper and stir.  Bring to a simmer.  Add 2 teaspoons lemon zest and 1 tablespoon lemon juice.  Continue to stir until thickened, about 2-3 minutes.  Remove from heat.
  4. Reserve all but 1 tablespoon of the bacon and add the rest to the pasta.  Add spinach, 1/2c mozzarella, and 1/2c Parmesan, then add sauce.  Stir gently.
  5. Transfer to an 8x8 or 9x9 baking dish.  Top with remaining cheese and bacon.  Cover with foil and bake 20 minutes.  Remove foil and bake until cheese is melted and pasta is bubbly, about 5-10 minutes.    Allow to cool for 10 minutes before serving.
*Omit bacon to make a vegetarian meal.

Monday, March 18, 2013

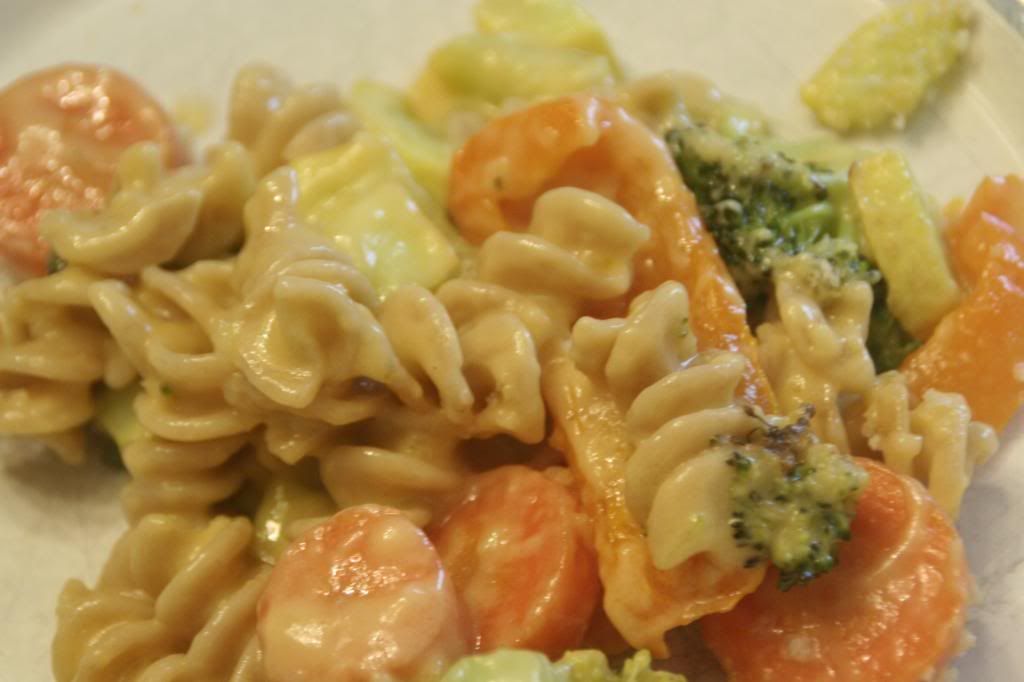
Not so spicy Roasted Vegetable Macaroni and Cheese

My sons are huge mac and cheese fans.  In fact, a recent diner trip resulted in a slight tantrum when they did not have mac and cheese on the menu.  So when I found this recipe that combined the deliciousness of roasted vegetables with the comfort of macaroni and cheese, I jumped on the opportunity.

It earned a "it's ok" rating from my husband, who does not like macaroni and cheese, but I enjoyed it very much.  The boys had mixed reactions, between super happy to have mac and cheese to "I refuse to eat vegetables," which a quickly forced no apple until you eat some veggies fixed when he realized they were sweet and delicious.

I will admit that this made a lot of dishes, which didn't really make anyone happy, but I was really happy with the outcome and will probably double it for leftovers next time.

Roasted Vegetable Macaroni and Cheese Adapted from  The Comfort of Cooking
Ingredients
1 cup broccoli florets, chopped into small chunks
1/2 red pepper, sliced
1 yellow squash, quartered and diced
2 carrots, sliced thinly
2 cups whole wheat pasta (elbow macaroni, rotini, penne, etc.)
1/4 cup plus 1T olive oil, divided
1 garlic clove, minced
3 Tbsp. all-purpose flour
1 1/2 cups milk
2 cups (8oz) shredded cheddar cheese
Salt and pepper, to taste
2 Tbsp. panko breadcrumbs

Directions
Preheat oven to 400 degrees F. Cook pasta according to package directions; drain and set aside.  Prepare a baking sheet by either covering it with silpat or foil.

Toss veggies with 1T olive oil on the baking sheet. Bake for 20 minutes, or until vegetables have softened, stirring occasionally. Remove from oven and set aside.
  
Meanwhile, heat remaining oil in a large skillet over medium heat. When shimmering, add garlic and cook 30 seconds. Whisk in flour and cook 1 minute (careful it doesn't burn). Gradually whisk in milk, stirring constantly until mixture is slightly thickened. Remove from heat. Stir in cheddar cheese until well distributed and melted, then add macaroni and vegetables.

Place mixture in a large casserole dish and sprinkle with panko breadcrumbs. Place under the broiler in your oven (500 degrees) for 3-4 minutes, or until the top is golden brown.

Dig in!

Thursday, March 14, 2013

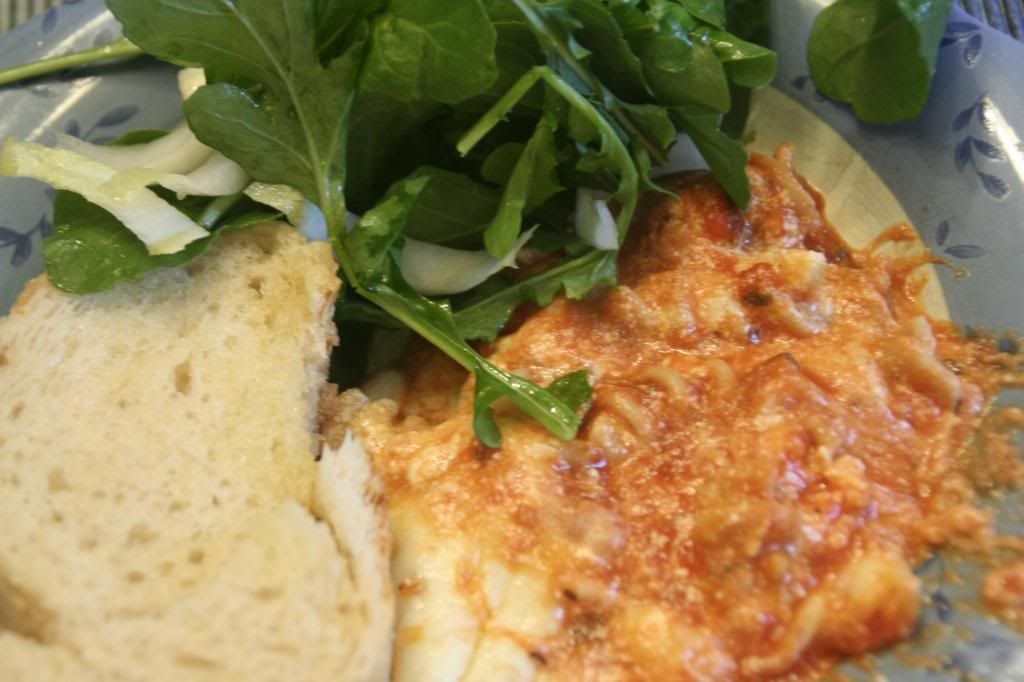
Baked Ziti with Italian Salad and Garlic Bread

My husband doesn't like baked ziti.  He'll get it down, but it isn't a favorite.  Nevertheless, I love it and add it to the meal plan on occasion.  So you know it was a hit when he declared it delicious and that I could make it again.

It's surprising to me, since there's really not much that's different from my typical method of making baked ziti, although it could be as simple as the choice of sauce (I used our store's brand of tomato basil sauce), but I agreed that this was particularly tasty.  It could also be that I used a bit more than normal of mozzarella inside the ziti.

The salad, on the other hand, was not a hit.  I felt the peppery flavor of the arugula was too much and there wasn't anything else in there to balance it out.  The dressing, of course, was easy and delicious, and this meal serves to demonstrate how easy it can be to get a good and balanced meal while making the best use of your cooking time. 

Speaking of which, I recently read in Rachael Ray Everyday magazine that it takes less time to make garlic bread from scratch than it does to prepare frozen premade garlic bread.  The magazine DIDN'T note the difference in hands-on time, which is important, but in this meal, there's plenty of time while things are cooking to handle the bread preparation as well as the salad work.

Baked Ziti with Italian Salad and Garlic Bread Source:  Martha Stewart
  • Coarse salt and ground pepper
  • 8 ounces ziti rigate (ridged) or other short pasta
  • 1 cup part-skim ricotta
  • 1 large egg
  • 3/4 cup finely grated Parmesan
  • 1-1/2 cup shredded part-skim mozzarella
  • 1 jar (24 to 26 ounces) best-quality tomato sauce (about 3 1/2 cups)
  • 1/2 loaf Italian bread (5 ounces)
  • 2 tablespoons butter, melted
  • 2 garlic cloves, minced
  • 1 tablespoon sherry vinegar or red-wine vinegar
  • 1 tablespoon olive oil
  • 1 head Belgian endive, stem end trimmed, thinly sliced
  • 3/4 of a bag of baby arugula

Directions

  1. Preheat oven to 450 degrees. Cook pasta according to package directions for al dente or less soft.  Set aside.
  2. Combine ricotta, egg, 1/4 cup Parmesan, and 1 cup of the mozzarella; set aside.
  3. In the bottom of a square casserole dish, make a layer of tomato sauce with about half the jar. Layer cooked pasta, cheese mixture, then remaining sauce. Top with remaining cheeses. Cook in preheated oven until melty and bubbly; 25-30 minutes.
  4. Meanwhile, prepare garlic bread: Cut the bread, without cutting through the bottom, into slices that are about 1/2" thick. Combine melty butter and chopped garlic, then brush garlic butter between cuts in bread. Wrap in aluminum foil; bake during last 10 minutes of baking the casserole.
  5. Next, make the salad:  Make dressing by whisking together vinegar and oil; season with salt and pepper. Add endive and arugula, and toss to coat.
     
  6.  Serve altogether and enjoy!

Friday, March 8, 2013

Artichoke Pasta

I am good at meal planning and grocery list making.  Sticking to the meal plan, however, tends to be a problem.  The other night, I planned to make something and came home to discover I forgot to buy one ingredient and had planned (and forgotten) to go to another store for a different one.  Nothing was defrosted and frozen ravioli looked to be the night's meal.


Then I remembered my friend Lishie having posted a delicious looking meal for which I had all ingredients earlier in the day.  Like many pasta based dishes, it seemed like it would be fast, so I took out everything and started cooking.

The kids weren't super enthused about this one, but my husband and I enjoyed it a lot.  Not only was it delicious, but it was also super fast.  Like 15 minutes fast.  I omitted the bacon, which surely would make this even more fantastic though would also add to the cooking time.  I loved the artichoke, the flavors, and the cheesiness.  I wish I'd used less pasta, though, because it was sort of overwhelming and made a TON of leftovers.  No complaints from this girl, who will be enjoying this one for lunches for a few days!

This would be delicious with some cream......

Artichoke Pasta very slightly adapted from Delish


  • 1 lb. medium pasta shells
  • 1 T olive oil
  • 1 shallot, chopped
  • 1 package frozen artichokes, defrosted
  • 1 can diced tomatoes with juice
  • 1 clove of garlic, minced
  • 1/4 c shredded mozzarella
  • grated parmesan, optional
Cook the pasta as directed, to al dente.

Meanwhile, heat the olive oil until shimmering over medium heat.  Add the shallot and cook for a minute. Add the artichokes; cook about three minutes. Add the tomatoes and the garlic. Allow to simmer for about fifteen minutes, stirring occesionally.  Stir in the mozzarella until melty and gooey. Top with grated parmesan and enjoy!


Sunday, October 21, 2012

Chicken Marsala Pasta

I stumbled across this recipe on Pinterest, and was surprised to find the pin pointing to What's Cooking, Chicago?, since I know of Joelen from a message board.  I was super happy to discover this comes originally from my heroes at America's Test Kitchen, so I knew it would rock.

Rock, indeed.  This was awesome.  It came together super fast (I love how accurate ATK is at getting even disorganized me with food on the table within 30 minutes) and the flavor is amazing.  Everyone in the family enjoyed it, and we're all looking forward to having the leftovers for lunch this week.

My photo is horrible, and for that I apologize, but go check out Joelen's photo, which is as amazing as the dinner!

Creamy Marsala Pasta Source:  America's Test Kitchen via What's Cooking, Chicago?
2 large boneless, skinless chicken breasts; cut into bite sized pieces
10-12 ounces sliced mushrooms
1 small onion, diced
3 cloves garlic, minced
3/4 cup Marsala cooking wine
1/2 cup chicken broth
1/2 cup heavy cream
1 pound dry pasta + water for cooking (I used penne, rigatoni is also good)
1 cup Parmesan cheese + more for serving
5 tablespoons unsalted butter
salt and pepper to taste
minced, chopped fresh parsley for garnish


Makes: 4-6 servings

Season chicken with salt and pepper. Melt 1 tablespoon butter in a large skillet until foaming. Cook chicken until lightly browned. Transfer to plate when done.

Boil water and cook pasta according to the directions.

Melt additional 1 tablespoon of butter in skillet, add garlic, mushrooms and onion and cook for about 6 minutes. Add cooked chicken back into the skillet. Add the Marsala, chicken broth and cream and bring to a boil. Simmer until sauce is is slightly thickened.

Drain pasta and reserve 1/2 cup cooking water. Return the pasta  to the pot with the remaining 3 tablespoons of butter. Add the mushrooms and chicken mixture and 1/2 cup of Parmesan cheese and cook until the pasta has absorbed some of the sauce, about 1 minute, adding the reserved cooking water as needed.

Season with salt and pepper and serve with additional Parmesan cheese and a garnish of chopped parsley.

Sunday, April 15, 2012

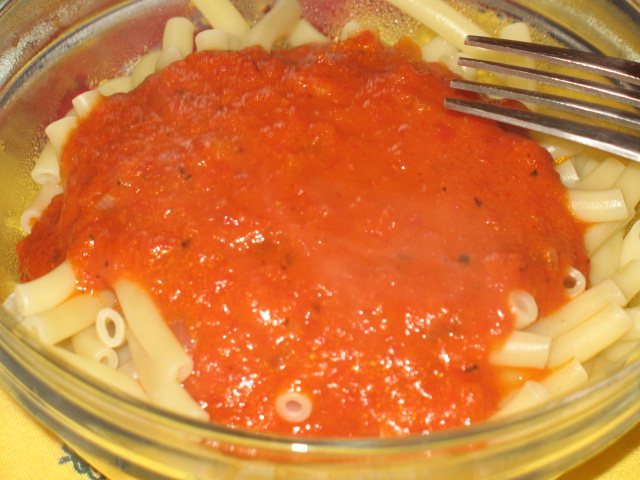
Poverty Meal

In my home, it is difficult to make budget meals.  Typical budget meals include pasta and sauce or ground beef or beans or some combination of the three, and all these are on my husband's "do not prefer" or "will not eat" lists. 

So when I found this meal on Food.com, I figured it would be a good one to try.  It seemed really familiar, like something my mom made when I was a kid, inexpensive even with changing the ground beef for turkey, and delicious.

This wasn't a super success for us, and I think it has to do with the whole wheat pasta more than anything.  It was an off texture for me, and it could probably have cooked a little more; maybe next time I'll cook the pasta a little before tossing it in with the other ingredients, just to take out a little bit of the bite.  Or maybe it calls for regular pasta or a different shape.

Don't make the mistake I did though and avoid using a cast iron skillet!  The crud was so cooked on, I had to scrub the pan with salt for at least half an hour!

Directions:

  1. 1
    Saute onions and garlic in olive oil until translucent.
  2. 2
    Brown ground beef and drain.
  3. 3
    Add ground beef, tomatoes, water, raw macaroni, salt and pepper to the onion and garlic mixture.
  4. 4
    Cook for 15 to 20 minutes or until macaroni is tender.
  5. 5
    If desired, top with Parmesan cheese.
  6. 6
    Serve with crusty bread and a salad.

Friday, March 9, 2012

Mexican Stuffed Shells


When I saw that a message board to which I belong was doing a recipe swap with the theme of pasta, I figured it was time to give it a try again.  I couldn't possibly have been more thrilled than I was when I received Mexican Stuffed Shells from Jaida at Sweet Beginnings; it looked like it would be perfect for my family and definitely something I'd never have considered making on my own... but should have!

When I went to the store, I looked at the taco sauce ingredients and thought, "Self, you can totally make this at home."  So I went to the internet and came across this taco sauce, which was way cheaper than what I'd have bought at the store.  I also used  taco seasoning I made; no packet!

My husband commented that it tasted much better when he ate it with the sour cream, that he liked the creaminess.  This could have been because of my having used turkey which made it drier than if I'd used beef?

Thank you so much to Sarah for hosting; check out her blog for the Roundup!

Mexican Stuffed Shells Source:  Sweet Beginnings

Ingredients
  • 1 lb. ground turkey
  • 2T taco seasoning 
  • 4 oz. Neufchatel cream cheese
  • 14-16 jumbo pasta shells
  • 1.5 cup salsa
  • 1 cup taco sauce (I accidentally used the whole thing)
  • 1 cup shredded cheddar cheese
  • 1 cup shredded Mexican cheese
  • 3 green onions
  • Sour cream
  • Black olives
Preparation
  1. Preheat oven to 350°.
  2. In a frying pan cook ground turkey; add taco seasoning and 1 cup of water and simmer until liquid is almost gone.  Add cream cheese, cover and simmer until cheese is melted. Blend well. Set aside and cool completely. 
  3. While ground turkeyis cooking, cook the pasta shells according to directions; drain. Set shells out individually on cutting board/baking sheet so that they don’t stick together.
  4. Pour salsa on bottom of 9×13 baking dish.  Stuff each shell with the meat mixture. Place shells in 9×13 pan open side up. Cover shells with taco sauce.  Cover with foil and bake for 30 minutes.
  5. After 30 minutes, add shredded cheese and bake for 10-15 more minutes, with the foil removed.  Top with any condiments you’d like (green onions, black olives, etc.) Serve with sour cream and/or more salsa.

Friday, March 2, 2012

Cajun Mac and Cheese

My husband chose this out of the March issue of Food Network Magazine, and upon his first taste, he exclaimed.  Like, yelled out, exclaimed because he liked it so much.  I agreed, this was quite delicious.  The andouille adds a little bit of spice and flavor, without being overwhelmingly spicy.  It was so creamy too, which sort of surprised me.  I used Essence of Emeril, which I had made up for another recipe a few weeks ago.

The bigger boy barely touched his while the littler boy kept coming back for the pasta, but didn't eat any of the rest of it.

Two thumbs up here!!

Cajun Mac and Cheese Source:  Food Network Magazine

  • Kosher salt
  • 12 ounces wagon-wheel pasta
  • 2 tablespoons extra-virgin olive oil
  • 6 ounces andouille sausage, diced
  • 2 bunches scallions, thinly sliced
  • 1 bell pepper (red or green), chopped
  • 1 tablespoon Cajun spice blend
  • 2 tablespoons all-purpose flour
  • 2 cups whole milk
  • 8 ounces sharp cheddar cheese, cut into small cubes

Directions

Bring a pot of salted water to a boil. Add the pasta and cook until al dente, about 1 minute less than the label directs. Reserve 1 cup of the cooking water, then drain the pasta.
Meanwhile, combine the olive oil and sausage in a large skillet over high heat and cook, stirring, until the sausage starts to brown, about 2 minutes. Stir in the scallions and bell pepper and cook until the vegetables are slightly soft, about 3 more minutes. Add the Cajun spice and flour and cook, stirring, 2 more minutes. Gradually whisk in the milk and continue whisking until the sauce is thick and smooth, about 5 more minutes.
Add the pasta, cheese and reserved cooking water to the skillet. Reduce the heat to medium low and cook, tossing to coat the pasta in the sauce and melt the cheese, about 1 minute.

Tuesday, January 10, 2012

Tortellini with Creamy Tomato Sauce


Ahh, Giada.  I love her cookbooks.  Her recipes are usually quite good, when I can get past how overwhelming they sometimes seem.

This wasn't one that overwhelmed; it just looked good.  Everyone loved it in my house, and the leftover sauce (in the book, but not on the website) was excellent in the Crock Pot Lasagna I made that day.  Deliciousness!!  You really have to try the tomato sauce Giada listed in her book; it's incredible.


Tortellini with Creamy Tomato Sauce Source:  Giada's Family Dinners by Giada Di Laurentiis via FoodNetwork.com

Directions

Bring a large pot of salted water to a boil. Add about 1/4 cup olive oil to the water to help prevent pasta from sticking. Add the ravioli and cook until al dente, stirring occasionally, about 5 minutes. Drain the ravioli, reserving 1/2 cup of the cooking water. Toss the ravioli with the remaining oil to coat.
Meanwhile, bring the marinara sauce to a simmer in a medium saucepan over medium heat, whisking often. Whisk in the ricotta and enough reserved cooking water to thin the sauce to desired consistency. For a thicker sauce, use less pasta water; for a thinner sauce, add more water. Return the sauce to a simmer. Season the sauce to taste with salt and pepper.
Spoon 3 tablespoons of sauce over the bottom of each of 6 bowls. Arrange the ravioli over the sauce.Drizzle the remaining sauce over the ravioli. Sprinkle with the Parmesan and the basil, and serve.

Quick Marinara Sauce, from Giada's Family Dinners by Giada Di Laurentiis

2 – 28 oz. cans whole tomatoes in juice
1 bunch fresh basil, stemmed
½ c. good quality olive oil
2 small onions, minced
4 garlic cloves, minced
1 t. dried oregano
1 t. sugar
1 Parmesan rind (if you can find it; ask the ladies in the cheese department if they have some stashed away – optional)
Salt and freshly ground pepper to taste
In a blender, puree the tomatoes with their juice and the basil until almost smooth.  Set the tomato puree aside.
Heat the oil in a large, heavy saucepan over medium heat.  Add the onions and garlic and sauté until very tender, about 12 minutes.  Stir in the tomato puree, oregano, sugar and optional Parmesan rind.  Bring to a simmer over medium-high heat.  Decrease the heat to medium and continue simmering until the sauce thickens slightly, stirring occasionally, about 10 minutes (I usually let mine go about an hour).  Season the sauce to taste with salt and pepper.  Discard Parmesan rind.
The sauce can be made 1 day ahead.  If storing for future use, cool, then cover and refrigerate or freeze.


Monday, December 12, 2011

Skillet Macaroni and Cheese

Have you yet checked out Best 30 Minute Recipes from Cook's Illustrated?  If not, you should do it.  Go to your library, add it to your Christmas list....  I tried a bunch of recipes in the time I had the book, and there was only one that my family wasn't raving about. 

This may be the best macaroni and cheese I've ever made.  My husband, who doesn't really like macaroni and cheese liked it...  that says a lot!  And how many macaroni and cheese recipes do YOU know that really, truly, honestly, absolutely take 30 minutes?  Even if you're a disorganized, odds are good you forgot something, cook like me? 

Skillet Macaroni and Cheese Best 30 Minute Recipes by Cook's Illustrated via Recipe Swap Blog at Syracuse

3½cups water, plus more as needed
1 (12 ounce) can evaporated milk
12 ounces elbow macaroni (3 cups)
Salt and pepper
1 teaspoon cornstarch
½ teaspoon dry mustard
¼teaspoon Tabasco sauce
2 cups shredded cheddar cheese
2 cups shredded Monterey Jack cheese
3 tablespoons unsalted butter
Bring water, 1 cup of evaporated milk, the macaroni and ½teaspoon salt to simmer in 12-inch nonstick skillet over high heat. Cook, stirring often, for 8-10 minutes or until macaroni is tender.
Whisk together remaining ½ cup evaporated milk, cornstarch, mustard and Tabasco, then stir into skillet. Simmer until slightly thickened, about 1 minute.
Take skillet off heat and stir in cheeses, 1 handful at a time. Add additional water if needed, if sauce gets too thick. Stir in butter and season to taste with salt and pepper.
Variations: Add 4 ounces deli-style baked ham, diced medium, and ½ cup frozen peas with the cornstarch mixture in step 2. Or, for spicy mac and cheese, add 2 teaspoons minced chipotle chiles in adobo sauce and 1 (10 ounce) can Rotel tomatoes, drained, with cornstarch mixture in step 2.

Sunday, December 11, 2011

Spanish Roasted Red Pepper Sauce

Recently, a friend of mine had her second baby in less than two years, and was really struggling.  I wanted to bring food to help her out.  Since they are vegetarians, I asked my friend Lishie, who is a former veg and has a veg sister, for some inspiration for food that would travel and/or freeze well.
She gave me a few suggestions, and this is the one I chose.

What a wonderful way to use up or take advantage of the bounty of summer produce.  This was really easy (once I figured out an easy and effective way to roast the peppers) and quite tasty.  It's such a basic recipe, you could easily spice it up by adding some crushed red peppers, or change the flavor with some easy additions (mushrooms?  green peppers?)  Lishie suggested making a lasagna using this sauce, which sounds outrageously good!

Spanish Roasted Red Pepper Sauce Delish

  • 5 red peppers
  • 3 medium tomatoes or 14 oz tomato sauce
  • 1 small Onion, diced
  • Olive Oil
  • 3 TBSp Heavy Cream
  • S & P

Place the red peppers & the tomatoes on a baking sheet & sprinkle with olive oil. Roast them under the broiler until they are blackened, roasted. Allow to cool.


Transfer the veg to the food processor & puree with a little more olive oil.


Meanwhile, saute the onion is a sauce pan on medium-high. Add the pureed mixture & stir. When the sauce is nearly heated through, add the cream. Add S & P to taste.

Saturday, December 10, 2011

Creamy Shiitake Alfredo

Oh, my blog, I've missed you.  I'm sure I'll fall behind again, take pictures of every new thing I make, forget what I thought about them, and be back here again.  At any rate, let's catch up.

A few months ago, the guys at The Bitten Word ran a contest to win a subscription to Everyday Food.  By some stroke of changing luck, I won!  I love this little meal because it's... Everyday and I can even use it... every day.  Not fussy, easy meals, that don't take long to make, complete with beautiful food photography, and a design that, if I had time/interest in scrapbooking, I'd use as inspiration for my scrapbook pages.

This is one recipe I discovered in this magazine.  Of course, their food photography looks a million times better than mine, so see how it's supposed to look in a photograph here.

We really enjoyed this.  The boys weren't nuts about the mushrooms, but my husband and I really loved the flavor they brought.  According to the time stamp on the photo, we had this on October 29.  A while ago.  But I know we liked it.  The recipe states it take 50 minutes from start to finish, and I can't remember at all, but I do know that I made it on a weeknight, so perhaps it wasn't so very bad to do...


Creamy Shiitake Alfredo Everyday Food November 2011

Ingredients

  • Coarse salt and ground pepper
  • 3/4 pound fusilli or other short twisted pasta
  • 2 tablespoons unsalted butter
  • 3 small shallots, thinly sliced
  • 3 garlic cloves, minced
  • 1 pound shiitake mushrooms, stemmed and thinly sliced
  • 2 tablespoons chopped fresh thyme leaves
  • 1/2 cup dry white wine, such as Sauvignon Blanc
  • 3/4 cup heavy cream
  • Grated Parmesan, for serving

Directions

  1. In a large pot of boiling salted water, cook pasta according to package instructions. Drain.
  2. Meanwhile, in a large skillet, melt butter over medium-high. Add shallots and garlic and cook, stirring, until shallots are translucent, about 5 minutes. Add mushrooms and thyme and cook until mushrooms are tender, about 2 minutes. Add wine and cook until liquid is reduced by half, about 2 minutes. Reduce heat to low, stir in cream, and cook until warmed (do not let boil). Season with salt and pepper. Add pasta to skillet, toss to combine, and top with Parmesan.

Tuesday, November 22, 2011

Four Cheese Pasta with Peas and Ham

My husband planned all the meals this week, with intentions of cooking as well, and he did it all through this month's Food Network Magazine. This is one of his choices, though I ended up making it.

This one was a huge hit with my family. The one year old gobbled it up, the four year old thought it was mac and cheese and ate it up, and my husband and I thought it was delicious. It was super creamy and gooey and cheesey, had the right amount of textures, and was really flavorful.

I made a few slight changes, using heavy cream instead of evaporated milk, and honey ham steak instead of deli ham, and I added black pepper at the end. Nothing crazy. But a crazy yummy dinner.


Four Cheese Pasta with Peas and Ham Food Network Magazine, December 2011
Ingredients
Kosher salt
12 ounces penne
1 cup frozen peas
2 large eggs, plus 1 egg white
1 cup evaporated milk
4 tablespoons unsalted butter
3 ounces sharp cheddar cheese, grated (1 scant cup)
3 ounces part-skim mozzarella cheese, grated (about 1 cup)
3 ounces fontina cheese, grated (1 scant cup)
3 ounces deli ham, in 1 piece, diced
1 ounce parmesan cheese, grated (about 1/2 cup)
Directions
Bring a large pot of salted water to a boil. Add the pasta and cook until very al dente, about 8 minutes, adding the peas in the last 2 minutes of cooking.
Meanwhile, whisk the eggs, egg white, evaporated milk and 1/2 teaspoon salt in a bowl.
Drain the pasta and peas; wipe the pot dry and return the pasta and peas to the pot. Add the butter and stir to coat. Add the cheddar, mozzarella, fontina and the egg mixture. Place the pot over medium-low heat and cook, stirring constantly, until thickened, 8 to 10 minutes, adding the ham halfway through cooking (don't let the mixture boil or the eggs will scramble). Remove the pot from the heat and stir in the parmesan.

Saturday, November 5, 2011

Skillet Baked Ziti

I love baked pasta dishes, the cheesier the better.  My husband, on the other hand, generally doesn't like baked pasta.  He can't take it when there are pieces of hard pasta--hitting a piece of it turns him off to the whole dish.  Nevertheless, I went for it when I saw that Cook's Illustrated had a skillet AND baked version of ziti.

It was farking awesome.  It was so fast, so easy, and tasted almost like something you'd get from your local pizza shop.  No hard pasta either, my husband (and my sons) loved it just as much as I did.

Keeper!


Skillet Baked Ziti Source:  The Best 30 Minute Recipe Cook's Illustrated, page 140, via Right in Front of Me

  • 1 Tbsp. olive oil
  • 6 garlic cloves, minced
  • 1/4 tsp. red pepper flakes
  • Table salt and ground black pepper
  • 1 28-oz. can crushed tomatoes
  • 3 cups water
  • 12 oz. ziti (3 3/4 cups) *
  • 1/2 cup heavy cream
  • 1/2 cup grated Parmesan cheese
  • 1/4 cup minced fresh basil leaves
  • 1 cup shredded mozzarella cheese

Combine oil, garlic, pepper flakes, and 1/2 tsp. salt in 12-inch ovensafe nonstick skillet and sauté over medium-high heat until fragrant, about 1 minute.
Add tomatoes, water, ziti, and 1/2 tsp. salt. Cover and cook, stirring often and adjusting heat as needed to maintain a vigorous simmer, until ziti is almost tender, 15 to 18 minutes. (Note: this is a good time to grate your Parmesan and prep your basil.)
Stir in cream, Parmesan, and basil. Season with salt and pepper to taste. Sprinkle mozzarella evenly over ziti. Transfer skillet to oven and bake at 475° until cheese has melted and browned, about 10 minutes.
(Note: if your 12-inch skillet isn’t ovensafe, you can transfer the pasta to a 2-quart casserole dish before sprinkling with mozzarella and baking.)


Wednesday, August 24, 2011

Baked Macaroni and Cheese

My four year old ate the healthiest of his life on our recent trip to Disney.  Every day he had macaroni and cheese--when we forced him to eat something else, he ate either a cheeseburger or hot dog... maybe he ate pizza.  Somehow, all this macaroni and cheese hasn't made him HATE the dish, but now he expects to have it daily. 


Meanwhile, my husband dislikes macaroni and cheese.  I'm not quite sure what it is he doesn't like about it--pasta, good... cheesey goodness, gooooood.  Since I don't really know what it is he doesn't like about it, I keep trying different versions of mac and cheese to try and find one we all will like.

Lately, he's been watching a lot of Good Eats, which combines two of his loves, food and science.  He really likes Alton Brown, so I figured trying his version of macaroni and cheese would be a hit.

I got experimental and tried a new product in this macaroni and cheese.  I went with  Barilla Piccolini Mini Pipe with Carrots and Squash.


The mini pipe was so cute!  I noticed a little bit of an unusual taste when I tasted them without any sauce, and placed it as the sweetness of the squash.  I asked my husband what he thought and he didn't notice a flavor difference, but wondered what was up with the color of the pasta.  Good job, Barilla, for making a tasty pasta that sneaks in some veggies!  (Is it wrong that I really wish it was whole wheat too?)

So, the results of Alton Brown's recipe.  It made a lot a lot a LOT of dishes.  I love macaroni and cheese too, and thought this was very good.  I used about 4 ounces of monterey jack cheese in addition to 8 ounces of cheddar, which may or may not have made an impact.

I thought this was a good, if labor intensive, macaroni and cheese.  I really liked the panko bread crumb crunchies on top.  My four year old ATE DINNER!!  And then he said he didn't like it, because he ONLY likes elbow macaroni in his macaroni and cheese.  Aye.  The one year old loved his and screamed for more.  My husband finished his plate, but said he really didn't like it.

See, this is why I give you everyone's impressions--we ate the exact same meal, and all had different thoughts on it.


Baked Macaroni and Cheese by Alton Brown

Ingredients

  • 1/2 pound elbow macaroni
  • 3 tablespoons butter
  • 3 tablespoons flour
  • 1 tablespoon powdered mustard
  • 3 cups milk
  • 1/2 cup yellow onion, finely diced
  • 1 bay leaf
  • 1/2 teaspoon paprika
  • 1 large egg
  • 12 ounces sharp cheddar, shredded
  • 1 teaspoon kosher salt
  • Fresh black pepper

Topping:

Directions

Preheat oven to 350 degrees F.
In a large pot of boiling, salted water cook the pasta to al dente.
While the pasta is cooking, in a separate pot, melt the butter. Whisk in the flour and mustard and keep it moving for about five minutes. Make sure it's free of lumps. Stir in the milk, onion, bay leaf, and paprika. Simmer for ten minutes and remove the bay leaf.
Temper in the egg**. Stir in 3/4 of the cheese. Season with salt and pepper. Fold the macaroni into the mix and pour into a 2-quart casserole dish. Top with remaining cheese.
Melt the butter in a saute pan and toss the bread crumbs to coat. Top the macaroni with the bread crumbs. Bake for 30 minutes. Remove from oven and rest for five minutes before serving.


**To temper an egg, crack the egg into a bowl, mix it up with a fork, then add some of the hot stuff (that's called a roulx), mix it in, then add it all SLOWLY back into the original pot.  This keeps the egg from scrambling!**

Tuesday, August 16, 2011

Radiatore with Grilled Chicken and Eggplant

I love when some chef or magazine or whatever gives me a meal plan for the whole week that will reuse ingredients.  Problem for me, of course, is that there are so many "No makes" that those same folks love to add.  So it turns out that I pick and choose from the predone menu, sort of defeating its purpose.

Rachael Ray is one such organization (chef?  magazine?  I'm not sure how to categorize her, and since I'm sure her people are doing this anyway, organization seems to be the best word choice) that does this helpful tool for email subscribers.  That's where I found the recipe for Radiatore with Grilled Chicken and Eggplant.


This was almost a meatless meal for us, since putting frozen chicken in the fridge overnight didn't get it defrosted, but I put the bagged chicken in some water and let it sit on the counter, defrosting MOST of it well enough to grill.  Like so many pasta dishes, this one lends itself to substitution as your kitchen needs dictate.

One note, though, is that the recipe suggests grating the tomatoes and garlic.  Don't.  Put it in your food processor, and save yourself the blood that I shed doing this DUMB task.

We all enjoyed this one (of course, except for the child who will not eat), and I love that it's full of veggies (I'm thinking some cooked broccoli would be delicious next time), excusing me from making a side dish (what?  That's not what I'm supposed to do??)  If you're one of those lucky people who don't have a groundhog living under their deck, eating all their container vegetables, you could use whatever your garden is growing (I'm really starting to think about the suggestions of certain people that we gas or maybe take a shotgun to that groundhog...  I know my friend Lishie has a recipe for Groundhog Stew on her blog....I keeed I keeed of course.)

It's funny, one of the nights this week I made one of Rachael's recipes, my husband commented that we typically don't like her stuff.  I don't think I told him that THIS was one of her's, so I guess I need to give credit where credit is due, and he'll embrace RR recipes again!

Radiatore with Grilled Chicken and Eggplant Source:  Rachael Ray
  • 2 large tomatoes (12 oz. each)
  • 2 cloves garlic, grated
  • 1 tbsp. EVOO, plus more for brushing
  • Salt and pepper
  • 2 sprigs basil, plus 1/2 cup basil leaves, torn
  • 1 box (12 oz.) tricolor radiatore pasta
  • 1 eggplant (1 lb.), sliced crosswise into 3/4-inch-thick rounds
  • 1 lb. skinless, boneless chicken thighs, trimmed of excess fat
  • 1/2 small red onion, thinly sliced


Directions:


  1. Preheat a grill to medium-high. Shred the tomatoes on the large holes of a box grater set in a bowl. Stir in the garlic and 1 tbsp. EVOO; season with salt and pepper. Add the basil sprigs and let sit at room temperature for at least 20 minutes. 2. In a large pot of boiling, salted water, cook the pasta until al dente; drain, reserving 1/2 cup of the pasta cooking water. Return the pasta to the pot.
  2. While the pasta is cooking, brush the eggplant with a little EVOO and season with salt and pepper. Lightly oil the grill grate and grill the eggplant, covered and turning halfway through, until grill marks appear and the flesh is soft, about 10 minutes. Season the chicken with salt and pepper and grill, covered and turning halfway through, until nicely marked, about 10 minutes. Set aside to rest for 10 minutes.
  3. Chop the eggplant and chicken and add to the pasta. Add the torn basil leaves and the onion. Remove the basil sprigs from the sauce and discard. Toss the sauce with the pasta, adding some of the reserved pasta cooking water to thin the consistency, if desired; season with salt and pepper.

Related Posts with Thumbnails