Wednesday, July 27, 2011

Honey Lime Enchiladas


I first made these forever ago with great success.  I've seen it floating around the blogosphere, so added it to the meal plan last week or so, and finally got around to them tonight.  They're fairly easy to make, and were a big hit with my entire family... yes, even Mr. "I won't even try it" ate it and liked it. 

This makes quite an unusual enchilada; the sweetness of the honey with the bite of the lime plus the mildness of the green enchilada sauce makes for such a different flavor than you'd get from your local Mexican restaurant (chain or otherwise!)

So make this delicious and easy meal!


Honey Lime Enchilada Mel's Kitchen Cafe, via Good Eats and Sweet Treats
6 tablespoons honey
5 tablespoons lime juice (approx. 1 large lime)
1 tablespoon chili powder (use a little less for a milder version)
1/2 teaspoon garlic powder
1 pound chicken, cooked and shredded (approx. 2 large chicken breasts)
8-10 flour tortillas
1 pound monterey jack cheese, shredded
16 ounces green enchilada sauce
1 cup heavy cream


Mix the honey (tip: spray your measuring spoon with cooking spray before measuring out the honey), lime juice, chili powder and garlic together and toss with the shredded chicken. Let it marinate for at least 1/2 hour (or toss together in a ziploc bag and let it sit in the fridge for a few hours).

Pour about 1/2 cup enchilada sauce on the bottom of a 9X13 baking pan. Fill flour tortillas with chicken (approx. 1/4 cup) and shredded cheese, saving about 1 cup of cheese to sprinkle on top of enchiladas. Mix the remaining enchilada sauce with the cream and leftover marinade. Pour sauce on top of the enchiladas and sprinkle with cheese. Bake at 350 degrees for 30 minutes until brown and crispy on top.

Tuesday, July 26, 2011

Meal Plan...err.. Tuesday

Slacker over here.  I was away for a few days, so things were sort of on hold, but here's what's up for the rest of the week:

Tuesday:  Frozen Ravioli (Hubby's request; what can I say?)
Wednesday:  Creamy Shrimp Rolls
Thursday:  Honey Lime Enchiladas (These didn't get made last week for one reason or another... trying again!)
Friday:  Chicken Bacon Ranch Pizza
Saturday:  Birthday Party Day!  (I can't believe my guy is going to be 4)
Sunday:  Cheesey Chicken Shells

Have a great week!!

Saturday, July 23, 2011

Strawberry, Orange, and Grilled Chicken Salad

When meal planning for this week, I went to my Google Reader and this recipe from Sarah came up in the feed.  It was so perfect, considering the heat has me looking for something light, and more importantly, I'm looking for meals that won't heat up the kitchen too much.

The only cooking this required was the chicken; I chose to cook it on the grill so the kitchen stayed cool and I did too, since I only went out to flip and check the chicken.

This was absolutely delicious.  So light, so refreshing, and moderately healthy.  My husband loved the vinaigrette. I had no pineapple in the house, otherwise I would have added it. It wasn't super filling, so I really wish I was good at accompanying dishes and could think of something to serve alongside it. 

Strawberry, Orange and Grilled Chicken Salad
Adapted from The Cookaholic Wife, via A Taste of Home Cooking

6 cups baby spinach leaves
2 cups cooked chicken, shredded
2 cups strawberries, diced
1 cup mandarin oranges, chopped
1/2 red onion, thinly sliced
1/2 cup gorgonzola, crumbled
Raspberry vinaigrette (recipe below)
Fresh cracked black pepper, to taste

Combine the first 7 ingredients in a large bowl. Add desired amount of dressing, toss well to coat. Season with pepper, to taste. Serve cold.

Raspberry Vinaigrette

1/4 cup olive oil
1/8 cup red wine vinegar
1/8 cup white wine vinegar
1 tablespoon raspberry preserves
1/2 teaspoon Dijon mustard
Fresh tarragon, minced
Black pepper
1 shallot, minced
1 teaspoon sesame seeds
Honey, to taste

Blend all the ingredients, except the sugar or honey, in a food processor, adding water as necessary to adjust the consistency. Add honey to taste at the very end.

Friday, July 22, 2011

Summer Pasta

This is an incredibly late submission for a recent recipe swap for Fourth of July inspired meals. 


When I saw this recipe from Melissa was my assignment, I was excited to make something deemed "Sicilian."  my grandfather, while born in America, was Sicilian, and I don't know a whole lot about it, other than that could be where my temper comes from.  I was late in making this for my own slacker reasons, but it's been delayed so much because of my grandmother's passing; losing her has made me think a lot about when my grandfather passed.  So, even though Mom Mom's family was from northern Italy, I felt I was honoring her by making this dish from her beloved husband's heritage.

This is probably the first recipe that I've really made some changes to in order to make this my own.  I typically don't have anchovies around, and didn't really feel like getting some when I had an idea of something that would be a good substitute.  I chose to use some kalamata olives instead; I definitely used too many and so the sauce was a bit too salty.  My basil plants are going crazy, so I threw some of that into the sauce too.  I figure a sauce can't be too garlicky, so added some of that with the onions. 

My finished product came out pretty well.  I do wish I'd added some broccoli as instructed, so maybe next time.  The great thing about this recipe is that it has some interesting textures--you've got the crunch of the nuts, the squish of the raisins, and the softer textures of the tomatoes and pasta.

Ha, I just remembered I meant to add cooked chicken to this.  Oops!

Thank you, Melissa, for a great starting point recipe!

Dad's Sicilian Summer Pasta, adapted from I Was Born to Cook
1 pound penne
2-3T extra virgin olive oil
5-10 kalamata olives, drained, pitted, and finely chopped
1 large onion, chopped
1 garlic clove, minced
5-10 basil leaves, chopped
1T Italian seasoning
Freshly ground black pepper, to taste
1 cup cherry tomatoes, halved
1/2 cup pignoli nuts
1 cup raisins, soaked first in water or liquor (rum, vodka)
1/2 (28 oz) can crushed tomatoes


Cook pasta until al dente.  Drain and set aside.  

While pasta is cooking, in a large skillet, cook the olives in the oil until fragrant, then add the onions and garlic, and cook until onions are translucent.  Add the tomatoes, pignoli nuts and raisins.

Cook all ingredients for a few minutes, then add crushed tomatoes, basil, and spices.  Stir until combined, and simmer for a few minutes, until desired consistency.  Add pasta to skillet, combine and cook for a few minutes on low.  Top with grated cheese and serve.

This dish can be served immediately or at room temperature.

Banana Blueberry Bread

Photobucket

I found this in my Betty Crocker cookbook, bridal edition, see it online
here.. I had three very overripe bananas, and decided we would make banana bread. Then I forgot about it. They were moved to the refrigerator for "later," so the fruit flies would go away. Later came, and they were beyond overripe and I was afraid they were gross. They smelled sort of sour. But I decided to go with it anyway.

The book in my recipe suggested to add blueberries as an option, and since I have a freezer full of them, I went with it. I didn't even have to defrost, but I don't recall the amount--I believe it was a cup. I added them when the original recipe suggested to add the nuts.

Despite the sour ick of the bananas, this came out great. It looked gorgeous when it came out of the oven, and it's really tasty. The Boy has asked for it for breakfast every morning since we made it.


Photobucket

1 1/4cups sugar
1/2cup butter or margarine, softened
2eggs I think the book says to use three...not sure.
1 1/2cups mashed very ripe bananas (3 to 4 medium)
1/2cup buttermilk I used 1/2 c plain fat free yogurt
1teaspoon vanilla
2 1/2cups Gold Medal® all-purpose flour
1teaspoon baking soda
1teaspoon salt
1cup chopped nuts, if desired Omitted


Print these coupons...


About Concordance™


1.Move oven rack to low position so that tops of pans will be in center of oven. Heat oven to 350°F. Grease bottoms only of 2 loaf pans, 8 1/2x4 1/2x2 1/2 inches, or 1 loaf pan, 9x5x3 inches.
2.Mix sugar and butter in large bowl. Stir in eggs until well blended. Add bananas, buttermilk and vanilla. Beat until smooth. Stir in flour, baking soda and salt just until moistened. Stir in nuts. Pour into pans.
3.Bake 8-inch loaves about 1 hour, 9-inch loaf about 1 1/4 hours, or until toothpick inserted in center comes out clean. Cool 10 minutes. Loosen sides of loaves from pans; remove from pans and place top side up on wire rack. Cool completely, about 2 hours, before slicing. Wrap tightly and store at room temperature up to 4 days, or refrigerate up to 10 days.

Wednesday, July 20, 2011

Crab, Corn, and Tomato Salad

With the heat wave we're having round here, I turned to the internet looking for no cook meals.  This came up from Cooking Light,  in my searching, and it looked so fresh and delicious plus uses a lot of in season produce.  I thought it was really tasty, light, and had great texture too, and it's great that it can easily be adapted to what's in your fridge, on sale, your tastes.  You could easily take out the crab, or substitute shrimp. 


I love the lemon dressing that goes along with this, though I have to admit I probably went a little heavy on the lemon here.  I'd have to say that it's really important to use fresh lemon here because it is so forward in the salad.


Crab, Corn, and Tomato Salad, Cooking Light, June 2008
Ingredients
  • 1 tablespoon lemon zest
  • 5 tablespoons fresh lemon juice, divided
  • 1 tablespoon extravirgin olive oil
  • 1 teaspoon honey
  • 1/2 teaspoon Dijon mustard
  • 1/4 teaspoon salt
  • 1/8 teaspoon freshly ground black pepper
  • 1 cup fresh corn kernels (about 2 ears)
  • 1/4 cup thinly sliced basil leaves
  • 1/4 cup chopped red bell pepper
  • 2 tablespoons finely chopped red onion
  • 1 pound lump crabmeat, shell pieces removed
  • 8 (1/4-inch-thick) slices ripe beefsteak tomato
  • 2 cups cherry tomatoes, halved
  • 1. Combine zest, 3 tablespoons juice, and next 5 ingredients (through black pepper) in a large bowl, stirring well with a whisk. Reserve 1 1/2 tablespoons juice mixture. Add remaining 2 tablespoons juice, corn, and next 4 ingredients (through crab) to remaining juice mixture; toss gently to coat.
  • 2. Arrange 2 tomato slices and 1/2 cup cherry tomatoes on each of 4 plates. Drizzle about 1 teaspoon reserved juice mixture over each serving. Top each serving with 1 cup corn and crab mixture.

Tuesday, July 19, 2011

Eggplant Panini

My friend Lishie posted this diner recreation a few weeks ago, and I thought it would be perfect for such a hot day, since it requires so little time at the stove.  You could make it even cooler and make the eggplant cutlets early or in the evening when the heat isn't so intense, then just use the stove to toast the bread and melt the cheese.

I made a few changes to suit my desire to "make it my own," since I'm watching (and loving) this season of Next Food Network Star, though this is about as far as I go at making anything my own.  And if you, like me, are hesitant to make a panini because you have neither a panini press nor a grill pan, remember that you're basically making a squished grilled cheese.  I used a pot and a teakettle to act as the press, flipped when crispy, and then pressed again.

Eggplant Panini, slightly adapted from Delish

  • 1 Eggplant
  • 1 egg, whisked
  • 1/2 cup Panko Bread crumbs
  • Black pepper
  • 1t Italian seasoning
  • 1t crushed red pepper
  • 1t garlic powder
  • Approximately 3 TBSp Olive Oil
  • Italian Sub Rolls or full Italian Bread, sliced into sandwich sizes
  • 1 Beefsteak Tomato
  • Fresh Mozzarella, sliced
  • Fresh Basil
  • Approximately 2-3 tsp Extra Virgin Olive Oil
  • Approximately 2-3 tsp Balsamic Vinegar


Clean, peel, & slice the eggplant length-wise. Set up your bowls for dredging:  place the egg in a shallow dish (8x8 Pyrex dish works great!), and combine the bread crumbs and spices in another.  Dip the eggplant slices in the egg, then in the bread crumb mixture, pressing to stick. Heat the 3 TBSp Olive Oil in a saute pan on medium-high heat. Place the eggplant in the saute pan, and cook until it is golden, about 2-3 minutes each side. Allow to cool on a paper towel lined plate.


After the eggplant is cooled, assemble the sandwiches... Bread, eggplant, peppers, tomato slices, basil leaves (I leave them whole) & finally the splashes of extra virgin olive oil & balsamic vinegar.


Close the assembled sandwich & cook it either on a panini maker OR on a grill pan with a weight on the sandwich (another pan or heavy plate) until the mozzarella is melted.

Friday, July 8, 2011

Cucumber Salad with Tomatoes and Mint

Summer's bounty and the generosity of friends has come our way, so I figured I'd put the abundance to good use and make a cucumber salad.  A friend of my dad's has given us four cucumbers so far, and I picked up some mint from a woman on freecycle, and figured this find on allrecipes would be a perfect fit.


Oh, how delicious it was. The mint was a really interesting twist and brought a lightness and freshness to this salad.  This was my first time using our homegrown mint, so I was thrilled to give it a try, and now I'm curious how swapping it for other herbs would go in other recipes.  Of course, the mint could be swapped for what you have around; dill, cilantro, basil, parsley would all work well too.


Cucumber Salad with Tomatoes, Red Onion, and Mint from allrecipes

  • 2 large cucumbers - halved lengthwise, seeded and sliced
  • 1/3 cup red wine vinegar
  • 1 tablespoon white sugar
  • 1 teaspoon salt
  • 3 large tomatoes, seeded and coarsely chopped
  • 2/3 cup coarsely chopped red onion
  • 1/2 cup chopped fresh mint leaves
  • 3 tablespoons olive oil
  • salt and pepper to taste

Directions

  1. In a large bowl, toss together the cucumbers, vinegar, sugar and salt. Let stand at room temperature for an hour, stirring occasionally.
  2. Add tomatoes, onion, mint and oil to cucumbers and toss to blend. Season to taste with salt and pepper.

Thursday, July 7, 2011

Grilled Chicken Caprese

Have I told you how much I love the combination of mozzarella, basil, and tomato?  Five or twenty times, you say?  Oh.

Well, I do.  Nothing says summer like these flavors, which is why I so love having them in the winter too, even though the tomatoes aren't in season, because I just can't get enough, both of the combo and of summer.

I've tried several incarnations of this, most notable being Rachael Ray's version (It came from one of her early cookbooks, but check out that super awesome video!  It's not the same recipe, as an aside), which just never came out right.

This version from Cook's Country involves making a (delicious, I drizzled it over my salad) vinaigrette and marinating the cheese in it then dressing the cooked recipe in it in addition to grilling the tomatoes and chicken.

I really loved the addition of grilled tomatoes, though my husband wasn't a fan.   The three year old, well, dinner has been a struggle for us and him.  He refuses, hubby threatens taking away his tv time, and we all end up angry or upset.


I was out of foil, so attempted to "tent" using my Silpat mat.  It softened, but didn't melt the cheese.

Grilled Chicken Caprese Source:  Cook's Country August/September 2011

2T chopped fresh basil
1T red wine vinegar
2 garlic cloves, pressed or minced
salt and pepper, to taste
3T olive oil
6 oz fresh mozzarella, cut into 1/4" slices, halved, and patted dry
1-1/2lb chicken cutlets, trimmed
2 tomatoes, cored and cut into 1/2" slices

1.  Make your vinaigrette by combining basil, vinegar, garlic, 1/2t salt, and 1/4t pepper in a bowl.  Slowly add oil, whisking gently until completely mixed.  Combine 2T with mozzarella, and reserve the rest of the vinaigrette.
2.  Pat chicken dry and season with salt and pepper.  Grill chicken and tomatoes over medium heat, about 2 minutes per side, until chicken is browned and tomatoes have a light char.  Transfer chicken to a serving platter and top each cutlet with two tomato slices.  Drizzle with reserved vinaigrette, then top with an even layer of cheese.  Tent with foil and let rest until cheese is melty, about 5-10 minutes.


Tuesday, July 5, 2011

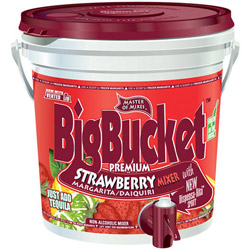
Margarita Cupcakes

Every year, we attend a Fourth of July party hosted by a really creative friend.  Last year, the theme was Mexican, and this year the theme was luau.  Definitely not what you'd expect of an Independence Day party, but definitely fun, and unlike Fourth parties you've been to in the past.  I offered to make either Aloha Mini Calzones or one of two cupcake recipes from Annie's Eats, my party go to starting place.  She chose either of the cupcakes, so I asked my husband which I should make and he chose these.

Of course, you have to know your audience, and be aware that boozey cupcakes won't go over with just any crowd.  I knew, however, that the liquor would surely be flowing and the hostess loves her buckets of margaritas, so these would be a perfect fit.


I made the cupcakes themselves the night before, and my husband kept tasting the batter.  I guess he liked it.  then my mom came and tasted the batter... she kept sticking her finger in again and again.  I figured she REALLY liked it until she said, "I can't even taste...  A (my four year old) can have these," because there's no booze in the cakes themselves.  I'd considered putting it into the cake batter, but decided to keep it as a nice side flavor in the frosting.  I'm glad I did so.  Annie's suggestion is to brush with tequila before frosting, but we held back on that.

These were really tasty, though from my pictures, they really don't look that great.  Folks at the party really enjoyed them, and yes, we did give A a taste of the cupcakes WITH frosting... the one year old had some too.    The frosting didn't come out as great as it could have, probably because I'd written the recipe as notes for myself, but my husband was the one who made it from my notes... a few of the directions were omitted because I knew they'd happen.  Nonetheless, they were delicious and fun to make and enjoy!

Margarita Cupcakes source:  Annie's Eats
Yield: about 24 cupcakes
Ingredients:

For the cupcakes:
3 cups all-purpose flour
1 tbsp. baking powder
½ tsp. salt
1 cup (2 sticks) unsalted butter, at room temperature
2 cups sugar
4 large eggs, at room temperature
3 limes, zested and juiced
½ tsp. vanilla extract
1 cup buttermilk
For the frosting:
2 cups sugar
8 large egg whites
Pinch fleur de sel (coarse salt)
1½ cups (3 sticks) unsalted butter, at room temperature
2½ tbsp. freshly squeezed lime juice
2-4 tbsp. tequila
Directions:
To make the cupcakes, preheat the oven to 325˚ F.  Line two cupcake pans with paper liners.  In a medium bowl, combine the flour, baking powder and salt; stir with a fork to blend.  In the bowl of a stand mixer fitted with the paddle attachment, cream together the butter and sugar on medium-high speed until light and fluffy, 3-5 minutes.  Blend in the eggs one at a time, mixing well after each addition and scraping down the sides of the bowl as needed.  Beat in the lime zest, lime juice and vanilla.  With the mixer on low speed, mix in the dry ingredients in three additions alternating with the buttermilk, beginning and ending with the dry ingredients.  Beat each addition just until incorporated.
Divide the batter between the prepared cupcake liners, filling each about ¾ full.  Bake 20-24 minutes, or until a toothpick inserted in the center comes out clean.  Let cool in the pan 5-10 minutes, then transfer to a wire rack to cool completely.  If desired, brush the cooled cakes with tequila to emphasize the true margarita flavor.
To make the frosting, combine the sugar, egg whites, and salt in a heatproof bowl set over a pot of simmering water.  Heat, whisking frequently, until the mixture reaches 160° F and the sugar has dissolved.
Transfer the mixture to the bowl of a stand mixer fitted with the whisk attachment.  Beat on medium-high speed until stiff peaks form and the mixture has cooled to room temperature, about 8 minutes.
Reduce the speed to medium and add the butter, 2 tablespoons at a time, adding more once each addition has been incorporated.  If the frosting looks soupy or curdled, continue to beat on medium-high speed until thick and smooth again, about 3-5 minutes more (don’t worry, it will come together, though it may take a long time!)  Stir in the lime juice and tequila and mix until fully incorporated and smooth.
Keep buttercream at room temperature if using the same day, or transfer to an airtight container and refrigerate up to 3 days or freeze up to 1 month. Before using, bring to room temperature and beat with paddle attachment on low speed until smooth again, about 5 minutes.
Frost the cooled cupcakes with the buttercream.  Garnish with lime zest and lime slices as desired.
Source: adapted from Confections of a Foodie Bride, who adapted it from Martha Stewart


Monday, July 4, 2011

Happy 4th of July!


I hope you have a fun and SAFE Fourth of July!

On this day, in Philadelphia, the 13 American colonies ratified the Declaration of Independence in 1776.  They were in the midst of a seemingly disastrous war against one of the strongest militaries in the world.  In this document, the Founding Fathers set forth some of our most important ideologies as Americans, that "all men are created equal," that we believe no government may take away a person's "life, liberty, and pursuit of happiness" without due process, and that the people have the authority to overthrow any government that is not protecting those rights.

So while you're celebrating, don't forget that first American army and also all those who have served in the American armed forces since!

Coming off my history teacher soapbox, we're having a very low key day here.  We ran some errands, are doing some cleaning, and are relaxing.  We may load the boys up in the car for fireworks, but haven't yet made up our minds.  This is the first Fourth in a really long time that we're home for the holiday, usually celebrating at my parents' house--who have a deck from which we can see the fireworks, so no need to wake the boys.

Happy Independence day, everyone!

Thursday, June 30, 2011

Veggie Bean Burger

This morning, my friend Lauren shared this recipe on her blog, and I was intrigued.  I love the health element of beans, and love the idea of eating something that's easier on my health, the environment, and my wallet.  My husband, however, refuses to eat beans.  When we go out for Mexican, he will say, "No beans, anywhere on the plate," so it was awesome that she shared it on a night he was not expected to be home for dinner.

This was so stinking easy, and it had so much delicious flavor.  I do have to admit, I wasn't nuts about the texture of the food, but it was yummy.

The boys, however wouldn't touch it.  E wouldn't even touch the cheese I put on top. We got A to give it a good try, but it was still a no go.

I encourage you to give this a try, especially if you're just looking for something to feed adults, though I do suggest giving it a try with your kids.

I froze the leftovers, and hope they'll be good for me for lunches over the next few weeks!

The recipe calls for "white kidney beans," and I've never seen those before, so I used Great White Northern Beans.


Summer Cookout Veggie Burgers
from Leslie Sarna, via Lauren's Kitchen
  • 1 can of black beans, drained and rinsed
  • 1 can of white kidney beans, drained and rinsed
  • 1 cup rolled oats (non-instant Oatmeal)
  • 3/4 cup bread crumbs (I like to use Panko also called Japanese bread crumbs if you can find them)
  • 1 tsp. (or more) chili powder
  • 1 tsp. paprika
  • salt and pepper to taste
  • about 3 tbsp. chopped chives
  • 1 egg
  • olive oil
  • 1 small red bell pepper, finely diced
  • 1/2 onion, finely diced
  • 4 oz. mushrooms, finely diced
  • 6 sun dried tomatoes, diced
  • 3 cloves of garlic, minced
In a medium frying pan, heat some olive oil. Add the chopped onion, garlic, bell peppers and a pinch of Salt. Let cook 2 minutes on a lower heat. Add mushrooms and sun dried tomatoes; let cook another couple minutes. Let cool when cooked. While the veggies are cooling, in a large bowl combine the Beans, Oats, Bread Crumbs and all the spices and chives. Toss a little and add the egg. Using your hands to mix the mixture until it's slightly sticky and about 3/4 of the beans are smashed. Add in the veggies. Continue to work with your hands. If the mix feels a little dry, add water by the teaspoon until right. If it's too wet, add bread crumbs : ) Form 8 burger patties. Refrigerate for about an hour. (you can also place these pouches in a ziploc bag and freeze for up to a couple of weeks) To cook, unwrap the burgers from the plastic and cook in a heated skillet with cooking spray or olive oil in the bottom. Cook about 3-4 minutes on each side.
PS these should always be cooked on a skillet or frying pan. Unfortunately, they can fall apart if cooked on the bbq.


Wednesday, June 29, 2011

Portobello Mushroom Burger

My original plan was to make a different Portobello recipe, but was out of a few of the key ingredients, so turned to the Food Network for help and came up with this one.


These really got mixed reviews here.  I really enjoyed it (though I can never figure out what people are talking about when they say portobello mushrooms taste like beef), but the three boys weren't on board AT ALL.  M ate it, but wasn't really thrilled about it, and the boys wouldn't even eat it.

I used a slice of tomato instead of a roasted red pepper and romaine lettuce instead of arugula.

Maybe someone else will have better success with her family than I had with mine!

Portobello Mushroom Burger from Paula Deen at FoodNetwork.comhttp://www.foodnetwork.com/recipes/paula-deen/portobello-mushroom-burger-recipe/index.html

Ingredients

  • 4 portobello mushroom caps, cleaned
  • 1/4 cup olive oil
  • Salt and freshly ground black pepper
  • 1/2 cup mayonnaise
  • 1 tablespoon prepared pesto
  • 2 teaspoons coarse-grained mustard
  • 4 hamburger buns, split, buttered, and toasted
  • 1 cup baby arugula
  • 1 (12-ounce) jar roasted red peppers, drained

Directions

Preheat grill to medium-high heat.
Brush mushrooms caps with olive oil; sprinkle evenly with salt and pepper. Grill mushrooms, smooth side down, covered with grill lid, for 6 to 8 minutes, or until tender.
In a small bowl, combine mayonnaise, pesto, mustard, 1/4 teaspoon salt and 1/4 teaspoon pepper. Spread mixture evenly over cut sides of buns. Divide arugula evenly over bottom halves of buns. Top each evenly with peppers. Place mushrooms caps over peppers. Cover with tops of buns.

Wednesday, June 22, 2011

Baked Buffalo Chicken Pasta

I've said it a few times I'm sure that my son is enthralled with mac and cheese, so when I saw this in my Google Reader, I knew I wanted to try it soon.

As he saw me pour the wing sauce into the dish, my husband asked, "Is this going to be too S-P-I-C-Y?" to which I replied, "I sure hope not!"  Then, as it was cooking, that delicious hot sauce smell was pretty strong; I got really worried again.

But all the boys enjoyed it--the medium one liked it, maybe because I called it "mac and cheese."  The little one liked it, but I don't think either of the boys liked the chicken so much.  Even the big one, who doesn't like mac and cheese at all enjoyed it.  And I liked it a lot too!

I grilled my chicken this time around, since I figured it would be the fastest way to get them done, so I was happy to have some wings without the fry!


Baked Buffalo Chicken Pasta  Source:  How Sweet It Is
serves 4-6
1 pound pasta (I used whole wheat orecchiette)
3 boneless, skinless chicken breasts, cooked and cut into chunks
1 tablespoon butter
1 tablespoon flour
1 1/2 cups milk

4 ounces grated monterey jack cheese (I used half a brick) + more for topping
1/3 cup grated sharp cheddar cheese + more for topping
1/3 cup buffalo wing sauce
1/3 cup panko bread crumbs
salt and pepper to taste
for garnish: 3/4 cup chopped green onions, 1/2 cup fresh cilantro, 1/2 cup gorgonzola cheese, additional buffalo wing sauce
Preheat oven to 375 degrees F.
Prepare water for pasta and cook according to directions.
While pasta is cooking, heat a medium saucepan over medium heat. Add the butter, and once it’s melted and bubbly add the flour. Whisk together to create a roux and cook for 1-2 minutes until mixture gets a bit golden in color. Add milk, stir and turn down heat to low. Continue stirring until milk thickens. Add in grated cheeses and continue to stir until mixture is smooth. Stir in buffalo wing sauce. Taste and season with salt and pepper if needed.
Spray a baking dish (9 x 13 is fine, I used a round 4-inch deep dish) with non-stick spray. Add pasta and chicken, then pour cheese sauce over and mix throughly until everything is coated. Sprinkle with additional grated cheese and bread crumbs. Bake for 25 minutes or until cheese is golden brown. Remove from oven and immediately top with gorgonzola, green onions and cilantro. Drizzle with buffalo wing sauce.

Tuesday, June 21, 2011

Meal Plan...err.. Tuesday

Behind as usual.
Monday--Baked Buffalo Chicken Pasta
Tuesday--Popcorn shrimp, Cook's Country Feb/Mar 2011
Wednesday--Mix and Match Pasta Salad
Thursday--Cheese-Stuffed Portobellos
Friday--I'm out, so pizza from the freezer for the boys
Sat/Sun--Mom and Dad's for the weekend!

Popcorn Shrimp

I grew up in a fishing household.  Summer flounder, aka: "fluke" was the most common catch.  Mom would batter and fry the fish, and kid that I was, I would refuse to eat it.

The smell of deep frying (and I've done quite a bit in the past few weeks) just brings me right back to that time and place; I could practically taste the battered fluke as I was cooking these shrimp.

As these were coming out of the oil, M started grabbing some of the cooked batter and proclaimed it good.  He then tasted the cooked shrimp and exclaimed that it was delicious and a keeper.  The only thing really missing was that I forgot to make cocktail sauce; we used lemon wedges and it was quite good with that, but we knew it would be even better with the cocktail sauce.

As for the little guys, the bigger one couldn't get enough.  He kept grabbing more off the platter, which is practically unheard of around here.  The littler one kept crying for dinner, so he had his meal while I cooked, and STILL ate two or three shrimp.

So, here's another major win for Cook's Country magazine.


Popcorn Shrimp Cook's Country Feb/Mar 2011

1.5lb medium/large shrimp, peeled, deveined, tails removed
3 qt canola oil
1t grated lemon zest
1 garlic clove, minced
1-1/2T Old Bay, divided
1-1/2c AP flour
1/2c cornstarch
2t black pepper
1t baking powder
1-1/2c bottled clam juice (I used 8 oz clam juice and 1/2 c water)

1.  Combine shrimp, 1T oil, lemon zest, garlic, and 1/2t Old Bay in a large bowl.  Refrigerate for 30-60 minutes.
2.  Heat remaining oil over medium-high heat to 375 degrees in a Dutch oven.  In a large bowl, mix flour, cornstarch, Old Bay, pepper, and baking powder; add clam juice and mix until smooth and no flour clumps remain.  Add in shrimp and carefully stir until evenly coated.
3.  Add 1/4 of the shrimp to the oil, one at a time.  Stir frequently, and fry until golden brown, about 2 minutes.  Drain on a paper towel lined plate, then move to wire rack set inside a baking sheet.  Return oil to 375 degrees and repeat with remaining shrimp.  Serve with cocktail sauce, tartar sauce, or lemon wedges.

Sunday, June 19, 2011

BBQ Grilled Chicken

I didn't take photos of this because it was really a last minute meal and we were starving. 

It never occurred to me that grilling chicken breasts would require any more work than grilling them up and then slathering some BBQ sauce on top.  But for some reason, I did a little googling and found this website, which directed me otherwise.  I took her advice and came up with some really tasty BBQ chicken.


First, I trimmed the breasts, and cut slits in them.  I set them in a marinade of 1c olive oil, 1/2c red wine vinegar, garlic, pepper, and Italian seasoning.  I was pressed for time, so I marinated for 15 minutes a side.  Meanwhile, I sprayed my grill, and preheated it to medium. 

I then drained the chicken from the marinade, discarding the marinade, and placed the chicken on the grill with the score marks down.  I basted the top with my BBQ sauce, rotated after about 4 minutes, and then basted with BBQ sauce again.  I grilled them for about 15 minutes total, until the chicken felt firm.

So good and so easy!


Thursday, June 16, 2011

Chicken Chimichangas

Dear folks at America's Test Kitchen,
I wasn't going to renew my subscription to Cook's Country, mostly because I'm cheap.  I mean, everything I've made has been good, and nearly everything has been awesome.  But I'm cheap.  And do I really need another magazine subscription?

Well, this recipe sold me.  I'm renewing my subscription.  Yeah, I don't need recipes that take an hour from start to finish.  But this one was awesome.

Sign me up, ATK.  I'm yours.
Love,
Mad Men Kitchen


 Chicken Chimichangas Source:  Cook's Country Magazine June/July 2011
1-1/4c low sodium chicken broth
1T minced canned chipotle chile in adobo sauce
1/2c long grain white rice
Salt and Pepper
2 boneless, skinless chicken breasts, trimmed
1T plus 3c canola oil
1 onion, chopped fine
2 garlic cloves, minced
1t chili powder
1/2t ground cumin
4oz sharp cheddar cheese, shredded
1/3c chopped fresh cilantro
1T all purpose flour
1T water
4 flour tortillas

1.  In a 2 cup liquid measuring cup, whisk broth and pepper.  Mix 1/2 cup of this mixture, rice, and 1/4t salt in a bowl.  Cover and microwave until liquid is absorbed, about 5 minutes.  Meanwhile, pat chicken dry and season with salt and pepper.
2.  In a Dutch oven, heat 1T oil over medium high heat until just smoking.  Cook onion until softened, about 5 minutes, then add garlic, chili powder, and cumin and cook until fragrant, about 30 seconds.  Add remaining chipotle broth, partially cooked rice, and bring to a boil.
3.  Reduce heat to medium low, add chicken, cover, and cook until chicken's internal temperature is 160 degrees and rice is tender, about 15 minutes, flipping chicken about halfway through.  Remove chicken to a cutting board to rest for 5-10 minutes, then cut into 1/2 inch pieces and return to rice mixture, adding cheddar and cilantro, all in a large bowl.  Wash the pot.
4.  Whisk flour and water in a small bowl.  Microwave tortillas, covered, on a plate, about 1 minute.  Divide chicken mixture into 4.  Working with one tortilla at a time, place 1/4 of the chicken mixture in the center.  Brush edges of tortilla with flour paste, then wrap top and bottom of tortilla tightly over filling (fold side toward center, then fold in the sides--you might want to repaste the last pieces). 
5.  Heat remaining 3c oil in Dutch oven over medium high heat until 325 degrees.  Place 2 chimis, seam down, in oil, and fry until deep golden brown, about 2 minutes a side.  Monitor your oil temperature, keeping it between 300 and 325 degrees.  Drain on a wire rack set inside a rimmed baking sheet.  Repeat with remaining chimis.  Serve.


Wednesday, June 15, 2011

Ham Steak with Fruit Salsa

I've blogged about this one once before, and it's so funny reading about the horrible missteps of making the recipe that time.  I've made this one many times, and while the recipe suggests that it can be made with any fruit, I like it as it's written so much, that's the only way I've made it.

The last time I blogged it, I did not share any pictures.  Additionally, my photo taking has improved immensely, if I do say so myself.


I always struggle with side dishes to serve with this recipe.  It's ham, so my mind says I should serve it with some sweet potatoes.  I always mean to do that, but it's usually not something I do since my husband doesn't like them.  Tonight, I served with carrots and a salad.

Did I mention that this is a Weight Watchers recipe?


Ham Steak with Fruit Salsa from Weight Watchers' Make it in Minutes cookbook.

2 peaches, diced
6 plums, diced
1/4c finely chopped red onion
1/2 jalepeno pepper, seeded and finely chopped  slices 
2T fresh lime juice
2T chopped cilantro
1T Dijon mustard
1T packed dark brown sugar
1-1lb ham steak

1. Heat the broiler to the hi setting.
2. Combine all ingredients, up to an including cilantro, in a large bowl.
3. Mix the mustard and sugar in a small bowl. 
4. Place the ham steak on the rack of a broiler pan; brush with half the mustard mixture and broil, 4 inches from the heat, 4 minutes. Turn the ham over and brush with the remaining mustard mixture; broil 4 minutes longer. Cut the steak into 4 portions and top each with 1 cup of the fruit salsa.
Related Posts with Thumbnails