Showing posts with label Easy. Show all posts

Saturday, February 1, 2014

Tropical Chicken Quesadilla


I made these last spring as part of the recipes swap in which I was partaking at the time.  That version used a pineapple-avocado salsa while this time around, I used the originally called for mango.  

I know I liked the pineapple, but this was fantastic.  It was an amazing salsa to go along with your pretty standard chicken and cheese quesadilla, and so bright and fresh for the dismal wintery "Polar Vortex" weather we've had lately.  I made these with some shredded chicken I had in the fridge, but Kelsey gives directions for cooking fresh chicken and spicing it up with some Mexican flavors.
Yummy!

Tropical Chicken Quesadilla with Mango Avocado Salsa  Source:  Kelsey's Apple a Day
Ingredients:
For the salsa:
1 mango, peeled and diced
1 avocado, peeled and diced
1 Roma tomato, seeded and diced
1 clove garlic, minced
1 habañero (Scotch Bonnet) or jalapeño, seeded and diced
1/4 c. chopped fresh cilantro
juice from one fresh lime
1/4 c. chopped red onion
Salt and pepper, to taste

For the quesadillas:
2 t coconut oil, divided
shredded chicken
1/2 red onion, very thinly sliced
1 red bell pepper, diced
8 medium/soft taco size tortillas
1 1/2 c. shredded cheese 

Directions:
  1. Make the salsa by combining all ingredients in a medium size bowl.  Adjust seasonings as you like.
  2. Make the quesadillas by laying out the tortilla then topping half with cheese, shredded chicken, onion, and pepper.  Fold quesadilla in half over the filling.  
  3. Heat 1 t coconut oil in a skillet.  When hot, lay the quesadilla in the pan and cook until crispy, then flip over to cook the other side.  Repeat with remaining quesadillas.  Serve with the salsa and enjoy!


Tuesday, October 15, 2013

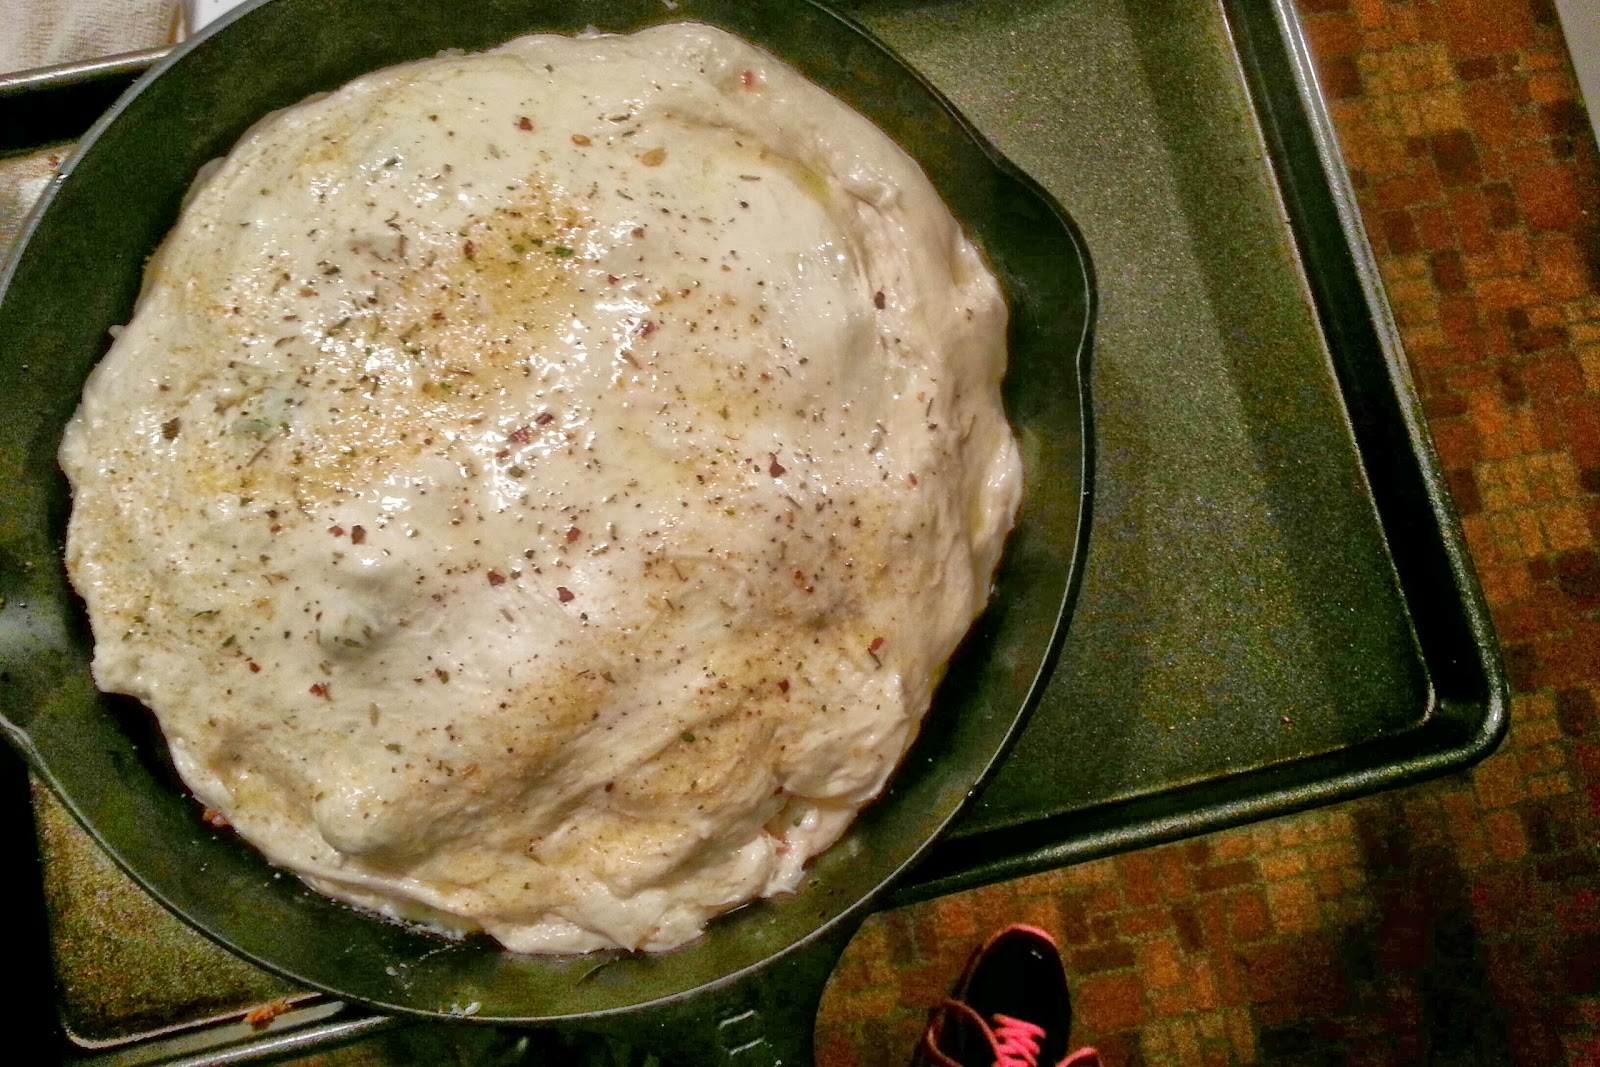
Stuffed pizza

This is one that I made a very long time ago and somehow didn't make again.  So when we had an extra pizza dough from an emergency "we need pizza dough so let's buy it from the grocery store," I decided it was high time we made it again.  I also got the incredibly brilliant idea to cook it in a cast iron skillet rather than any of my more typical pizza making methods.

Of course, "hit" was written all over this one.  It was fairly easy to make (though the steaming and the sauteeing does create more dishes than such an easy dish would suggest), it's loaded with veggies, and it's quite tasty.
It looks like I've made this twice before, once with roasted red peppers and once with tomatoes.  This time, I had no roasted peppers in the house and an abundance of tomatoes about to go bad, so the choice was easy.  I think this is probably my preferred version any way.


Stuffed Pizza Source:  Picky Palate, via Lauren's Kitchen
16 oz whole wheat or white pizza dough
1 Cup ricotta cheese
¼ Cup grated parmesan cheese
1 Tablespoon extra virgin olive oil
2 Cups fresh spinach leaves, chopped
2 Cups fresh broccoli florets, steamed until fork tender, about 3 minutes in boiling water
Pinch of salt
½ Cup Roasted red bell peppers, from can or fresh
1 ½ Cup shredded mozzarella cheese
2 Tablespoons extra virgin olive oil
½ teaspoon dried Italian Seasoning

1. Preheat oven to 375 degrees F. Divide dough into 2 equal pieces. Spread and press one piece of dough into the bottom and sides of a 9-9 ½ inch round cake or tart pan that has been sprayed with non-stick cooking spray. (I used a 9 ½ inch deep quiche pan with a removable bottom that worked perfectly) In a medium bowl, mix together the ricotta and parmesan cheese until well combined. Spread into pressed pizza dough.
2. Place olive oil into a medium skillet over medium heat. Saute spinach until wilted down, about 3 minutes. Place evenly over ricotta cheese layer. Place steamed broccoli florets over spinach and season with a pinch or two of kosher salt. Layer roasted red peppers, then mozzarella cheese over top. Press out remaining piece of dough and place over filling, tucking edges inside of pan. Brush with olive oil and sprinkle with Italian Seasoning. Bake for 25-35 minutes or until crust is golden brown and cooked through.
3. Let cool for 10 minutes before removing from pan or cutting into wedges.
8 slices

Friday, July 19, 2013

Chicken Parmesan

My husband loves chicken parm, as I've said many times before.  He asked for it this week, despite my having made the Pinterest chicken parm casserole.


It's been so hot here, I have NOT been in a cooking mood AT ALL and somehow have managed to stay away from the takeout menu folder.  So I went scouring for a Quick Chicken Parm recipe when I came across this from Simply Recipes.  I made it even faster by using jarred spaghetti sauce, though their marinara sounds great too.

I modified ever so slightly by using crushed panko for the breadcrumbs, and I think that added the perfect amount of crunch to the outside.  It wasn't super fast, but I was happy with the results and it *seemed* faster because I was trying something new maybe?

Chicken Parmesan by Simply Recipes
  • 2 chicken breast, butterflied or pounded thin
  • Salt
  • 2 eggs
  • 1 cup panko breadcrumbs, slightly crushed
  • 1 cup freshly grated Parmesan cheese, divided
  • 1/4 cup olive oil
  • 2 Tbsp fresh basil leaves, thinly sliced
  • 8 ounces mozzarella cheese, sliced
  • 2-4 cups prepared spaghetti sauce (I used a tomato basil version with great success)

Method

1.  Preheat oven to 400°F.  If serving with pasta, cook pasta according to package directions.
2.  In a pie plate, set up your dredging station--mix panko and 1/2c Parmesan cheese in one shallow dish, and slightly beat the eggs in another one.  Dredge by dipping each chicken piece first in the eggs then in the breadcrumb mixture, pressing to adhere.
3.  Heat olive oil in a saute pan over medium heat until shimmering.  Add chicken until golden, about 4 minutes a side (don't crowd them; better to do them in two batches).
4.  Coat a baking dish with a layer of spaghetti sauce, then nestle the chicken pieces in the sauce.  Top each breast piece with sauce, then basil, then some cheese.  Bake 10-12 minutes, or until the cheese starts to brown.
5.  Serve with bread, pasta, and some delicious veggies!

Friday, April 5, 2013

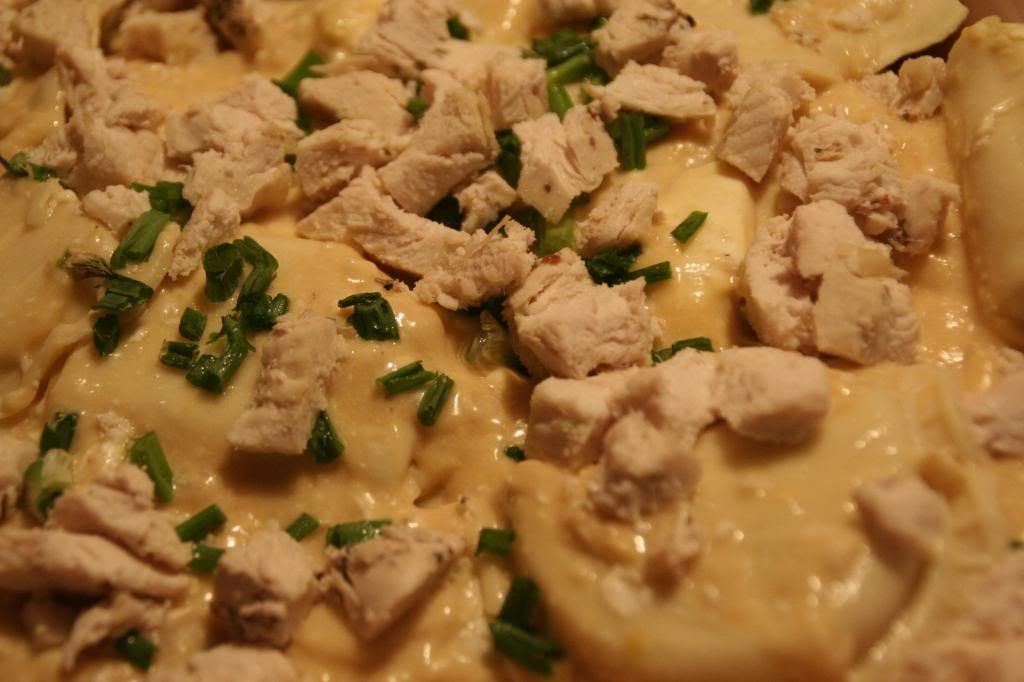
Lemon Chicken Pierogie Bake

Stephanie does a great job of not only making up her own recipes but also riffing on well known ones.  Here's here interpretation of the internet famous Bacon Pierogie Bake.

I wish I had added the veggies as suggested, but was running low on time so skipped it.  It definitely made for a much prettier plate for Stephanie than the sort of bland colors on mine, so I'm posting Stephanie's original directions so you can avoid the mistake I made!  But the taste was quite good.  It was nice and light, which is so nice as we're all itching for spring weather to arrive and match the calendar!

Lemon Chicken Pierogie Bake Source:  Stephanie Cooks
Ingredients:

1 tbsp butter
2 tbsp flour
2 cloves garlic
1 cup broth
juice from half a lemon
1 tsp lemon zest
4 tbsp cream cheese
3 green onions, sliced thin.
1 package frozen pierogies
1 cup cooked chicken, diced
1 cup cooked veggies, any kind
1/2 cup parmesan cheese
Directions:
1- Preheat the oven to 400.
2- In a skillet melt the butter. Stir in the garlic and allow to saute until fragrant, about 2-3 minutes. Add the flour and stir well. Slowly pour in the broth.
3- Bring the broth to a boil, then reduce the heat. Add the lemon juice, zest, and cream cheese. Stir until cheese is melted. Stir in the green onion.
4- In an oven safe dish lay the pierogies on the bottom. Add the chicken and veggies, and pour the sauce over the whole dish. Top with the parmesan cheese.
5- Cover with foil and bake 25 minutes. Remove the foil and bake an additional 5 minutes.


Thursday, March 14, 2013

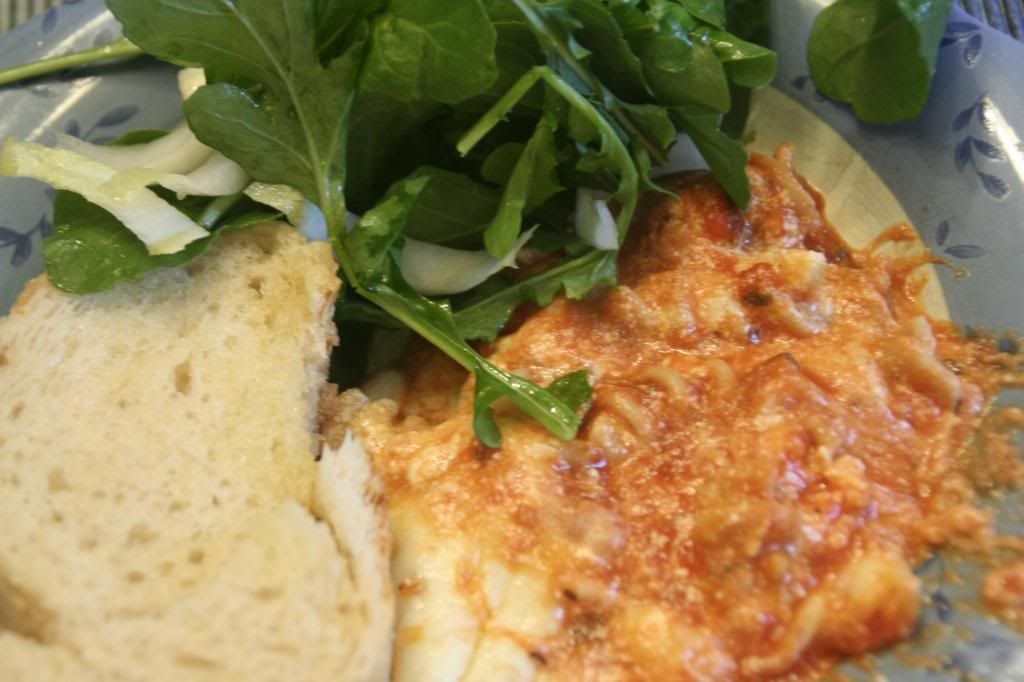
Baked Ziti with Italian Salad and Garlic Bread

My husband doesn't like baked ziti.  He'll get it down, but it isn't a favorite.  Nevertheless, I love it and add it to the meal plan on occasion.  So you know it was a hit when he declared it delicious and that I could make it again.

It's surprising to me, since there's really not much that's different from my typical method of making baked ziti, although it could be as simple as the choice of sauce (I used our store's brand of tomato basil sauce), but I agreed that this was particularly tasty.  It could also be that I used a bit more than normal of mozzarella inside the ziti.

The salad, on the other hand, was not a hit.  I felt the peppery flavor of the arugula was too much and there wasn't anything else in there to balance it out.  The dressing, of course, was easy and delicious, and this meal serves to demonstrate how easy it can be to get a good and balanced meal while making the best use of your cooking time. 

Speaking of which, I recently read in Rachael Ray Everyday magazine that it takes less time to make garlic bread from scratch than it does to prepare frozen premade garlic bread.  The magazine DIDN'T note the difference in hands-on time, which is important, but in this meal, there's plenty of time while things are cooking to handle the bread preparation as well as the salad work.

Baked Ziti with Italian Salad and Garlic Bread Source:  Martha Stewart
  • Coarse salt and ground pepper
  • 8 ounces ziti rigate (ridged) or other short pasta
  • 1 cup part-skim ricotta
  • 1 large egg
  • 3/4 cup finely grated Parmesan
  • 1-1/2 cup shredded part-skim mozzarella
  • 1 jar (24 to 26 ounces) best-quality tomato sauce (about 3 1/2 cups)
  • 1/2 loaf Italian bread (5 ounces)
  • 2 tablespoons butter, melted
  • 2 garlic cloves, minced
  • 1 tablespoon sherry vinegar or red-wine vinegar
  • 1 tablespoon olive oil
  • 1 head Belgian endive, stem end trimmed, thinly sliced
  • 3/4 of a bag of baby arugula

Directions

  1. Preheat oven to 450 degrees. Cook pasta according to package directions for al dente or less soft.  Set aside.
  2. Combine ricotta, egg, 1/4 cup Parmesan, and 1 cup of the mozzarella; set aside.
  3. In the bottom of a square casserole dish, make a layer of tomato sauce with about half the jar. Layer cooked pasta, cheese mixture, then remaining sauce. Top with remaining cheeses. Cook in preheated oven until melty and bubbly; 25-30 minutes.
  4. Meanwhile, prepare garlic bread: Cut the bread, without cutting through the bottom, into slices that are about 1/2" thick. Combine melty butter and chopped garlic, then brush garlic butter between cuts in bread. Wrap in aluminum foil; bake during last 10 minutes of baking the casserole.
  5. Next, make the salad:  Make dressing by whisking together vinegar and oil; season with salt and pepper. Add endive and arugula, and toss to coat.
     
  6.  Serve altogether and enjoy!

Tuesday, July 10, 2012

S'mores Brownies

One of the first times my friend Lishie came to my house, she brought S'mores Brownies.  They were so very yummy and I begged for the recipe.  She then brought them to one of our large summertime parties and everyone went NUTS for them.  We finally got around to making them when my husband decided they would be the treat we sent into school to celebrate my son's fifth birthday!

He decided to skip the homemade brownie part and used a box mix (the brand of which I have no idea.  Trust me, homemade brownies take only a few minutes later, though the box kind was delicious too if you're short on time!)  I'm posting Lishie's original recipe, including the homemade brownies.

These were a huge hit; A's teacher said that EVERYONE loved them, from the five year olds to the teachers.  My husband and I pretty much were unable to stop "tasting" them and said five year olds and teachers almost didn't get any.  I digress.

Give these delicious and easy brownies a try!  And stop in a visit Lishie's blog and say howdy!


S'mores Bars Source:  Delish

  • 1 & 1/2 sticks Butter, @ room temperature
  • 2/3 cup sugar
  • 1 egg
  • 1 tsp vanilla
  • 3 cups crushed (food processor) graham crackers 
  • 1/2 cup all purpose flour
  • 1/2 tsp salt
  • 2 cups chocolate chips
  • 3 1/2 cups mini marshmallows
Pre-heat oven to 350°, grease or spray 13x9x2-inch baking pan (or two, 8x8 brownie pans). 

Beat butter and sugar with electric mixer on medium speed until light and fluffy. Beat in egg and vanilla. In a separate bowl, mix together crushed graham crackers, flour, and salt. Stir the graham cracker mixture into the butter/sugar/egg/vanilla mixture. Should become one, big crumbly clump.

Press about 1/2 cup or more, if needed, of the graham cracker mix over the bottom of the greased 13x9x2-inch baking pan. Sprinkle half (1 cup) of the chocolate chips on top. Sprinkle 3 cups of the mini marshmallows on top. Crumble, by hand, the rest of the graham cracker mix on top. Sprinkle last 1/2 cup of the mini marshmallows on top and finally, sprinkle the rest (1 cup) of the chocolate chips on top.

Bake for 25-30 minutes or until brown.


Tuesday, June 12, 2012

Blueberry Maple Oatmeal

Breakfasts are hard for me.  You probably have the same problem; you're rushing out the door or have limited time to get ready and just don't want to have to make something for breakfast.  Cold cereal fits the bill perfectly, but you know it's not that good for you and you're hungry by 10 anyway.

I found this recipe while browsing on Pinterest; it was originally posted on The Yummy Life.  It fits the bill perfectly; not only is it pretty good for you, but it also kept me full until nearly lunchtime.  I really enjoyed it, and my four year old loved it so much that he remembered to tell me about it when he got home from school.

I used blueberries that I had bought fresh and frozen, and they worked perfectly.  They defrosted overnight and were the perfect texture; I don't know if store bought frozen blueberries would become too mushy in this or not.

The only problem with this recipe is remembering to make it the night before (The Yummy Life advises not making it more than 2 days in advance).  Otherwise, it's a perfect solution to our breakfast problem!

Pardon the poor photography.  Many shots and this was the best.  Thanks, Picnik, for helping it look a tiny bit better.


Blueberry Maple Refrigerator Oatmeal Source: The Yummy Life
  • 1/4 cup uncooked old fashioned oats
  • 1/3 cup skim milk
  • 1/4 cup low-fat Greek yogurt
  • 1-1/2 teaspoons dried chia seeds
  • 2 teaspoons maple syrup (more or less to taste)
  • 1/4 cup blueberries (or enough to fill jar)

Directions
In a half pint (1 cup) jar, add oats, milk, yogurt, chia seeds, and maple syrup. Put lid on jar and shake until well combined; give it more than you think--the yogurt stays pretty clumpy. Remove lid, add blueberries and stir until mixed throughout. Return lid to jar and refrigerate overnight or up to 2 days. Eat chilled.

Monday, June 4, 2012

Pistachio Chai Muffins

My dad always loved Pistachios.  For Christmas, he'd find a bag of them, always red, in his stocking, and I can remember him sitting in his "CB Room" chair eating them.

For some reason, despite the prevalence of pistachios in my childhood, I don't think I've ever tasted them.  It may be that unsightly red stain or some other reason, but I just never did.

When making these muffins, of course I had to try, and they are in fact quite tasty--even unsalted.  Definitely different from other nuts I've had, and of course, no stain.


I made these lovelies for my children to eat at daycare.  I was setting them up with breakfast when my four year old reminded me "no nuts at school!"  Oops.  We tasted them at home, and they were really delicious.

I was hesitant about the whole concept of EATING tea; for whatever reason, this just seems wrong.  But it isn't gross, though it's surely more caffeine than I should be handing my two OR four year old, but I wasn't thinking... obviously (see nuts above).

Taking some of the recommendations on the recipe's comments, I made a few modifications, adding a third teabag, another teaspoon of vanilla, a 1/2 teaspoon of cinnamon, and a pinch of cardamom.  The end result was quite tasty; it was much like a spice cake but with much more interesting flavors and the delightful green crunch of the nuts on top.

Pistachio Chai Muffins Adapted from Cooking Light

  • 7 9/10 ounces all-purpose flour (about 1 3/4 cups)
  • 1/2 cup packed brown sugar
  • 1 teaspoon baking powder
  • 1 teaspoon baking soda
  • 1/4 teaspoon salt 
  •   3chai blend tea bags, opened
  • 1/2 teaspoon ground cinnamon
  • pinch ground cardamom 
  • 1 cup low-fat buttermilk
  • 1/4 cup butter, melted 
  • 2 teaspoons vanilla extract
  • 1 large egg, lightly beaten 
  • Cooking spray 
  • 1/3 cup shelled dry-roasted pistachios, chopped

Preparation

  1. Preheat oven to 375°.
  2. Weigh or measure flour into dry measuring cups; level with a knife. Combine flour and next 4 ingredients (through salt) in a large bowl, stirring with a whisk. Cut open tea bags; add tea, cinnamon, and cardamom to flour mixture, stirring well. Make a well in center of mixture. Combine buttermilk, butter, 1 teaspoon vanilla, and egg in a bowl, stirring well with a whisk. Add buttermilk mixture to flour mixture, stirring just until moist.  Don't overmix!
  3. Coat a 12 cup muffin pan with cooking spray. Divide batter evenly among prepared muffin cups. Sprinkle nuts evenly over batter. Bake at 375° for 15 minutes or until a wooden pick inserted in center comes out clean. Cool for 5 minutes in pan on a wire rack.

Friday, June 1, 2012

Recipe Swap: Cajun Chicken Pasta

For this week's swap, the theme was Noodles. I received a recipe from the healthier food focused blog, Prevention RD, whose photography and recipes are always beautiful.

I was given her recipe for Cajun Chicken Pasta, and it looked like a real winner. Who can deny the wonder of a healthful, delicious, and FAST meal?


Indeed, it was exactly that; the recipe took less than 30 minutes (once I finished chopping, which can easily be done the night before), and it was delicious.  It was a bit on the too spicy side for the kiddos, though my four year old said it was "delicious but too spicy," and my husband and I could have handled less spice too.  Next time I make this (oh yes, there WILL be a next time), I will probably use the two teaspoons that season the chicken and leave it at that.  Speaking of spices, I used Essence of Emeril, which I had sitting in the cabinet and it was perfect.

I also brought this in as leftovers for lunch club, and found that the spice had mellowed substantially, so if you're planning to make this in advance, rock those 4 teaspoons!

Thank you to Sarah for hosting another fun swap and Nicole for a delicious and healthful recipe.

Cajun Chicken Pasta taken from Prevention RD, who heavily adapted from All Recipes and Ommy Noms

10 oz whole wheat linguine
1 lb boneless, skinless chicken breasts
4 tsp Cajun seasoning
1 Tbsp extra-virgin olive oil
1 red bell pepper, sliced into strips
1 green bell pepper, slices into strips
1 large yellow onion, halved and thinly sliced
3 garlic cloves, minced
1 1/2 cups half-and-half
1 T fresh basil

Directions:

Bring a large pot of water to a boil. Add pasta and cook for 8 to 10 minutes or until al dente; drain and set aside.

Meanwhile, cut chicken breasts into thin strips and season with 2 teaspoons of cajun seasoning. In a large skillet over medium heat, saute the chicken in the olive oil for 4-5 minutes or until no longer pink.

Add the onion and saute 1-2 minutes. Add the garlic and saute an additional minute. Add red and green bell peppers. Saute for 2 to 3 minutes, until peppers are slightly tender.

Add the half-and-half and basil, bring to a boil. Add the cooked linguine, tossing to allow the half and half to cook into the al dente pasta. Add the remaining 2 teaspoons of cajun seasoning. Yield: 6 servings (about 1 1/2 cups each).

Saturday, May 19, 2012

Pierogie Bake


When I made this last, I said it would be really good with some steamed broccoli.  This time, I did exactly that, and it was delicious.  Even my husband commented that the broccoli was a really nice addition. 

I would have added bacon, but it's in the freezer and I forgot to defrost it, so a slightly vegetarian meal (I did use chicken broth, so not completely).  I also doubled it, which made enough for all of us and some leftovers for a yummy lunch.

Broccoli Pierogie Bake Source: Slightly adapted fromStephanie Cooks, who Slightly adapted from Cooking Light

Ingredients:
1 (16 oz) package frozen pierogies
1 head broccoli, cut into florets
1t extra virgin olive oil
2 garlic cloves, minced
1/3 cup 1/3-less-fat cream cheese
1/2 cup chicken broth
1/2 cup shredded cheddar cheese
1/4 cup thin sliced green onions
1 small plum tomato, seeded, and diced  (I used an handful of grape tomatoes, which I diced)
Pepper
Cooking spray

Directions:
1- Preheat the oven to 400
2- Steam broccoli until tender.
3- Spray a baking dish with cooking spray. Arrange the frozen pierogies in the dish.
4- In a medium saucepan, heat the oil over medium heat.
5- Add garlic to the pan, cook for 30 seconds. Add the cream cheese, stirring until it melts. Add the broth, whisking continuously until it's all incorporated.
6- Pour the sauce mixture over the pierogies. Top with the cheddar cheese.
7- Bake for 15 minutes. Remove from the oven, top with the tomatoes and bacon, and return it to the oven. Bake for 5 additional minutes.
8- Remove from the oven sprinkle with green onions and black pepper. Serve hot.

Thursday, May 17, 2012

Margherita Pizza

When it comes to a quick and easy dinner, pizza using pre-made dough is tops.  So, when looking through my blog for a quick dinner, this recipe came to mind, and since the pictures have disappeared, all the reasons came into place.

This is a delicious dinner.  It came together so quickly and inexpensively, it's perfect for crazy weeknight dinners. 


Margherita Pizza Source:  All New Complete Cooking Light Cookbook, p 302

1 (10 oz) can refrigerated pizza crust dough (or homemade will work too!)
Cooking spray
1t extra virgin olive oil, divided
1 garlic clove, minced
5 plum tomatoes, thinly sliced
1 c shredded mozzarella cheese
1 t balsamic or red wine vinegar
1/2 c thinly sliced fresh basil


1. Preheat oven to 400.
2. Unroll dough onto a baking sheet coated with cooking spray; pat into a 13x11 inch rectangle. Bake for 8 min. Remove crust from oven; brush with 1/2t oil. 
Rub crust with cut side of garlic (I use the jarred chopped garlic, so just sprinkled it all over; we love garlic).
3. Arrange tomato slices on crust, leaving a 1/2 border, sprinkle evenly with cheese. Bake for 12 min or until cheese melts and crust is golden.
4. Combine 1/2t oil and vinegar, stirring with a whisk. Sprinkle pizza evenly with slice basil, salt, and pepper. Drizzle vinegar mixture evenly over pizza.
Cut into 8 rectangles.

Wednesday, May 2, 2012

Mint Chocolate Oreo Truffles


When a colleague said her favorite baked good was "anything mint-chocolate," I struggled to decide what to make.  See, I'm in the minority of the world when I admit that I dislike mint.  As a kid, we had Sunday sundaes, and my mom's favorite ice cream was mint chocolate chip--I'd eat it, but I just never liked it, and I still don't.

I turned to the internet and went to one of my favorite baking sites, Brown Eyed Baker, and was super happy to find this easy to make recipe.


These are outstanding, and this is coming from a mint hater.  The cream cheese balances (and makes tolerable) the mintiness. 

Perhaps I need to give mom's favorite ice cream another shot....

Mint Chocolate Oreo Truffles very slightly adapted from Brown Eyed Baker

1 package mint Oreo cookies
8 ounces cream cheese, softened at room temperature
2 cups semisweet chocolate chips
2 tablespoons vegetable shortening

1. Crush the Oreos (pretty much the whole package, minus a handful, will do) until finely ground. A food processor does the best job, but if you don’t have one, throw the cookies in a ziploc bag, grab a rolling pin, and go to town.
2. Transfer 3 cups of the Oreo crumbs to a bowl and add the cream cheese. Using a spoon, press, mix and stir until the cream cheese is completely mixed into the Oreo crumbs and you have a soft, homogeneous mixture. Using a small cookie scoop (or the equivalent of 2 teaspoons), scoop/roll balls of the Oreo/cream cheese mixture and place on a wax paper-lined baking sheet. Once you have scooped out all of the filling, refrigerate the baking sheet for at least 30 minutes, until firm.
3. In a small bowl, microwave the chocolate chips and shortening in 30 second increments at 50% power, stirring after each, until completely melted and smooth. Working with one Oreo ball at a time, dip it into the melted chocolate, roll it around to cover completely, and then use a fork to remove it from the chocolate, letting any excess drip off. Place the dipped truffle back on the wax paper-lined sheet. Repeat with all truffles; once finished, return the baking sheet to the refrigerator for another 30 minutes.
4. Serve the truffles, or garnish with some melted white chocolate and leftover crushed Oreos. Store in an airtight container in the refrigerator for up to 2 weeks.

Friday, April 20, 2012

Roasted Asparagus


This week's recipe swap was a Celebrity Chef recipe.  I am so happy to have received a veggie side dish, since I'm always looking for great and easy ones.  I was sad to see it was asparagus, because while I love it, my husband won't eat it and I had a feeling my children would react the same way.

I thought this was delicious and couldn't possibly have been more simple.  Of course my husband didn't take any, but my children had no choice.  My 2 year old, who won't even try many foods, ate about one stalk while my 4 year old ate a few bites, especially after I called them "Truffala Trees."

Thank you so much to Dawn for this easy recipe from Ina Garten, and Sarah for hosting the swap.  Check out Sarah's blog for the whole Recipe Swap run down!


Roasted Asparagus with Parmesan Source:  Ina Garten via Simple Gourmet Cooking


2 1/2 pounds asparagus, ends trimmed
2 tablespoons olive oil
1/2 teaspoon kosher salt
1/4 teaspoon ground black pepper
1/2 cup freshly grated Parmesan Cheese
lemon wedges, for serving

Preheat the oven to 400 degrees F.

Place asparagus in a single layer on a sheet pan. Drizzle asparagus lightly with olive oil and season with salt and pepper. Roast in the oven for 15 to 20 minutes, until tender. Sprinkle the Parmesan over the asparagus and return to the oven for another two minutes. Sprinkle lightly with lemon juice and serve with lemon wedges.

Adapted from Ina Garten

Monday, April 16, 2012

Crockpot Chicken Stroganoff

This may not look pretty, but it's quite delicious.  And so, so easy to make.  The original recipe calls for egg noodles, which makes complete sense in a stroganoff, but I was out of them so served over rice. 

My entire family enjoyed this one, except the 4 year old, who claimed he wasn't at all hungry, though he did try all parts of his dinner.

Make this!!

Crockpot Chicken Stroganoff Source:365 Days of Slow Cooking via Lauren's Kitchen
  • 1 1/2 lbs boneless, skinless chicken thighs
  • 1 Tbsp dehydrated onion or 1/4 cup chopped onion
  • 1 (4 oz) can mushrooms, drained
  • 1 (13.75 oz) can cream of chicken soup
  • 2 tsp dried parsley
  • 1 (8 oz) can tomato sauce
  • 1/2 cup sour cream
  • Salt and pepper to taste
Combine the chicken, onion, mushrooms, cream of chicken soup, and tomato sauce in slow cooker. Cover and cook on LOW for 5-6 hours or on HIGH for 3 hours. Shred the chicken and add in the parsley, sour cream and salt and pepper. Stir and turn to HIGH. Let sit without lid for 10-15 minutes. Serve over egg noodles.

Saturday, April 14, 2012

Not So Sloppy Jes

This is a recipe I've made a ton of times, and I know I've posted about it many times too, but I discovered that there are no photos to accompany it.  I love this one, and this might have been the first time I've made it with actual ground beef rather than turkey or chicken, and even my beef disliking husband liked it.

I generally use about half the recipe for dinner, saving the rest for a future taco night.  It works really well in both methods.

Give this a try; you'll never go back to that Sloppy Joe in a can again!

Not So Sloppy Joes Source:  Real Simple

Ingredients

  • 1 tablespoon olive oil
  • small yellow onion, finely chopped
  • clove garlic, minced
  • red bell pepper, finely chopped
  • 1 pound ground beef
  • 1 6-ounce can tomato paste
  • 1 1/2 teaspoons chili powder
  • 1 teaspoon cumin
  • 1 teaspoon kosher salt
  • 1/8 teaspoon freshly ground black pepper
  • 1/8 teaspoon cinnamon
  • hamburger buns, toasted
  • 1/2 cup grated Cheddar
  • 1/2 cup sour cream

Directions

  1. Heat the oil in a large saucepan over medium heat. Add the onion, garlic, and red pepper. Sauté until fragrant, about 3 minutes.
  2. Add the ground beef and brown, about 5 minutes.
  3. Stir in the tomato paste, chili powder, cumin, salt, black pepper, and cinnamon. Simmer, stirring occasionally, until thickened slightly, about 12 minutes.
  4. Spoon onto the buns. Sprinkle each with the Cheddar and top with a dollop of the sour cream.

Saturday, March 31, 2012

Gnocchi Mac and Cheese

I was assigned this through a small recipe swap with some friends.  I actually neither made nor ate it because I was down for the count with a stomach virus, but my husband and kids said it was delicious.  The boys actually ate it, which hasn't been happening pretty much at all lately, and my husband raved too--the same husband who dislikes macaroni and cheese in almost all its forms.

Since I was on the couch, no photo, but I will surely be making this one again!  Many thanks to Laura, who shared this recipe for the swap.  Check out her blog and the recipe here.


Gnocchi Mac n’ Cheese Source:  Cuisine at Home via Laurie's Kitchen
1 pound purchased or homemade gnocchi
2 Tablespoons butter
1 teaspoon garlic powder (original calls for 2tsp fresh garlic)
3 Tablespoon all-purpose flour
3/4 cup milk
3 teaspoon Dijon mustard
1/4 cup+ shredded Gruyere cheese
1/4 cup+ shredded fontina cheese
Salt and white pepper to taste
1/3 cup+ shredded Parmigiano-Reggiano
Basil leaves for garnish, optional

Preheat oven to 375.
Prepare gnocchi according to package directions. Drain and place gnocchi in a single-layer in a 1-1/2 quart shallow baking dish that has been sprayed with nonstick spray.
Melt butter in a medium saucepan over medium heat. Stir in garlic powder and cook until fragrant, about 30 seconds. Whisk in flour until it thickens and bubbles, then whisk in milk and Dijon. Continue to whisk mixture and cook until slightly thickened, about 3-5 minutes.
Combine Gruyere and fontina, then add by the handful to milk mixture, stirring until melted before adding the next handful. Once all cheese is melted, season sauce with salt and pepper.
Pour sauce over gnocchi and sprinkle with Parmigiano-Reggiano over top. Bake gnocchi until they puff and the cheese is golden and bubbly, about 25 minutes. Let gnocchi rest for 5 minutes before serving.

Sunday, June 19, 2011

BBQ Grilled Chicken

I didn't take photos of this because it was really a last minute meal and we were starving. 

It never occurred to me that grilling chicken breasts would require any more work than grilling them up and then slathering some BBQ sauce on top.  But for some reason, I did a little googling and found this website, which directed me otherwise.  I took her advice and came up with some really tasty BBQ chicken.


First, I trimmed the breasts, and cut slits in them.  I set them in a marinade of 1c olive oil, 1/2c red wine vinegar, garlic, pepper, and Italian seasoning.  I was pressed for time, so I marinated for 15 minutes a side.  Meanwhile, I sprayed my grill, and preheated it to medium. 

I then drained the chicken from the marinade, discarding the marinade, and placed the chicken on the grill with the score marks down.  I basted the top with my BBQ sauce, rotated after about 4 minutes, and then basted with BBQ sauce again.  I grilled them for about 15 minutes total, until the chicken felt firm.

So good and so easy!


Tuesday, May 24, 2011

Baked Scallops


I haven't been feeling well today, so asked hubby to cook dinner. We were going to make Scallops fra Diavolo, but didn't have brandy/cognac or diced tomatoes, so looked for something else. This came up, and we had all the ingredients.

We weren't big fans of this; I said there was way too much bread crumb. He then told me that the original recipe called for 1.5lb of scallops, and that he had 1lb but didn't cut the other ingredients. So it's worth another try for sure.

It was definitely an easy recipe; it only took him about 15 minutes to put together. If you're looking for a fast, easy meal with ingredients you likely have on hand, it's worth a try, but just make sure you scale back on the other ingredients if you don't have the right amount of scallops.

I wonder how this would be with shrimp......

Baked Scallops from allrecipes

Ingredients
4 tablespoons butter, melted
1 1/2 pounds bay scallops, rinsed and drained
1/2 cup seasoned dry bread crumbs
1 teaspoon onion powder
1 teaspoon garlic powder
1/2 teaspoon paprika
1/2 teaspoon dried parsley
3 cloves garlic, minced
1/4 cup grated Parmesan cheese
Directions
Preheat oven to 400 degrees F (200 degrees C).
Pour melted butter into a 2 quart oval casserole dish. Distribute butter and scallops evenly inside the dish.
Combine the bread crumbs, onion powder, garlic powder, paprika, parsley, minced garlic and Parmesan cheese. Sprinkle this mixture over the scallops.
Bake in pre-heated oven until scallops are firm, about 20 minutes.
Posted by Picasa

Wednesday, May 11, 2011

Balsamic Portobello and Radicchio

I served with broccoli, and really wish I'd had some of the balsamic reduction to drizzle over it.  Yum!
When I saw this post on my friend Lishie's blog, I nearly started salivating.  She promised it was a decent substitute for steak (well, maybe she didn't promise... maybe my steak starved self extrapolated the promise) but completely meat free.

It also sounded delicious.  I made it tonight, and was a little surprised that this was meant as a main course.  See, the finished product didn't seem all that filling to me--a side dish or topping sure, but as a main?  So, I made some pasta to go along.

Upon his first taste, M exclaimed that the mushrooms were REALLY good.  His assessment was that pasta was not a good choice, but thought they would be really great over chicken.  I agree with his assessment, except for the pasta bit.  I thought it was quite tasty with the pasta.

The boys wouldn't eat anything but pasta.  Stinkers.

Here's the dish the way I made it... slightly different from Lishie's.  I did use chicken stock because that's what I had open, so it wasn't completely vegetarian, but that's a super easy substitution!

Balsamic Portobello and Radicchio slightly adapted from DeLish

  • 1/3lb your favorite shape pasta
  • 1T Extra virgin Olive Oil
  • 1 clove garlic, minced or pressed
  • 4 Portobello Mushroom Caps, sliced
  • 1/2 Radicchio head, shredded
  • 1 TBSp Sugar
  • 3T thinly sliced fresh Basil
  • 1/4 cup Balsamic Vinegar
  • 1/4 cup Chicken Stock

Cook pasta according to package directions.  Heat oil on medium-high heat. When it starts to shimmer, add garlic.  When it starts to sizzle, add the sliced portobello to the saute pan. Cook until the mushrooms are darker and cooked down (smaller), continuously mixing. Add the shredded radicchio & stir together with the mushrooms. Keep mixing & sauteing until the radicchio is wilted. Add the sugar & basil & stir/saute for another minute. Add in the balsamic vinegar & allow it to cook down (become half its amount & thicker). Then carefully add the stock & simmer for 5 more minutes.  Mix the cooked pasta into the pan so it's evenly coated with the sauce.

Thursday, March 17, 2011

Mild Island Ziti

Photobucket

A frequent complaint heard from the mouth of 3 year olds around here is that dinner is "too spicy," even if said spice is Italian.  So, I toned this down substantially; I used mild Italian sausage and barely any crushed red pepper.

Alas, said 3 year old was loaded up on St Patrick's Day treats from school, and barely ate his meal.  M and I really liked ours, though I'd have preferred a little bit more spice.  I thought it would be very similar to a meal I used to make frequently, Broccoli and Sausage Cavatelli from allrecipes, but it wasn't at all.  This is a very light and almost summery dish, while the allrecipes version I remember being much heavier and wintery.

The 10 month old really enjoyed his too, though the broccoli went on the floor (his frequent complaint is throwing stuff he doesn't like on the floor.  Or when he's done, it goes on the floor.  It's nice).

Next time, I think I will just remove the casings and break up the sausage.  The casings were just gross to me, and while I prefer the sliced sausage, I couldn't slice it properly; don't know what I did wrong there.

This came from Taste of Home Magazine, by way of A Taste of Home Cooking.  Since the only fresh tomatoes in the house are grape tomatoes, I appreciated Sarah's substitution of canned diced tomatoes.  I also made a few minor modifications to meet our (garlic loving) needs.

Fire Island Ziti
Modified from Taste of Home, via A Taste of Home Cooking

1 15oz can diced tomatoes, undrained
2 tablespoon olive oil
2 garlic cloves, minced
1 teaspoon salt (omitted)
8 ounces uncooked ziti (I used a 12oz box of whole wheat)
2 broccoli crowns cut into florets (I used one head and half a bag of frozen)
1 pound Italian sausage links, cut into 1/2-inch slices
1/4 teaspoon crushed red pepper flakes
Grated Parmesan cheese

Cook ziti according to package directions, adding broccoli during the last 4 minutes.

Meanwhile, in a large skillet over medium heat, heat oil until shimmering.  Heat garlic until it "speaks," then cook sausage in oil until no longer pink. Add pepper flakes; cook 1 minute longer. Stir in tomatoes with the juice; simmer until the sauciness you like (I like it saaaucy!).

Drain ziti mixture; toss with sausage mixture. Sprinkle with cheese.  Serve hot.
Related Posts with Thumbnails